Have you ever wished you could animate your robot like a stop-motion puppet? Did you want to animate a real robot like a 3D model? I did. And I built a keyframe system in Python to help me do it. That system was the key to make GELO do consistent hand-plants. Keyframe motor animations were also essential to my Interstellar Tars project. Here’s a full tutorial, including some handy motor keyframe boilerplate code.
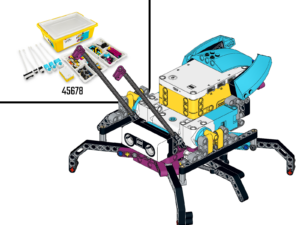
In my previous article, I showed how to run multiple motors in sync by defining their time functions. Time functions are a good start, but they have limited flexibility. Sometimes you need more control over timing. The SPIKE Prime Ladybug uses keyframes too in its Python program. The keyframes are for moving smoothly from side to side.
The walking animation for Tars has even more complex keyframe motor animations. First, Tars has to drop his shoulders and swing back slightly. In the next 200ms, Tars has to swing his body forward while lifting the shoulders. And so on. To time and define every motor position, I used keyframes. Get the complete program and building instructions for Tars in the digital downloads section.
Keyframes like Pixar for your Robot Inventor creations
Animators who make movies use keyframes for this. Keyframes are certain positions where the movie characters have to be at a specific point in time. Those keyframes can be seconds apart, and computers calculate all the frames in-between for a smooth movement. Movies can have up to 60 frames per second, so it’s a good thing we have computers. Walt Disney had to draw every frame manually. Pixar uses keyframes and computers to render their fantastic movies.
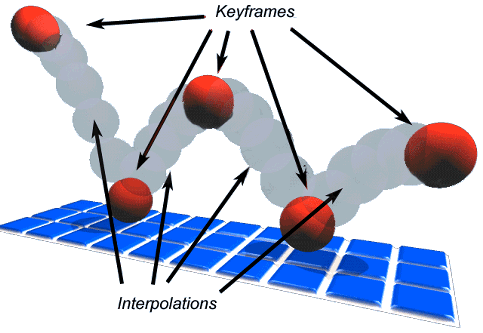
A keyframe for a MINDSTORMS Motor in Python
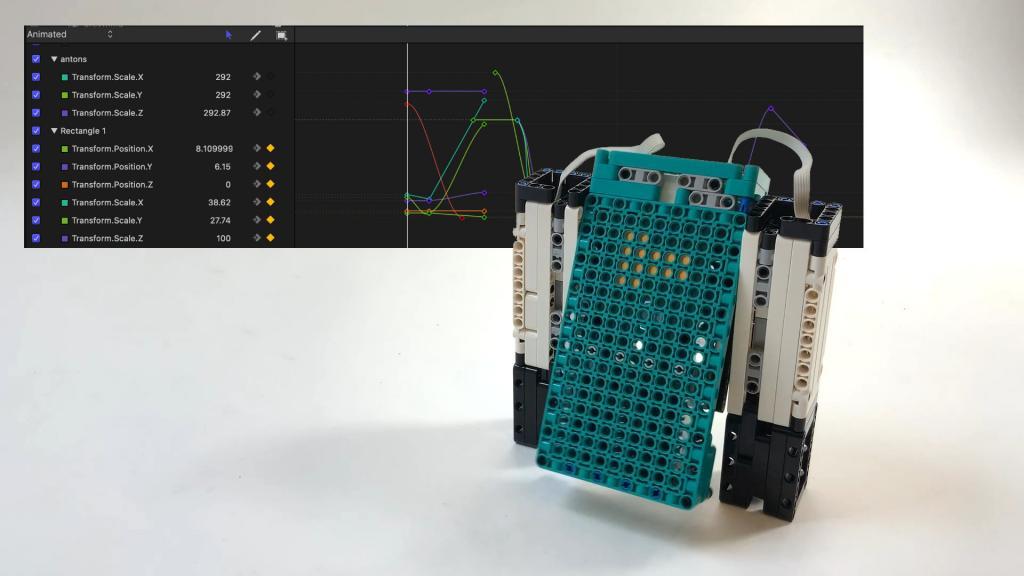
I don’t want to have to define every motor position 20 times per second for my robots. I want to define just a few moments in time and their corresponding motor positions. Then I want my programming code to do all the calculations in-between. This combination of timing and position is what I call a keyframe. For Tars’ arms, the keyframes look like this.
# Define target motor angles
ARM_FWD = 20
ARM_BWD = -40
ARM_FAR_FWD = 45

# Define timing moments
START = 0
BACKSWING = 500
BODY_FWD_SWING_TIME = BACKSWING + 150
BODY_STAND_MOMENT =BODY_LAND_MOMENT + 250
ARMS_FWD_MOMENT = ARMS_PUSH_MOMENT + 300
LOOP_TIME = ARMS_FWD_MOMENT + 600

# Define keyframes
ARM_KEYFRAMES = [
    (START, ARM_FWD),
    (BACKSWING, ARM_FAR_FWD),
    (BODY_FWD_SWING_TIME, ARM_BWD),
    (BODY_STAND_MOMENT, ARM_BWD),
    (ARMS_FWD_MOMENT+200, ARM_FWD),
    (LOOP_TIME, ARM_FWD),
    ]
For the middle legs of Ladybug, the keyframes look like this.
# Define target motor angles
TILT_LEFT = -120
TILT_RIGHT = 120

# Define timing moments
START = 0
LOOP_TIME = 2000 #ms
SWITCH_TIME = 200 #ms

TILT_LEFT_END = LOOP_TIME * 0.2
TILT_RIGHT_START = TILT_LEFT_END + SWITCH_TIME

TILT_RIGHT_END = LOOP_TIME * 0.7
TILT_LEFT_START = TILT_RIGHT_END + SWITCH_TIME


# Define keyframes
MIDDLE_LEGS_KEYFRAMES = [
    (START, TILT_LEFT),
    (TILT_LEFT_END, TILT_LEFT),
    (TILT_RIGHT_START, TILT_RIGHT),
    (TILT_RIGHT_END, TILT_RIGHT),
    (TILT_LEFT_START, TILT_LEFT),
    (LOOP_TIME, TILT_LEFT),
    ]
Do you just want to try it? You can also download the full code and building instructions of these models in the digital download section.
Interpolation of motor keyframes in Python
Next comes the challenge of calculating everything in between the keyframes. The calculation of a frame between two other frames is called interpolation. You don’t have to worry about the precise calculation because my code does that for you. What is more interesting now is how to use that code.
The principle is the same as with the time functions for synchronizing a mechanism. You create a function that returns a motor angle if you feed it a moment in time. Only this time, the parameters for creating that function are keyframes. In Python, it looks like this:
motors = [left_arm, right_arm, left_shoulder, right_shoulder]

functions = [
    linear_interpolation(ARM_ANIMATION),
    linear_interpolation(ARM_ANIMATION, scale=-1),
    linear_interpolation(SHOULDER_ANIMATION),
    linear_interpolation(SHOULDER_ANIMATION, scale=-1),
]
Edge handling of the interpolated keyframes
What if you define keyframes and time runs beyond your last keyframe moment? Or it runs before the first keyframe? In that case, we have an edge situation. I have built three ways of handling the edges in my interpolation code: constant edges, wrapping, and wrapping with accumulation.
keyframes = [(-200, 100), (0, 100), (250, -100), (500, -100), (1000, 100)]The simplest of these three is constant edges. This means the function returns the angle of the keyframe at the closest edge. Here’s a graph of the result. I never actually used it, but it might be handy one day.
graph = linear_interpolation(points, wrapping = False)
The second type of edge handling is wrapping. This means the function copies and infinitely repeats the set of keyframes, both forward and backward in time. It is what I use for Tars.
function = linear_interpolation(points)
The third type of edge handling is wrapping with accumulation. This is the same as plain wrapping, except that the interpolation adds a constant value after each wrapping. That value is the difference between the first and last keyframe position after scaling. This is handy when the motors do not maneuver around zero but make complete rotations and start again at the next rotation. It is what I use to make GELO’s feet move fast in the air and slow on the ground.
points = [(-200, 100), (0, 100), (250, -100), (500, -100), (1000, 200)]
function = linear_interpolation(points, accumulation=False)
accumulating_function = linear_interpolation(points)
Accumulation is on by default, although you can turn it off with a parameter. To make use of accumulation, make sure that the last keyframe position is different from the first keyframe. So in GELO’s case, I made sure that the second frame is 360 more than the first frame. This effectively adds 360 degrees to the motor target after each cycle. With that, the motor would start running back to zero real fast at the end of each cycle.
Keyframe transformation convenience for walking robots
Apart from handling edges, I also wanted to conveniently manipulate the keyframes. When to motors are mounted in a mirrored fashion, the interpolation function allows you to invert the keyframe values. The interpolation system can also create a time offset. This is handy for Gelo’s front and hind legs: they have a time difference of half the loop time. With one set of keyframes, inversions, and offsets, you can now configure GELO’s complete walking movement.
CYCLE_TIME = 1500

LIFT_FOOT_TIME = 0
FOOT_DOWN_TIME = CYCLE_TIME // 3

walk_keyframes = [
    (LIFT_FOOT_TIME, 60),
    (FOOT_DOWN_TIME, 300),
    (CYCLE_TIME, 60+360)
]
To make GELO do hand plants with Python, just configure your keyframes like this.
move_d = linear_interpolation(walk_keyframes, scale= 1)
move_a = linear_interpolation(walk_keyframes, scale=-1)
move_b = linear_interpolation(walk_keyframes, scale= 1, time_offset=CYCLE_TIME//2)
move_c = linear_interpolation(walk_keyframes, scale=-1, time_offset=CYCLE_TIME//2)

walk_functions = [move_a, move_b, move_c, move_d]
Boilerplate Robot code for keyframe motor animation in Python
EDIT: I have reorganized my mpy-robot-tools library. It is now more convenient to use and easier to install. It deviates a little from this article, however. For the new library, go to: https://github.com/antonvh/mpy-robot-tools
ORIGINAL TEXT: If you want to animate your own robots, the boilerplate code below is a good start. You can create a new Python program with the MINDSTORMS or SPIKE Prime app and replace the entire default program with the code below. Then you can start configuring and animating your robot. I’d love to see some of your robots dance! You can also copy the code from Github.
Download Python code for Gelo walking and Gelo Hand Plant
If you want to study the complete code for Gelo’s various maneuvers, you can download the MINDSTORMS files here. This is the file I created while recording my YouTube explainer about keyframe animation with motors.
Download Ladybug Code as Seen on Youtube
In my SPIKE Prime explainer about Keyframes, I used the ladybug model as an example. Here you can download the full code, as I created it while recording the video.
Support my work & Don’t Miss any updates
I hope you enjoyed this article. It took me a few days to write it and collect the image materials. If you appreciated it, consider supporting me on Patreon. Supporters get free monthly building instructions.
If you have more questions, feel free to ask them in the comments. If you follow me on Facebook, Instagram, and YouTube, these social media platforms will notify you of new articles and tutorials as I make them.



Gelo walks very naturally. I changed the rate value here:
def init(self, rate=1000, acceleration=0):
from 1000 to a higher value which causes Gelo to walk faster. Depending on how much larger the rate value becomes Gelo does a very aggressive handstand which results in in Gelo flipping over onto its back. If I leave the rate value as is than Gelo’s handstand is not like what you show.
I also tried to get Gelo to turn using the following code, which does not work very well except for Gelo to have a seizure before walking and then doing a handstand.
turn_d = linear_interpolation(walk_keyframes, scale= 1, time_offset=CYCLE_TIME//2)
turn_a = linear_interpolation(walk_keyframes, scale= -1, time_offset=CYCLE_TIME//2)
turn_b = linear_interpolation(walk_keyframes, scale = 1)
turn_c = linear_interpolation(walk_keyframes, scale = -1)
turn_functions = [turn_a, turn_b, turn_c, turn_d]
timer = AMHTimer()
while timer.time < CYCLE_TIME * 5:
gelo_turn.update_motor_pwms(timer.time)
hub.led(3) #used to help tell which movement is currently running
Here is a link to my dropbox account of the video of Gelo’s current movements.
https://www.dropbox.com/s/fq8xum4m7zhg1hz/IMG_1841.MOV?dl=0
I am not sure how to implement your keyframe structure to make a turning function. Any help would be greatly appreciated.
it’s cleaner to not change the timer rate in init, but change it in your program:
timer= AMHTimer()
timer.rate = 2000
I think I made GELO turn by setting all scale values to 1. Offsets stay the same.
I think part of the problem with Gelo going crazy is when I add extra lines of code, that then alter the timing, and thus, how the keyframes are executed. So when I run this set of lines Gelo walks properly:
while wall_follower() < 30:
utime.sleep_ms(16)
my_mechanism.update.motors.pwms(timer.time)
If I add one or more lines, particularly lines that call a function, then Gelo goes crazy and does not walk properly.
while wall_follower() < 30:
utime.sleep_ms(16)
my_mechanism.update.motors.pwms(timer.time)
print(wall_follower()) #print out reading from distance sensor
Is there another way to control Gelo’s walk so that is does not depend on the timer.time? Or do a complete leg movement before it proceeds to the next line of code?
Lastly, in order to keep Gelo from following over and still be able to do a proper handplant, I added two blue friction pins to the front of Gelo between the distance sensor and the light/colour sensor.
Yeah. Print() messes up your timing. It’s sad. I have complained about this to LEGO.
When I run these lines Gelo walks properly:
while wall_follower() < 30:
utime.sleep_ms(16)
my_mechanism(timer.time)
But if I add extra lines, especially if there is a call function, than Gelo’s walk becomes crazy:
while wall_follower() < 30:
utime.sleep_ms(16)
my_mechanism(timer.time)
print(wall_follower())
Is there a way to get Gelo to do one full step before proceeding to the next line of code? I was thinking about setting up a separate timer or know what the current time and have the while know when the new time is whatever time is required for Gelo to do one step.
hub.motion.reset_yaw()
while abs(yaw_angle) < 90:
while #not sure how to setup a timer so that I can do the while for whatever time it takes Gelo to do one step
utime.sleep_ms(16)
my_left_mechanism(timer.time)
yaw_angle, pitch_angle, roll_angle = hub.motion.position()
Finally, I have found that if I put two blue push pins on the front of Gelo between the distance sensor and light/colour sensor than Gelo can do a full handstand without flipping onto it back.