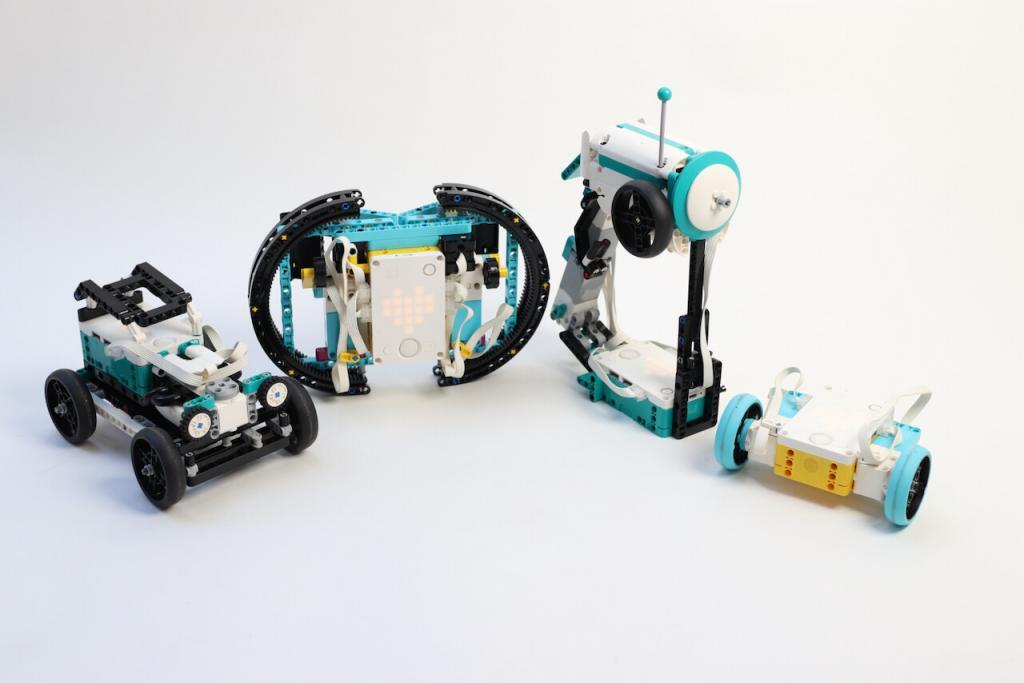
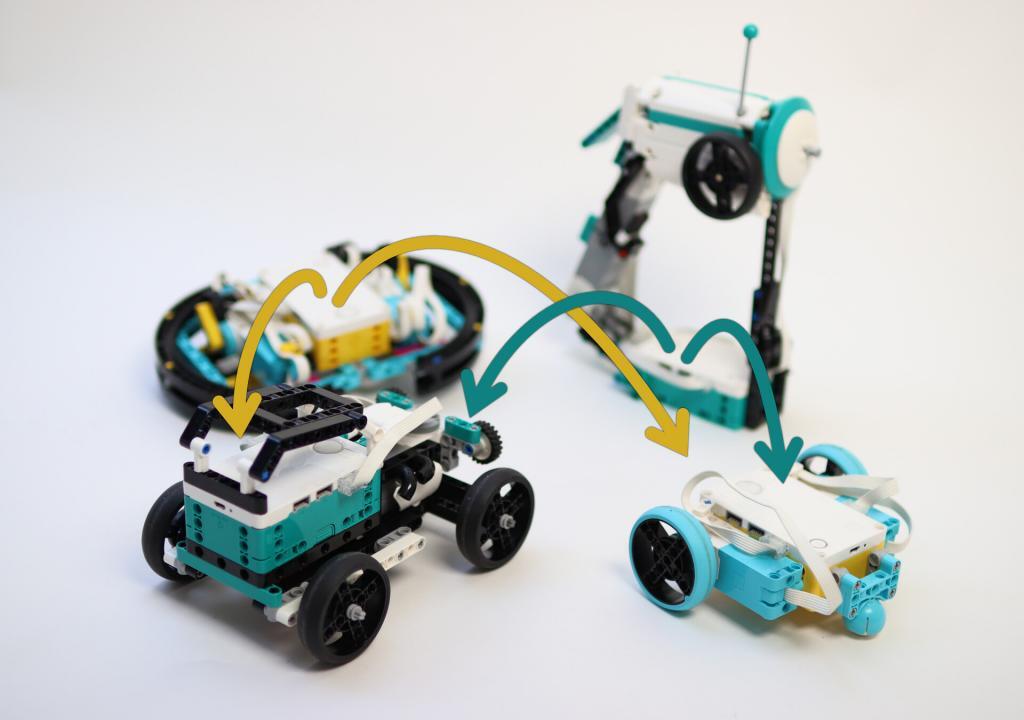
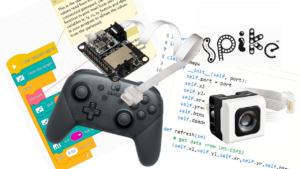
This article will explain how to remote control one of the new LEGO hubs – SPIKE or MINDSTORMS Robot Inventor – with another such hub. The cool thing is that you can use the green with the yellow hub without flashing the firmware: the Bluetooth protocol is universal! To connect two hubs, I’m using Python code. It’s a bit harder than word blocks, but the performance is much better: the Remote Control is pretty much real-time. With Word Blocks, there is too much lag to build fun racing cars or battling robots.
This article explains how to connect two new hubs. However, if you want to connect a new hub as a remote control to an EV3 brick, I have another tutorial for that.
If you are new to Python or don’t like to code, you can follow the steps below. In these steps, I provide ready-made models and code to get you started with just some copy-paste. If you’re interested, read on past the how-to to learn how to code works and how you can adapt to your own robots.
Step-by-step LEGO remote control tutorial with Python
Time Needed : 10 minutes
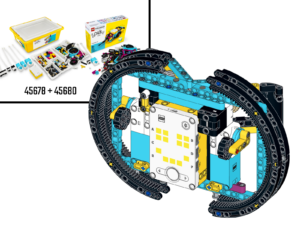
This tutorial shows how to connect SPIKE Prime or MINDSTORMS Robot Inventor LEGO hubs for remote controlling a vehicle or robot.
Build a remote control device.
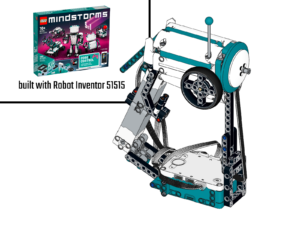
If you don’t like to code, I advise you to use one of my models. I have a Robot Inventor remote control and Spike Prime Steering Wheel for which you can copy-paste the code.
Build a vehicle.
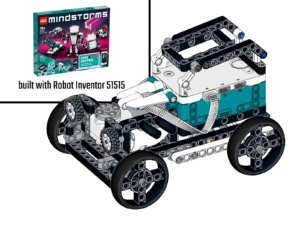
Just slap two motors and a caster wheel on a hub, or build this Hot Rod with differential gear. If you download the Hot Rod, make sure to build the version with the geared-down steering. Of course, you can invent your own robot too, but then you’ll have to adapt the code.
Head over to GitHub to copy the code for your vehicle.
Choose from either the tank code or the car code. The tank is for robots with a motor on each side. The car code is for robots with pivoting front wheels and rear-wheel propulsion.
Create a new Python project in the LEGO software on desktop.
It can be the MINDSTORMS or SPIKE Prime app, dependent on your hub. Name the project something like ‘rc vehicle’ to remember what it does.
Paste the code and run it on the vehicle.
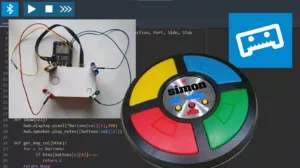
I prefer to download the code over a USB connection. After downloading and running, you can disconnect the USB cable. The vehicle will now show a radar-like animation, waiting for remote control.
Head over to GitHub again to copy the code for your remote control.
There is a version that uses the gyro in the hub to act as a steering wheel. There is another version that acts like a regular car RC transmitter with a trigger and a steer on the side.
Create another new Python project in the LEGO software on Mac/PC.
Paste the proper code for your remote. It’s a good idea to name your code something like ‘RC transmitter’ to remember what it does. Now run the code. If your vehicle program is still running, the remote control will connect right away. You know when it has connected if the vehicle starts responding and if the transmitter shows the vehicle’s logo.
Note that if you are using both MINDSTORMS and SPIKE, you can’t run both programs at the same time. They hog the USB port and prevent each other from working.Have fun driving around!
If you are using the SPIKE Prime steering wheel, you can accelerate with the right flappy paddle, and reverse with the left one. The steering trim is on the right thumbstick.
When you use the Robot Inventor RC Transmitter, it works just like any other car transmitter. The steering trim is on the bottom-most motor in the handle.Properly disconnect
Make sure to stop the program on the transmitter first and then on the car. STOP THE TRANSMITTER WITH THE BUTTON ON THE HUB. If you don’t the hubs go into strange states and you have to remove the battery to make them work normally. Doing it the other way around might get your hubs in weird and unresponsive states until you remove the battery. See also the limitation below.
Tools
- Laptop running the LEGO software
USB cable to program the hubs
Materials
- Two new LEGO hubs, SPIKE Prime or Robot Inventor
Customizing your LEGO Python Remote Control code
There are some fun things you can change yourself.
Your custom vehicle logo
The first one is the logo of the vehicle. When instantiating the BlePeripheral, you can pass it a logo= argument. Use this format: “00000:00000:00000:00000:00000” Replace the zeroes with numbers up to 9 to light up pixels on each row.
receiver = BLESimplePeripheral(logo="00000:09990:00900:00900:00000") # T for tankChange the maximum angle on the steering wheels
In the RC Car code, the full steering range of -100 to 100 is used as a target angle for the steering motor. Normal car wheels only turn -40º to 40º. But on the Hot Rod, I have geared down the steering to make it more accurate. I used an 8 tooth and 24 tooth gear to get a ratio of 1:3. It also reverses the steering direction. This results in a -33.3º wheel angle on a 100 steering value.
If you do not gear your steering wheel down, or use a different ratio, change this line to reflect that:
track_target(steer_left,
                   target = l_stick_hor * 0.33 + setting1
                   # Scale down the steering angle with a factor 0.33
                   # On the stick, horizontal right is positive
                   # Setting1 is steering calibration
                   )
Change the force with which the transmitter recenters the controls
I have created virtual springs on the transmitter controls to re-center the steering wheel and trigger. The virtual springs apply a small dc voltage to the motor if it out of the center. The further out, the higher the voltage. In your hand, this feels like a spring. You can adjust the spring strength with the ‘gain=’ parameter in these lines.
l_stick_hor = track_target(steer, gain=1) * 1.3
r_stick_ver = (track_target(trigger, gain=2)+3) * -5.7
How the LEGO Python Remote Control code works
Low-level Python API
I chose to write the Python code using the low-level Python API, which is universal between SPIKE Prime and Robot Inventor. However, the methods and classes for this are not documented inside the LEGO apps. Furthermore, the API has some peculiarities. For instance, feeding a motor more than 127% PWM makes it run backward. I documented most of these strange behaviors in another article. Recently LEGO has also released complete documentation.
# Helper function to ensure we always pass an int between -100 and 100
# to a motor pwm call.
def clamp_int(n, floor=-100, ceiling=100):
    return max(min(int(n),ceiling),floor)
BLE/Bluetooth 4.0 standard
The remote control code for MINDSTORMS and SPIKE Hubs uses the standard Bluetooth 4.0 BLE protocol. The vehicle advertises itself as a peripheral called ‘robot’. The transmitter searches for it and then connects. Then the transmitter searches for a Ble UART service to exchange data.
Data exchange is bi-directional when all goes well. However, if a program crashes, receiving data from the vehicle stops working until you remove the battery. See also the limitation below.
Callbacks for data reception
The Bluetooth stack uses interrupts and callbacks to start receiving data. Unfortunately, buffer overflows crash the brick. That’s why I made the callback function on the vehicle as fast as possible: they only write some global variables. I also limited the sending rate on the transmitter to 30Hz.
# Ble UART data callback that only writes globals
def on_rx(control):
    global l_stick_hor, l_stick_ver, r_stick_hor, r_stick_ver, l_trigger, r_trigger, setting1, setting2, buttons_char
    l_stick_hor, l_stick_ver, r_stick_hor, r_stick_ver, l_trigger, r_trigger, setting1, setting2, buttons_char = struct.unpack("bbbbBBiiB", control)
Struct.pack for encoding the transmitter state
The Bluetooth Low Energy UART only transmits bytes, like any other UART connection. To encode the state of the transmitter control into bytes I used python struct. I choose to send over 16 values and name them like the controls on a gamepad. The first 4 values are signed bytes (-127-127), then there are two unsigned bytes (0-255) for the trigger buttons, two ints to transfer settings (-2.147.483.648, 2.147.483.648), and finally, a byte that packs eight booleans with the buttons states.
I choose to keep these names for cross-device compatibility. The RC transmitter moves l_stick_hor on the steering knob on the side. The car listens to l_stick_hor to adjust the steering. They are just variable names, so you can change the names if that makes more sense to you.
l_stick_hor, l_stick_ver, r_stick_hor, r_stick_ver, l_trigger, r_trigger, setting1, setting2, buttons_char = struct.unpack("bbbbBBiiB", control)Infinite control loop
The vehicle runs a ‘while True’ control loop that reads the transmitter state and changes voltages on the motors accordingly. You can expand the loop with more motor movements, display shows, and sounds. Make sure to use non-blocking code in the loop. If the loop blocks and can’t execute more than 20 times per second, weird things start to happen.
Limitations and weird behavior of the LEGO hubs
Code crashes may require you to remove the battery and do a cold reboot.
Stopping or starting a program on a LEGO brick does not correctly reset the Bluetooth stack. If your program crashes and you fail to disconnect properly, the Bluetooth stack can enter a strange state. Rebooting the brick often doesn’t help. While developing, I had to remove the battery and USB cable often.
The Gyro sensor is slow to boot; give it some time.
The program on the steering wheel uses the internal gyro angle. That angle only seems to start working about half a minute after the hub has booted. I think it has to do with an alignment and calibration procedure. Give the steering wheel some time before you run the remote control program.
What’s next?
I’m working on an Android app to do the remote control. This setup saves hubs and allows me to create multi-hub robots. Micro:bit boards also support BLE. So I’m investigating how to connect them to LEGO. Finally, it should be possible to use the MINDSTORMS remote control to steer your LEGO Powered Up 2.0 vehicles, like the Batmobile and the RC Extreme Offroader. If you like my work, consider supporting me on Patreon. Thanks!

Thanks a lot for the tutorial and the code. Where do I find the complete API documentation released by lego?
When running the code on my remote control (spike prime kit) the main button will be lit white for a few seconds and then it will flash red and go back to the idle state. Am I missing something? I thought we followed the instructions for the remote and car quite well but something isn’t connecting between the hubs.
There is a problem with the code. It seems like the program crashes. What does the python console say inside the LEGO app?
i got the same problem
Had the same problem. It says something like: In line 400 _ _ int _ _ py …“
Something went wrong with my comment. But I’ve got the same problem. Here’s again what I wanted to say: „line 400 _ int _ .py …“
In witch lines are the changes. I can’t finde them.
What exactly do you need?
I found them already. But thanks.
I am getting an EPERM error on the ‘import bluetooth’. Is this still supposed to work on the latest firmware or has Lego blocked Bluetooth access?
It should work on Robot Inventor Firmware and SPIKE2. Not on SPIKE3. I’m also not sure if it works when you program the hub via bluetooth. Better to use USB.
I was indeed using SPIKE3. Just switched to Pybricks and got the BLE UART up and running there in a matter of minutes. I can now proceed with my PC <> hub communication. Thanks!
hopping that you can help me. i have built a tank like robot and the controller but when i try to downlode the coade to the hub i get the following err
Traceback (most recent call last): File “robot tank code take 2”, line 13, in ImportError: can’t import name display
You need to flash your hub with MINDSTORMS Robot Inventor software. This doesn’t work on SPIKE3, because LEGO nerfed python.