After my first experiments with the Huskylens, here’s a complete guide to connecting the smart AI camera to your LEGO robot. For this guide, I’m using the new hub. The camera also works with EV3, but I haven’t built that yet. Read on to find out what hardware you need, how to do pin-out and wiring, and how to program the hub with Python.
Required hardware to do image recognition on your LEGO hub
- Huskylens. Get your AI image recognition camera first. Currently it is cheaper ($58) and more available than openMV H7 ($65). That is especially so if you want the OpenMV cam with a display. That will set you back another $20.
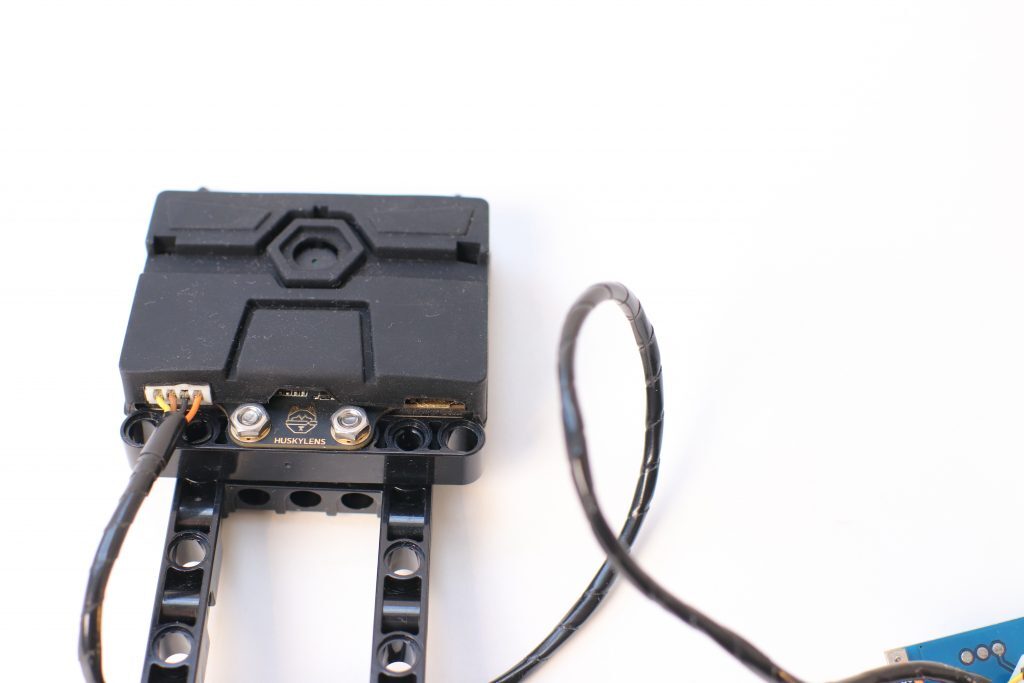
- Two M3x10mm screws with M3 nuts. They are perfect for attaching a LEGO Technic beam to the Huskylens.
- You need something to plug in to your hub. For this, get either a Lego We do/LPF2 soldering wire OR a distance sensor breakout board.
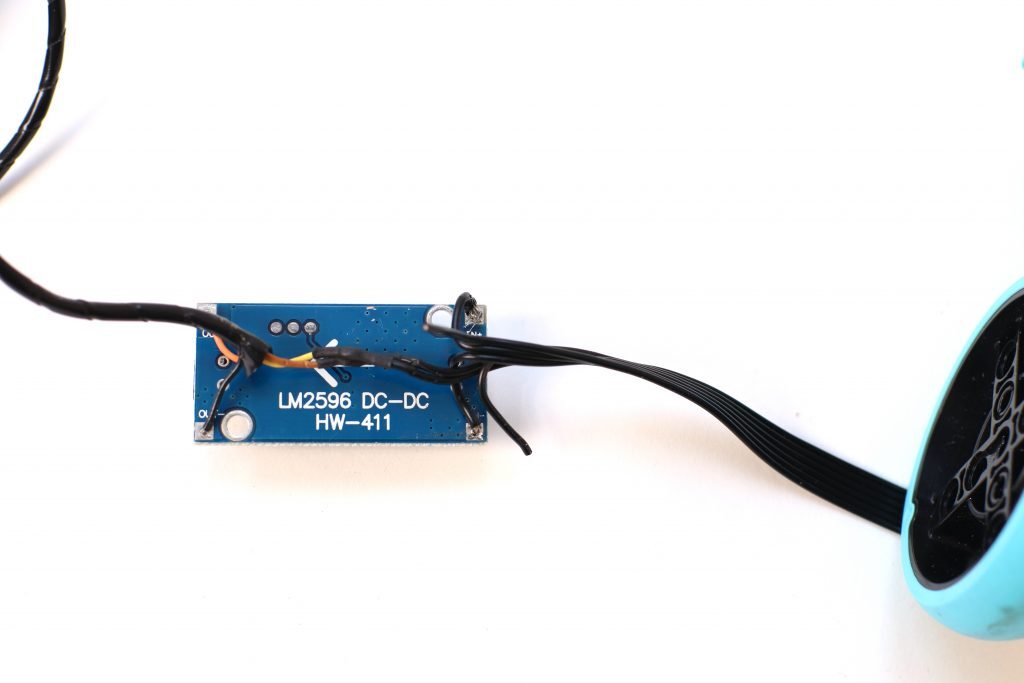
- A voltage converter. It is optional if you use the oldest huskylens firmware. The newer firmware (0.5+) draws more power and requires a 3v3 Buck dc-dc converter.
- Some soldering equipment, like tin, iron, shrink tube,…
How to make wire for the Huskylens by yourself
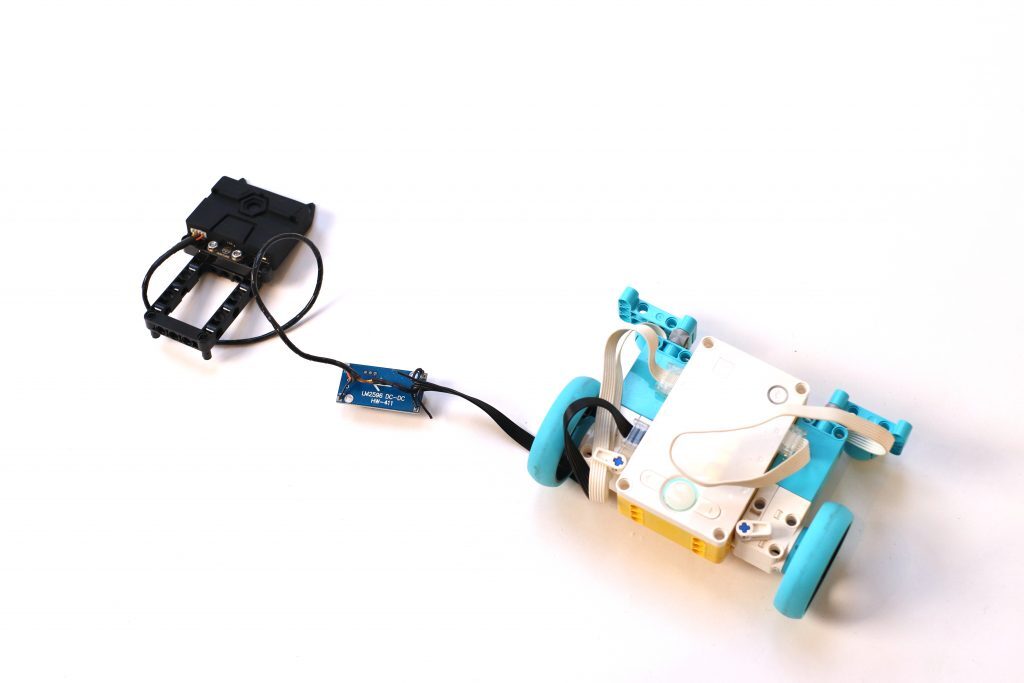
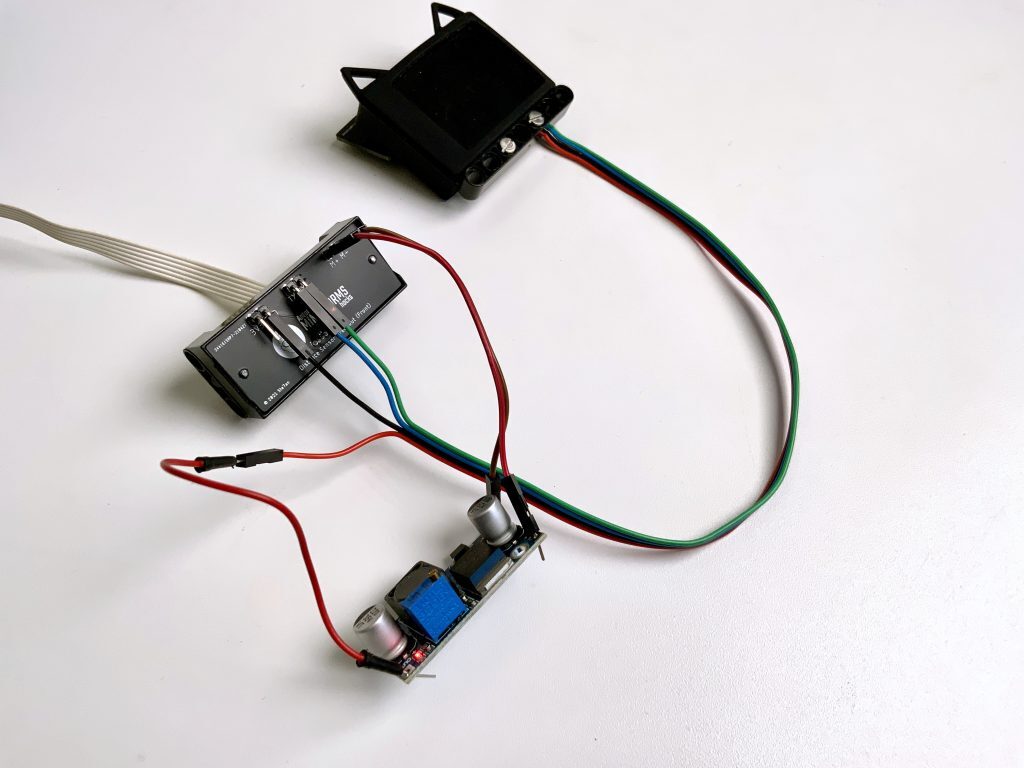
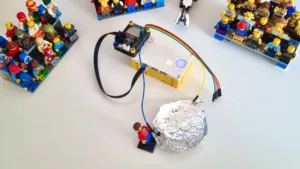
Below is the pin-out that I used for connecting the Huskylens to SPIKE Prime and Robot Inventor. There is one option without dc-dc converter and one with the converter. The Huskylens needs 3v3 in the power supply and the RX and tx wires connected. The camera is 5v resistant, but I found that communication hampered. I didn’t have a fixed 3v3 regulator, so I used a larger but tunable converter.
I did not use the included JST-wire but a spare one that I had lying around. That’s why colors are different. I want to use the included wire to connect to EV3 in a later project.
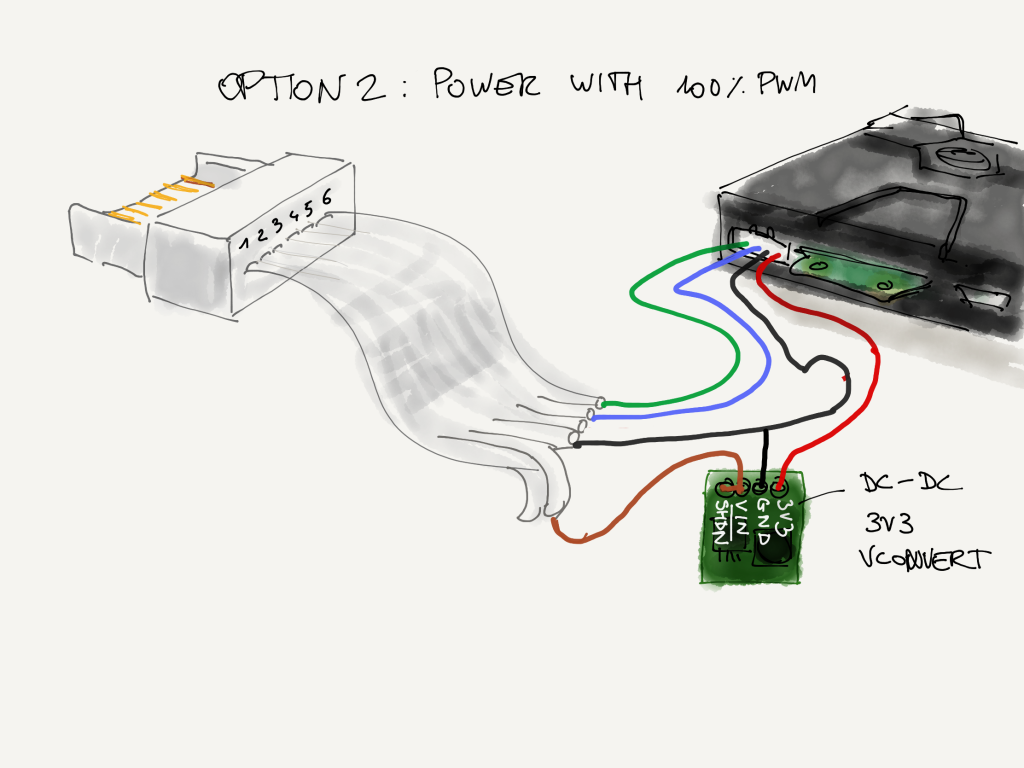
Buck converter wired to Motor Lead 2. This feeds it 8v on 100% pwm. 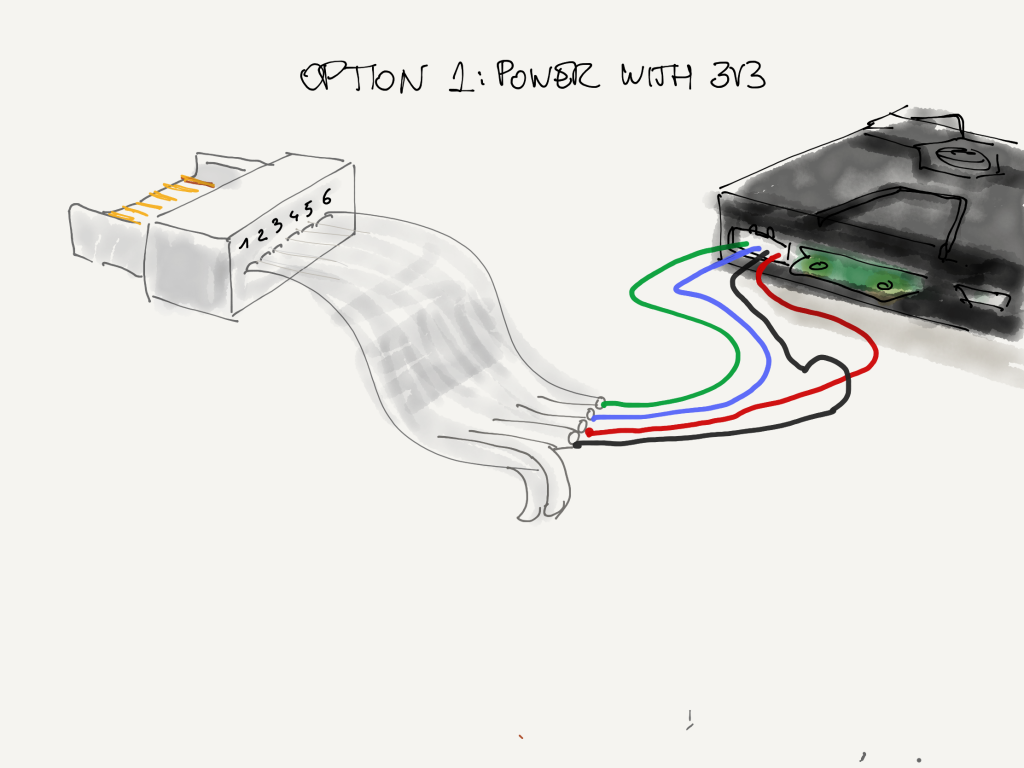
Version without dc-dc converter. 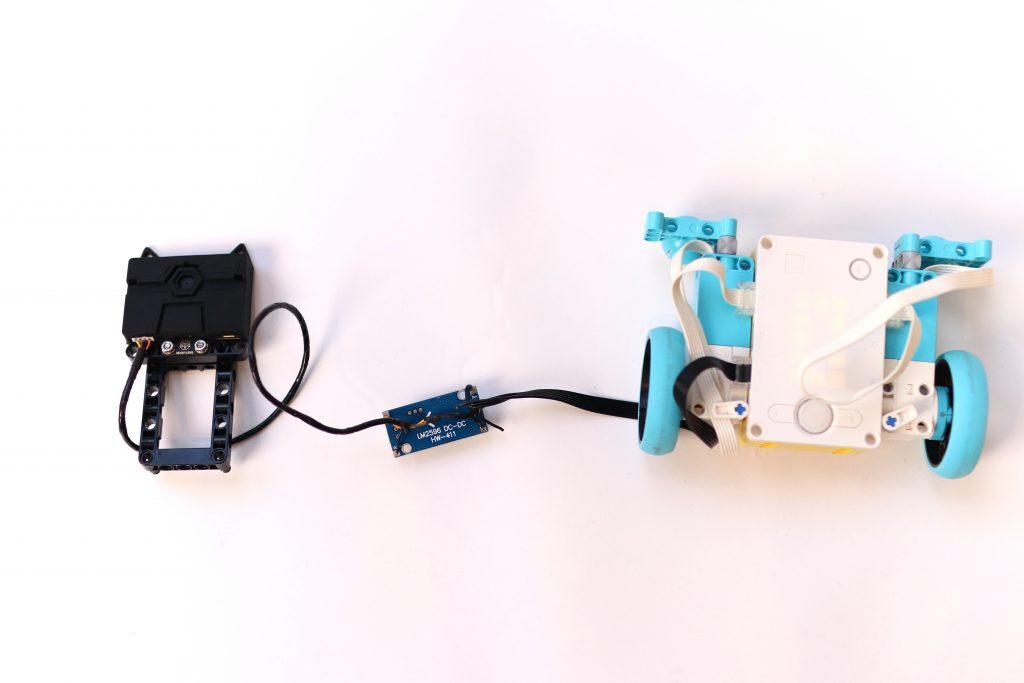
How to wire the Huskylens using the Distance Sensor Breakout board
If you don’t want to cut and solder wires, you can also use the Distance Sensor Breakout Board. It now comes with a free screwdriver to open up the distance sensor. You can simply slide the four Huskylens wires over the header pins, in the order they are. For a more stable performance of the Huskylens, you can easily wire in a 3V3 buck converter. If you set the port to 100% PWM, M+ will be about 8V and M- will be 0V (GND).

How to program your Robot Inventor or SPIKE hub to work with the Huskylens
LEGO does not provide Scratch word blocks for third-party hardware, nor do the producers of the Huskylens. As far as I know, it is not even possible to import plug-ins into the LEGO Software with your own blocks.
The good news is that LEGO officially supports Python now. Having no Scratch blocks means that you have to use Micropython. To make things easy, I have created a LEGO-Huskylens library on Github.
To use that library, simply copy it in front of your script, or use the installer script to make the library importable.
Once the script is installed you can use the boilerplate script to start coding your smart camera with LEGO. Here’s an example script that follows a line.
# default imports
from mindstorms import MSHub, Motor, MotorPair, ColorSensor, DistanceSensor, App
from mindstorms.control import wait_for_seconds, wait_until, Timer
from mindstorms.operator import greater_than, greater_than_or_equal_to, less_than, less_than_or_equal_to, equal_to, not_equal_to
import math
# imports from Anton's Mindstorms LEGO Huskylens library
# https://github.com/antonvh/LEGO-HuskyLenslib
from projects.pyhuskylens import (HuskyLens,
ALGORITHM_FACE_RECOGNITION,
ALGORITHM_FACE_RECOGNITION,
ALGORITHM_OBJECT_TRACKING,
ALGORITHM_OBJECT_RECOGNITION,
ALGORITHM_LINE_TRACKING,
ALGORITHM_COLOR_RECOGNITION,
ALGORITHM_TAG_RECOGNITION,
ALGORITHM_OBJECT_CLASSIFICATION,
ALGORITHM_QR_CODE_RECOGNITION,
ALGORITHM_BARCODE_RECOGNITION,
ARROWS, # key for get() dict
BLOCKS, # key for get() dict
FRAME, # key for get() dict
clamp_int)
### huskylens usage ###
# Init with the the port it is in. Here it is in port 'E': hl = HuskyLens('E')
# Add a pwm parameter if you use a wire with a voltage converter: hl = HuskyLens('E', pwm=100)
# get_blocks(ID=None, learned=False) returns a list of block objects
# blocks have x, y , width , height, ID properties.
# get_arrows(ID=None, learned=False) returns a list of arrow objects
# arrows have x_tail, y_tail , x_head , y_head, ID and direction properties
# get(ID=None, learned=False) returns a dict with blocks, arrows & frame
# on firmware 0.5+ you also have these Huskylens class methods available:
# show_text("text", position=(10,10))
# clear_text()
# Create your objects here.
ms_hub = MSHub()
hl = HuskyLens('E', pwm=100)
ma = Motor('A')
mb = Motor('B')
# Write your program here.
ms_hub.speaker.beep()
# Get direction of a LEARNED arrow. Point the lens at a line and press the learn button.
print("Starting line tracking")
hl.set_alg(ALGORITHM_LINE_TRACKING)
while not ms_hub.left_button.is_pressed():
arrows = hl.get_arrows(learned=True)
if len(arrows) > 0:
direction = ((arrows[0].x_head+arrows[0].x_tail)/2 - 160)/-6
ma.start_at_power(clamp_int(30+direction))
mb.start_at_power(clamp_int(-30+direction))
else:
ma.start_at_power(0)
mb.start_at_power(0)
ma.start_at_power(0)
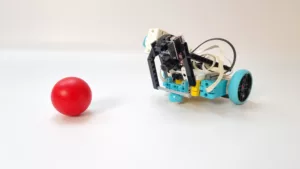
mb.start_at_power(0)You can see the line follower script in action on my Youtube channel. Here’s a video. Did you subscribe?
What to do if you get stuck trying to connect Huskylens to SPIKE Prime or Robot Inventor
If it doesn’t work for you, leave a reaction in the comments below. You can also support me on Patreon for an ultra-fast reply. If you make something cool or find out new things about this camera, be sure to tag me on Facebook, Instagram, or YouTube. I’d love to see what you are doing with this.

Thanks for the tutorial. Some idea how to use it is already growing in my head 🙂
Hi Anton,
Your work here is awesome. Really impressive.
Now that LEGO Education have released the SPIKE App v3 with a different implementation of MicroPython, are you likely to update this project to work with that version?
Or the more evergreen PyBricks?
I’ve tried to access features such as .pwm and .uart and setting up duplex ports using SPIKE v3 but LEGO don’t seem to have included libraries or functionality for this. Do you know if they are there? Are those things accessible at a lower level?
BTW, I am having a few problems with your sample. I get the following errors:
The only change I’ve made to your code is line 36 is now hl = HuskyLens(‘E’, 9600, False, 100)
It is in the correct port because it powers the Huskylens and there is communication because the code changes the camera to line tracking.
Any ideas?
Hi Anton,
Correction, your line following code above works correctly. I used the LF code on your github and had not trained the Huskylens camera on a line correctly.
Hello, blogger. I couldn’t run this program successfully. Is it related to the programming environment?
We intend to create a facial recognition project using the Huskylens AI vision sensor and Spike Prime. However, we have encountered an issue with the firmware and LEGO Education Spike software of the Spike Prime controller, as they have been updated to version 3.0 and no longer support the “Pybricks” library (which was integrated into the version 2.0 firmware). This means that Spike Prime cannot drive the external vision sensor, Huskylens. Have you come across this problem? Is there a plan to update and upgrade the Pybricks library to establish compatibility between Spike Prime version 3.0 and Huskylens? Alternatively, are there any other solutions available?
You need an LMS-ESP32 in between to emulate LEGO sensors and convert power: https://www.antonsmindstorms.com/product/wifi-python-esp32-board-for-mindstorms/
For someone that is very new to lego robotics: could you please elaborate the the esp32 board is related to the SPIKE Smart Camera Breakout Board? Are both components required to connect the hub?
You only need one. The LMS-ESP32 is more comfortable and has more usage options, since you can emulate LEGO sensors and connect bluetooth and wifi. It is a bit more expensive, however.