Last January, The LEGO House launched a new version of Robo Lab. It’s an experience where kids get to program real LEGO robots and have them do missions on an ever-evolving play table. The new theme was flowers and Beekeeping. The LEGO House team asked me to design the new robot. In this article, I proudly share the design story behind the Robo Lab Beekeeper robot. It’s been a fantastic collaboration with Master Builder Stuart Harris and digital lead Mads Mommsen.
What is the LEGO House?
The LEGO House is a private museum and experience center in Billund, Denmark. You could say that it is a physical manifestation of the creative power of a child’s imagination.
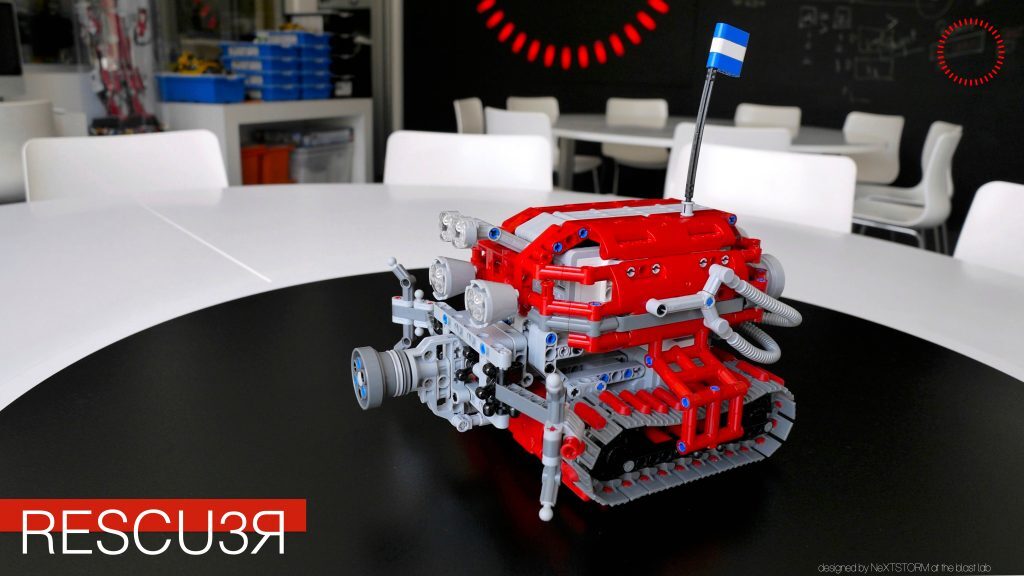
The LEGO House is an interactive experience that will stimulate the imagination of every visitor. That’s what sets it apart from LEGO land. The latter is mainly about thrill rides and not so much about creativity. The museum even had its own Netflix documentary. Today it is free to watch on YouTube. In it, you’ll meet Stuart and catch a glimpse of the old polar rescue-themed Robo Lab.
The result of this Design Story: a Robo Lab beekeeper experience
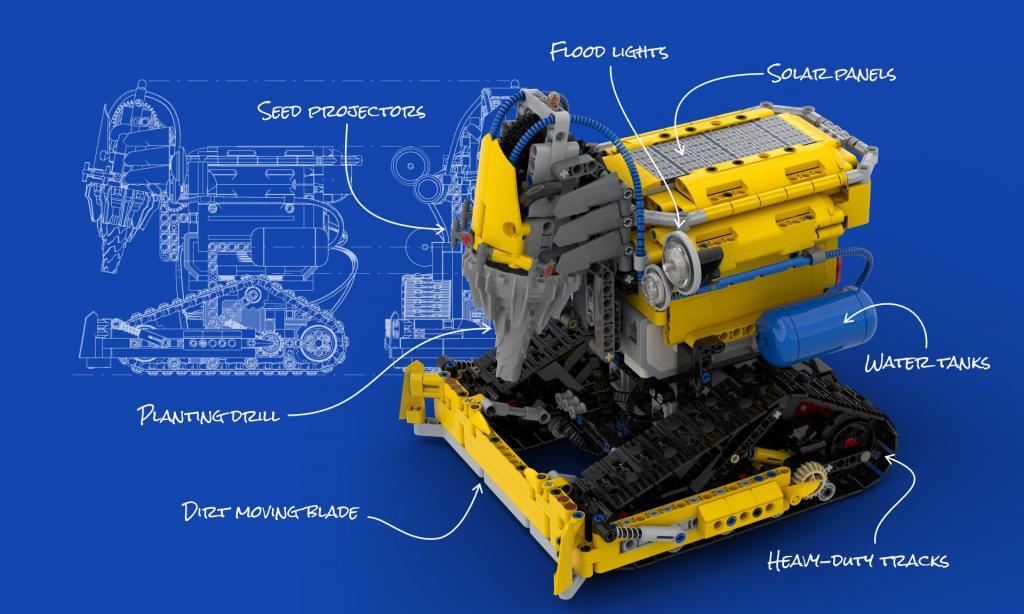
Kids can now launch their beekeeper robot and program it to plant as many flowers as possible. The goal? Creating a sustainable world for the bees. To try the Robo Lab for yourself, go to the Blue Zone in LEGO® House.
Before you go there, you can already get a feel of the experience through these Instagram posts by the LEGO house.
The very beginning of the Robo Lab beekeeper design story
The LEGO House Robo Lab team contacted me in the fall of 2019. They asked whether I could design the new robot. I thought about it for 2 very long nanoseconds and then said: “Yes!”
As always in this kind of project, there wasn’t a whole lot of time. The new experience had to be ready for testing in January 2020. That gave me about 6 weeks to complete the full model. January is the yearly shut-down of the LEGO House, where the team has room for maintenance and installing new experiences.
The late Vassilis Chryssanthakopoulos designed the previous version, so I had some big shoes to fill. Furthermore, there were some stringent constraints to the robot design:
- MINDSTORMS EV3 brain with a maximum of three motors and tracks as wheels
- Working with the current robot tracking cameras in the lab
- Easy access to the brain for charging, powering up, and maintenance
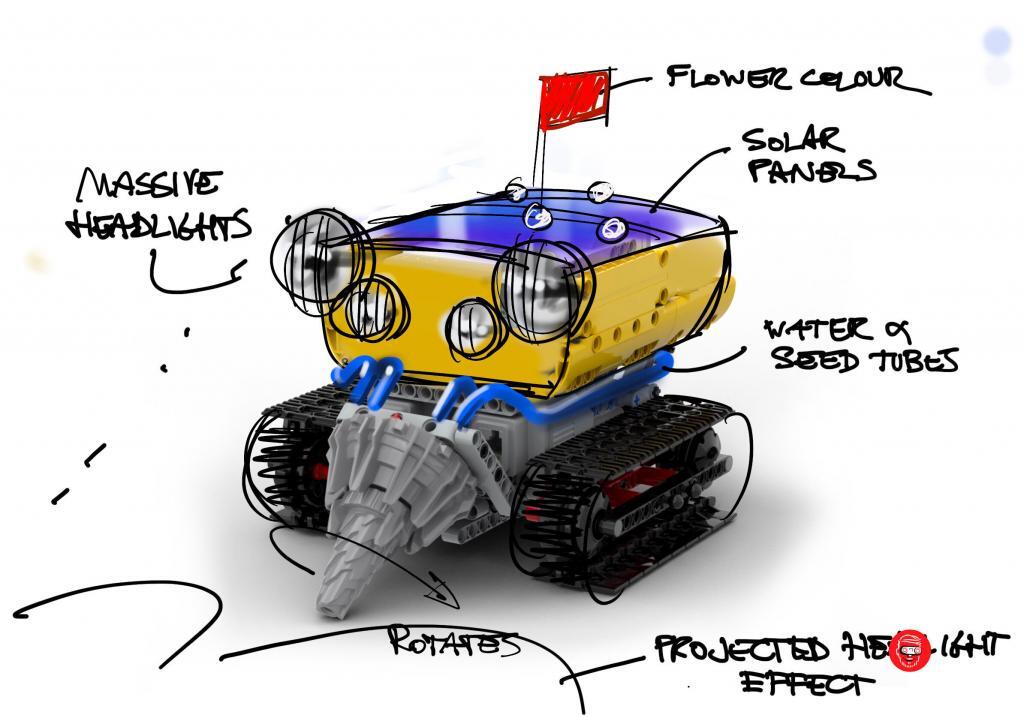
- The robot needed to be ‘easy to read’ for the kids in the lab. Without touching it, kids needed to instantly see that this robot could plant flowers and move things around like a friendly Bee Buddy.
Nevertheless, I was overjoyed at the opportunity to design a new robot, and I was eager to get started.
The Agile project approach: prototyping, prototyping, prototyping
To pay for my LEGO hobby, I have a job as an Agile coach and consultant. Agile is my preferred approach. So for this project, I also proposed to work Agile. Working Agile meant that I would show a lot of prototypes very early on. It also meant that we would set fixed time boxes for each design sprint and go forward with the best material from that sprint.
In retrospect, that approach was a significant factor in the project’s success. Through our frequent discussions, the LEGO team and I came to understand each other well. Furthermore, the early prototypes helped the LEGO team to involve their stakeholders in the design. And finally, when last-minute changes and constraints hit the project, we could quickly solve them in cooperation.
Early prototypes: the package design
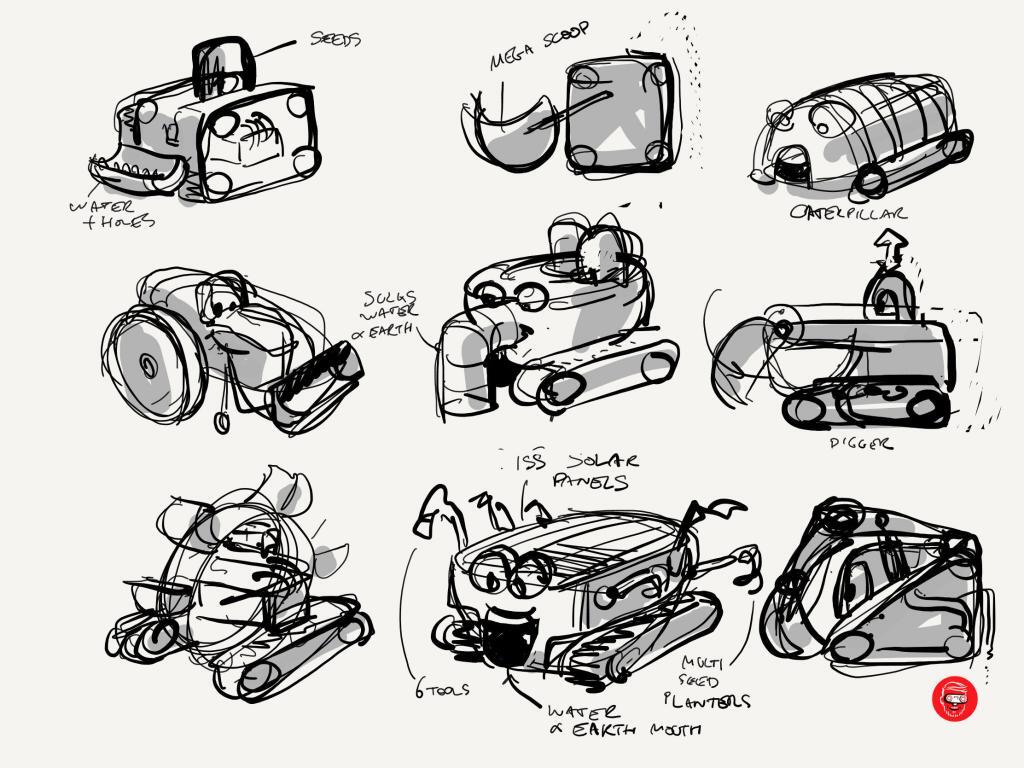
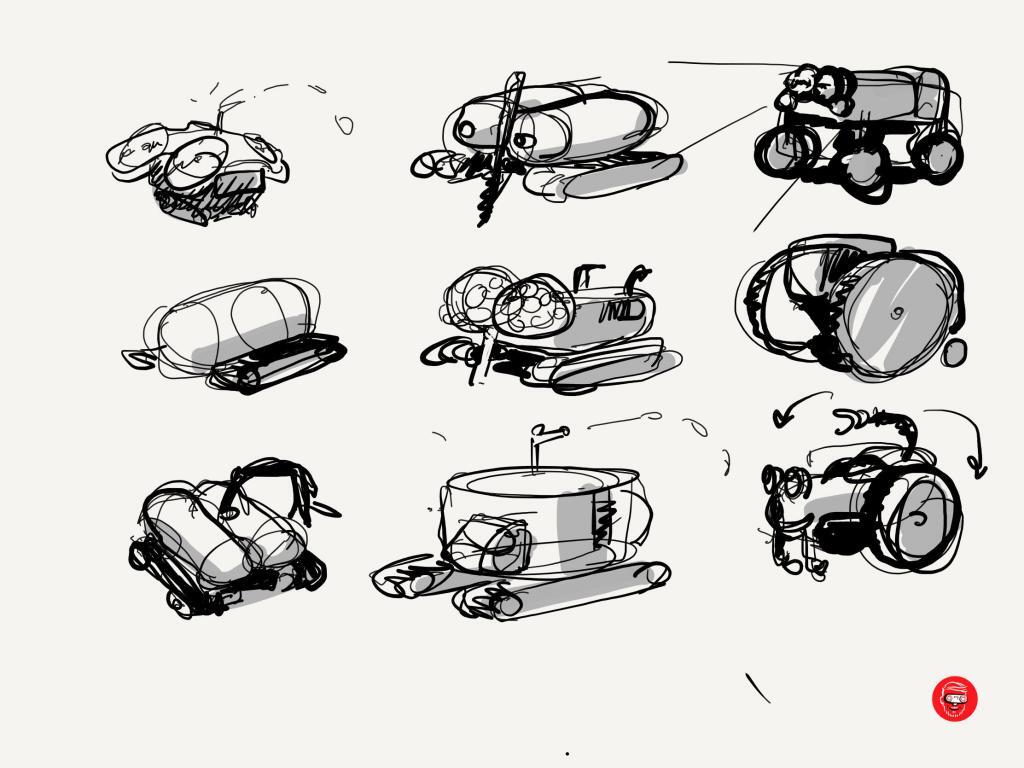
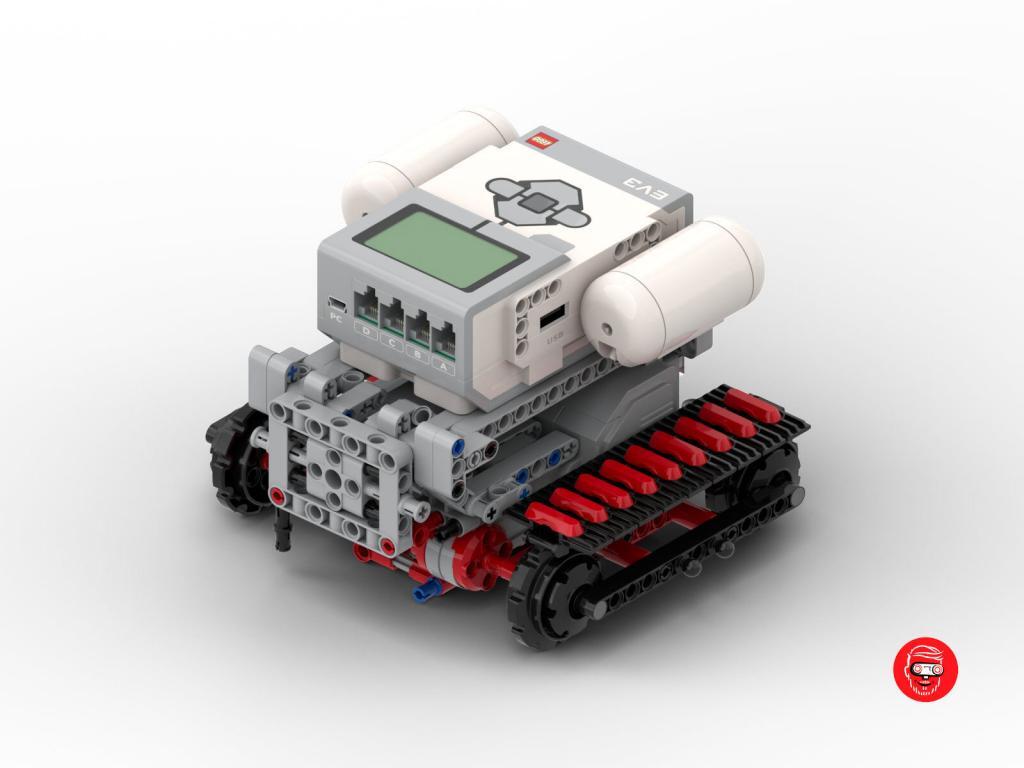
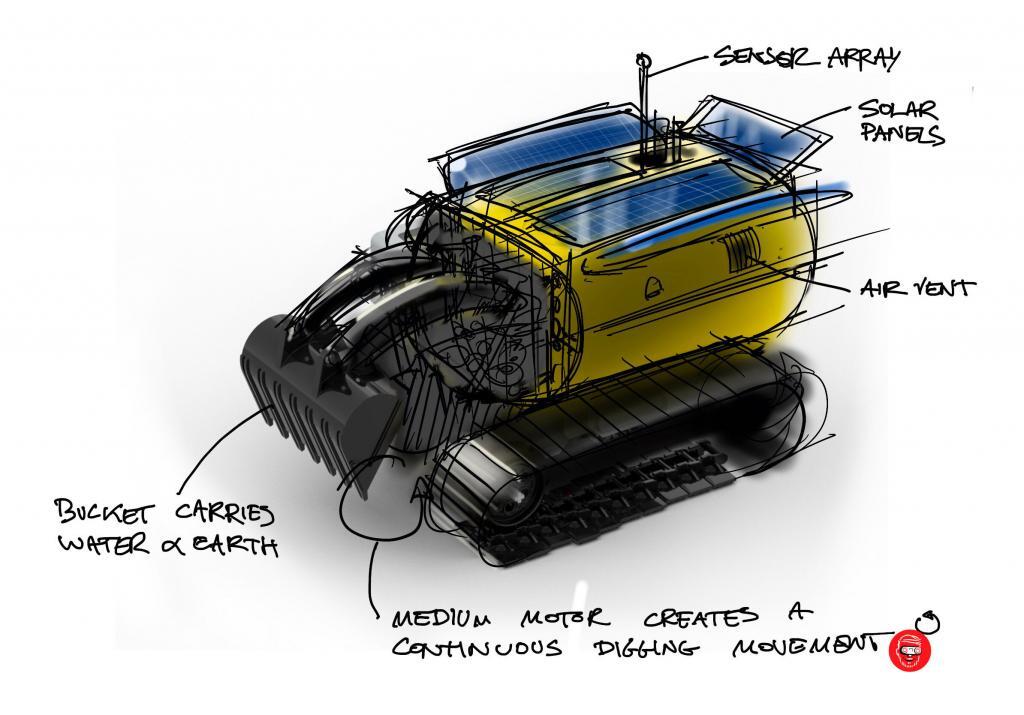
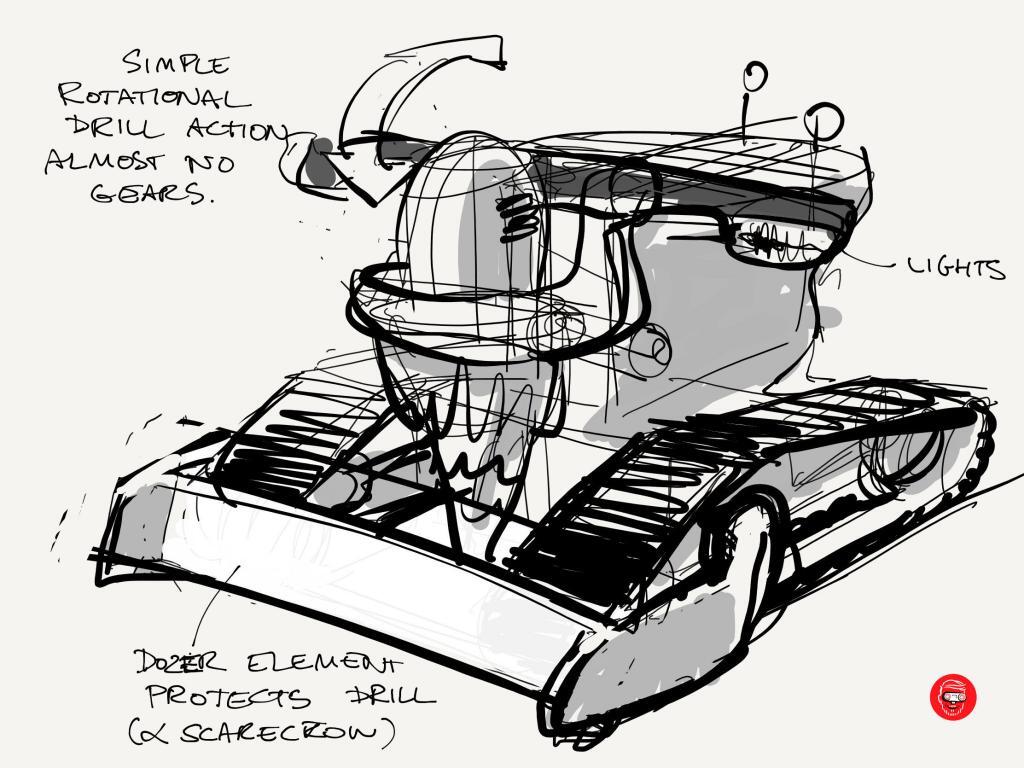
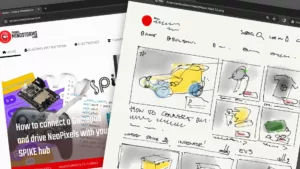
My first challenge was to pack the chunky EV3 brain and motors to give the robot a Bee Buddy character. Through the years, I’ve become a pretty fast Technic builder. However, sketching always beats building when it comes to speed. I started with sheets and sheets of different options for ‘packaging’ the LEGO MINDSTORMS parts. The ‘package’ is the word car designers use for the wheels and internals of the car. When the package is set, they can proceed to add the design as a skin.
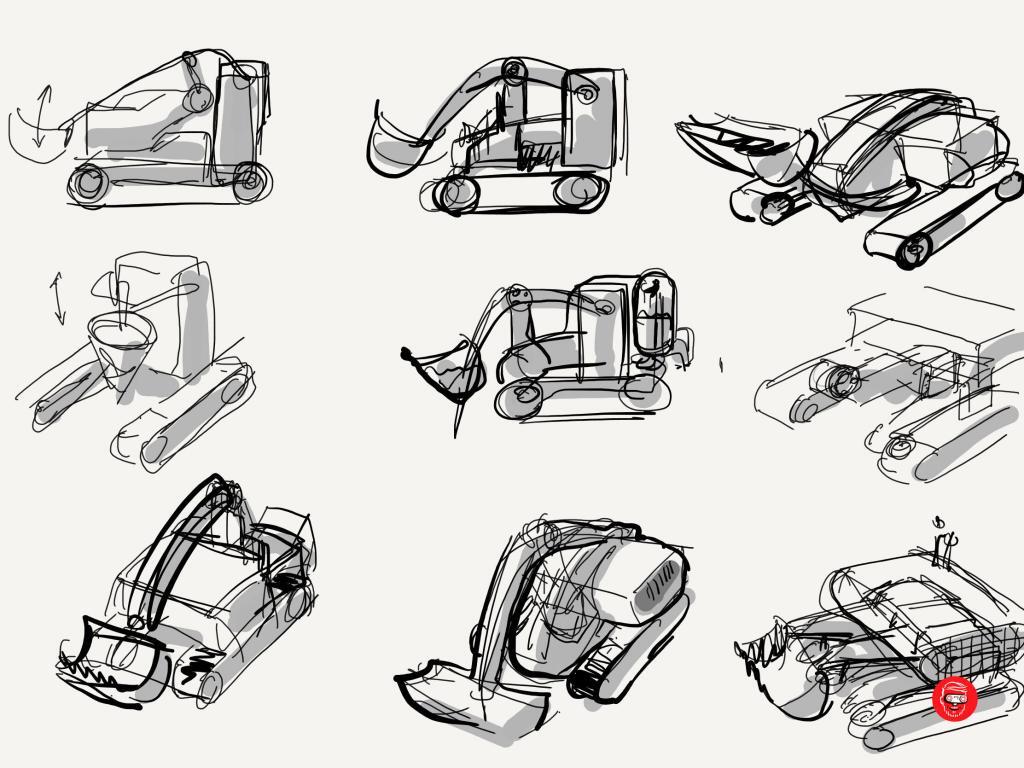
Sketching to proportion with a Studio underlay
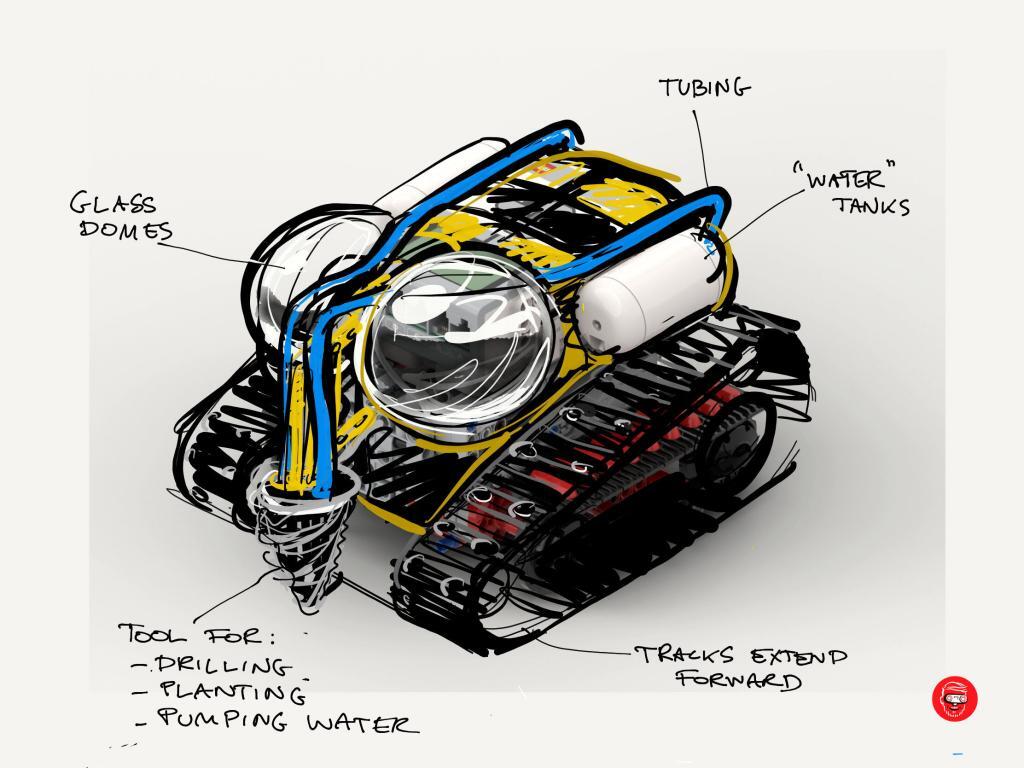
Once I had explored the package, I selected some sketches that best fit the briefing. It was time to add more detail. To be sure that my sketches had the right proportions, I created a quick Studio model to use as an underlay. In the gallery below you can see the designs for the early discussions.

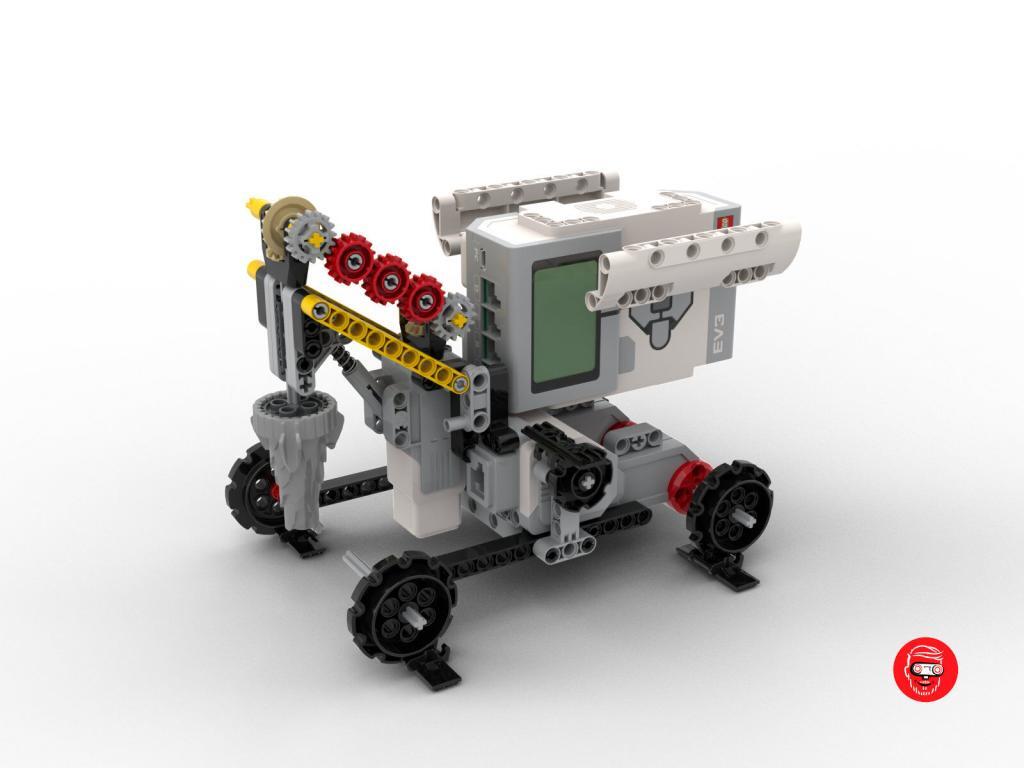

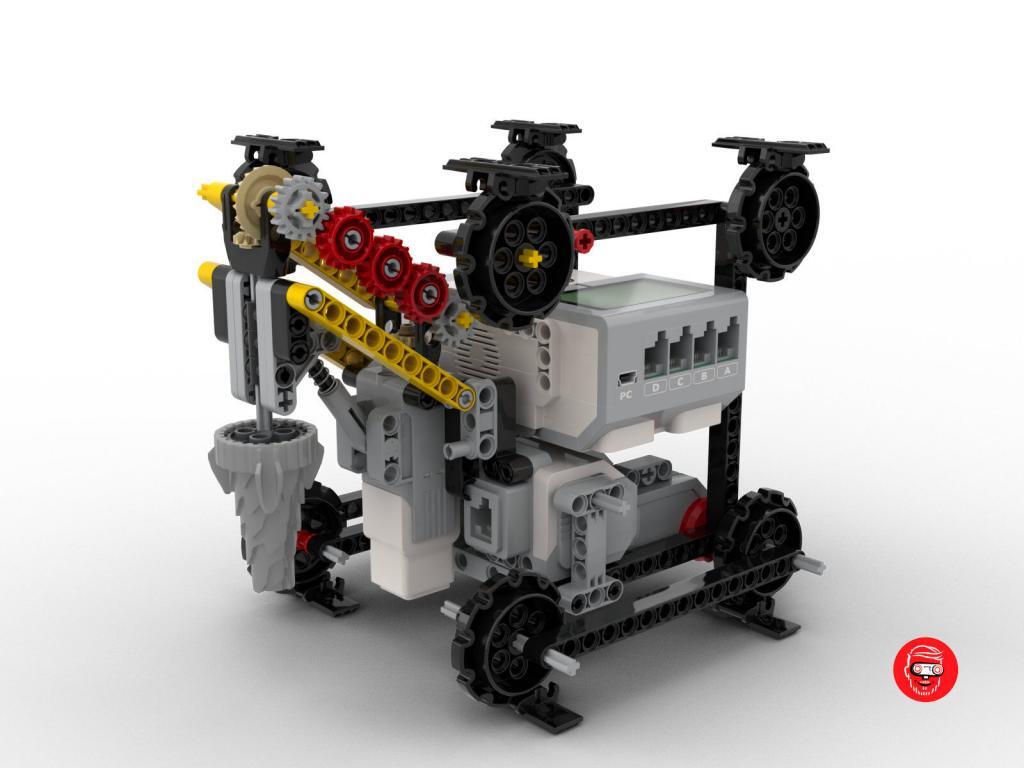
Only the best is good enough: the drill mechanism.
The original briefing did not require the drill to rotate or move. However, I wanted to raise the bar there. LEGO’s motto is still: “Only the best is good enough.” The Beekeeper Robot was a LEGO project, so I felt that I also had to go the extra mile.
Performing multiple functions with a single motor is no easy feat. The first idea that I played with was using the resistance in a gearbox to create an extra movement.
The problem with this is that the gears are plastic and that these robots have to perform eight hours per day, seven days per week. Do you know what happens if you turn ABS gears for that amount of time? Indeed. They turn into plastic dust. So that was back to the drawing board. Or should I say building plate?
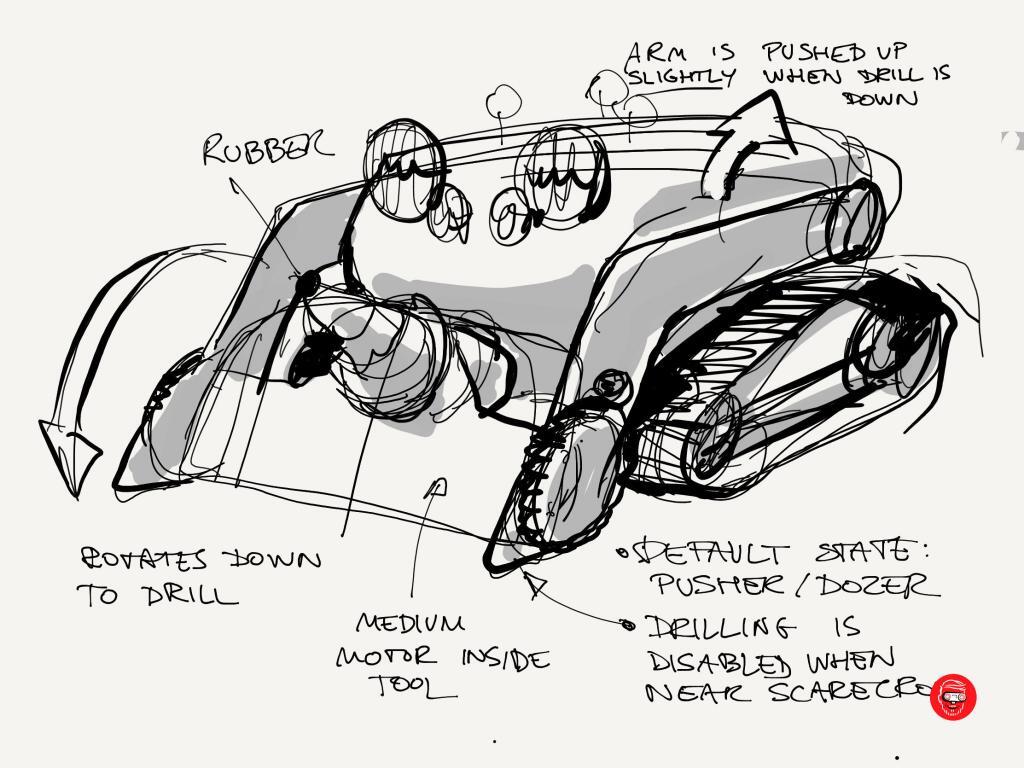
I did not film all prototypes I built after the first one, but ultimately I settled for a design where the shearing motion of moving the drill also rotates it.
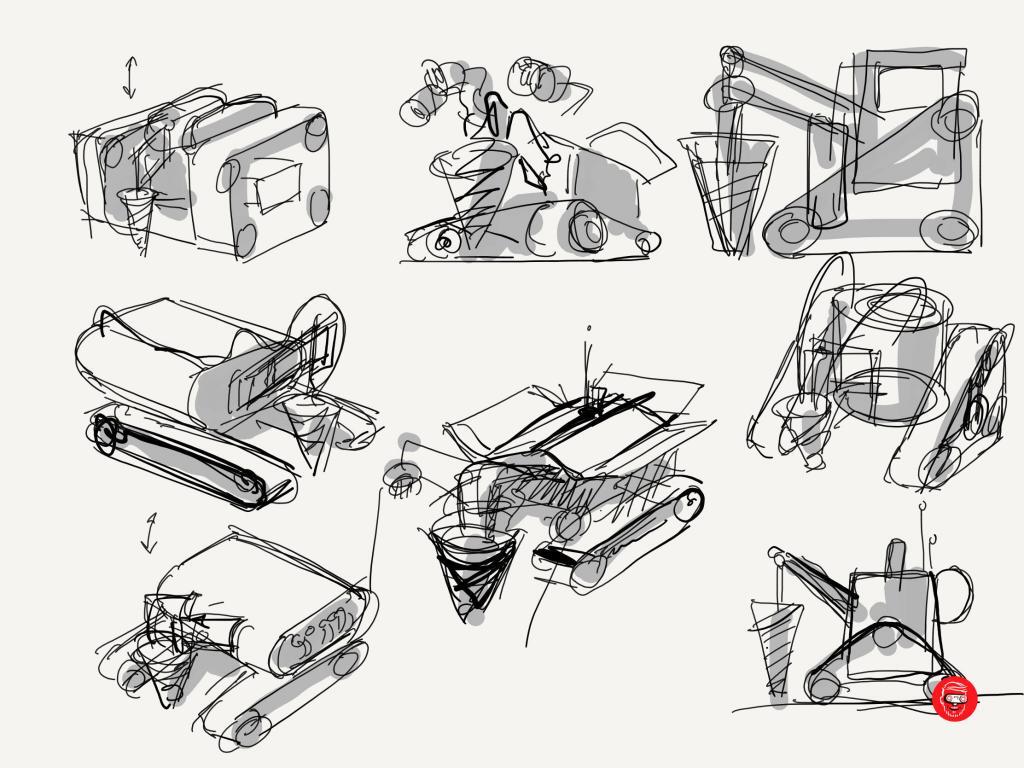
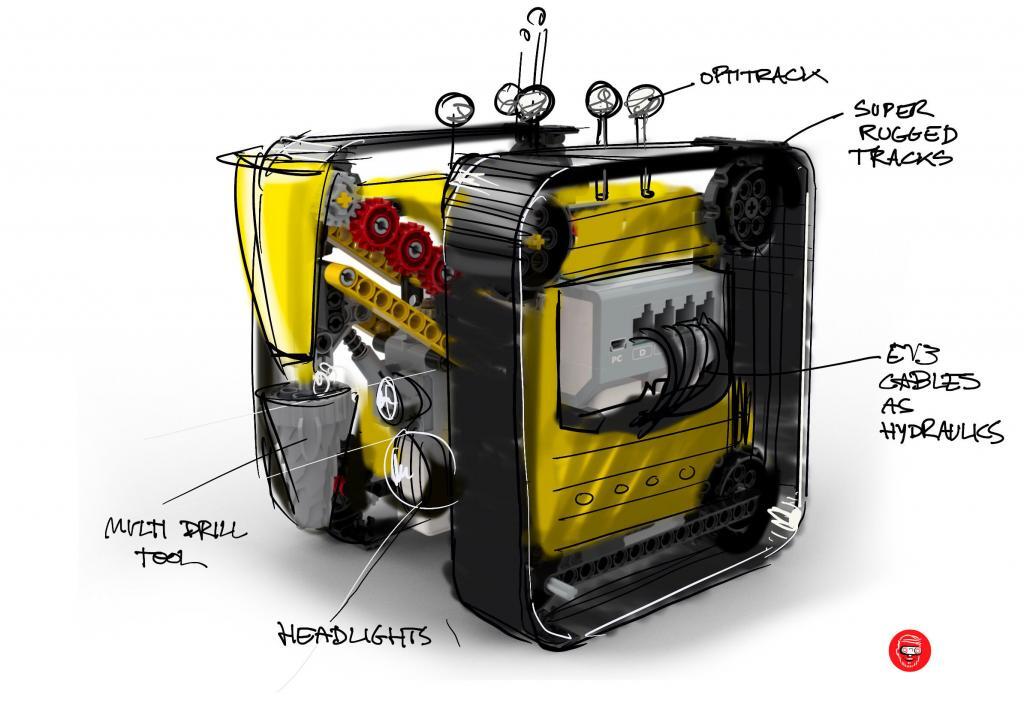
Design direction: all tools in front
In the first sketches, I explored some ideas where a pusher blade would be at the back of the robot and the drill and watering device in front. This made the robot hard to ‘decode’ for the children playing the game. It was harder for them to see which side was forward and it was harder to guess all functionalities. Furthermore, tools in front and at the back would complicate the programming of the robot. Therefore we opted to put all tools in front. The last few sketches I made, show the direction.
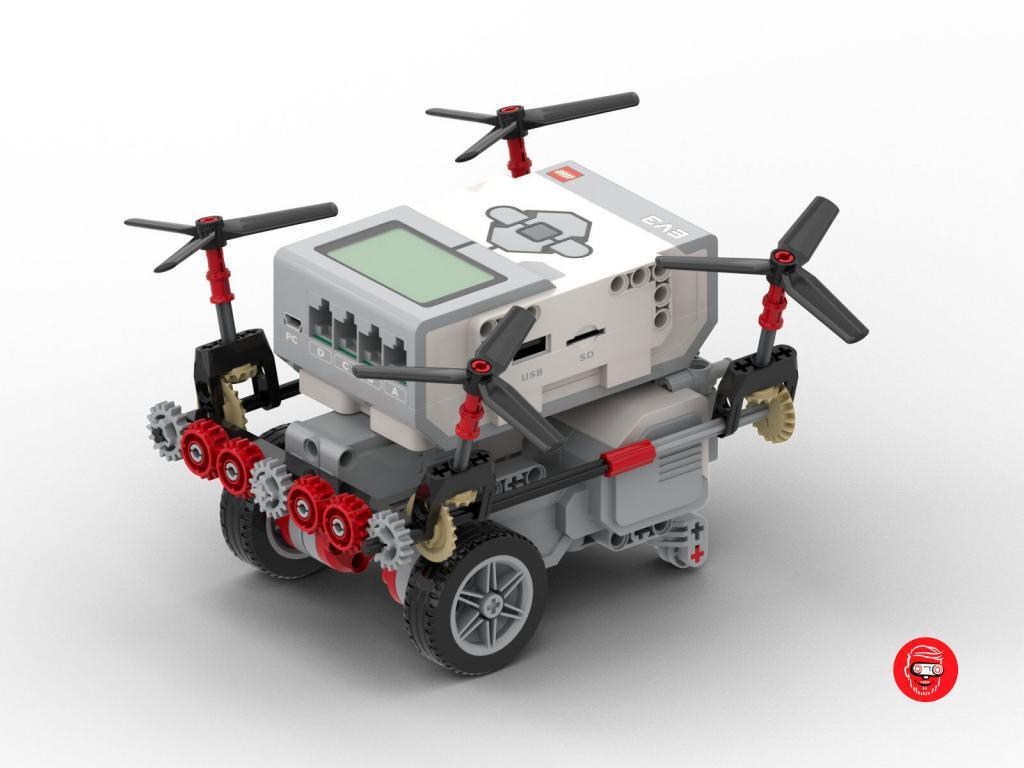
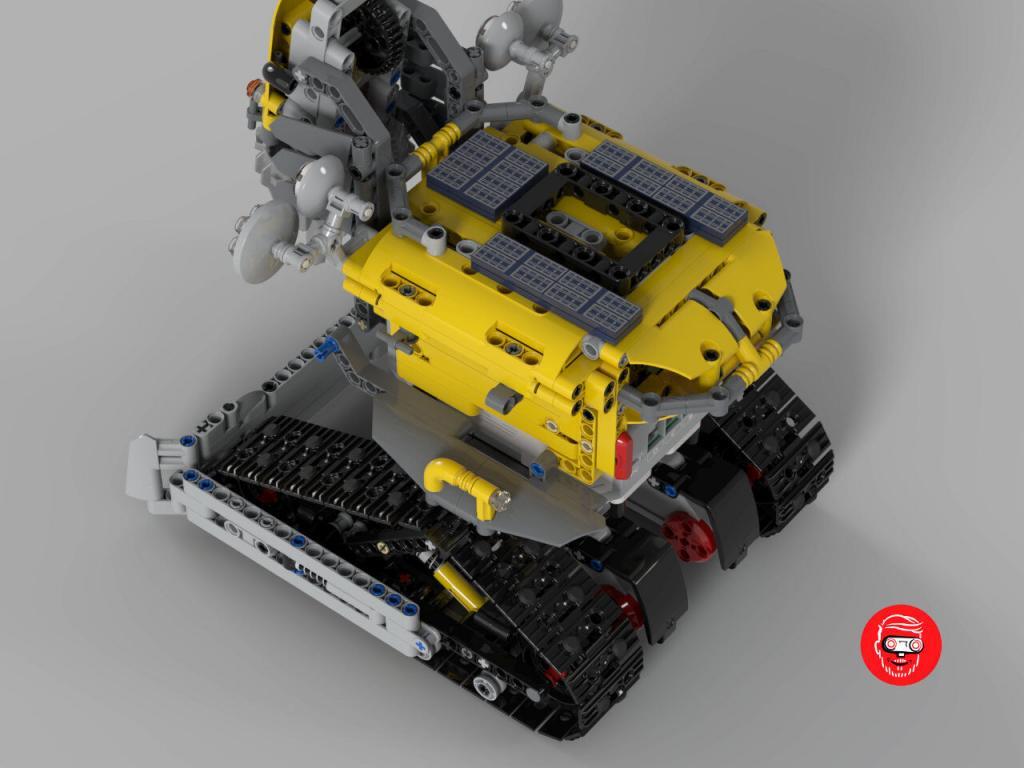
After these sketches, the direction was solid enough to do the rest of the detailing in real LEGO bricks and in Studio. First I wanted to make sure all mechanisms were actually working and it would be possible to give the robot some characteristic animations.
Detailing the Robo Lab Beekeeper robot
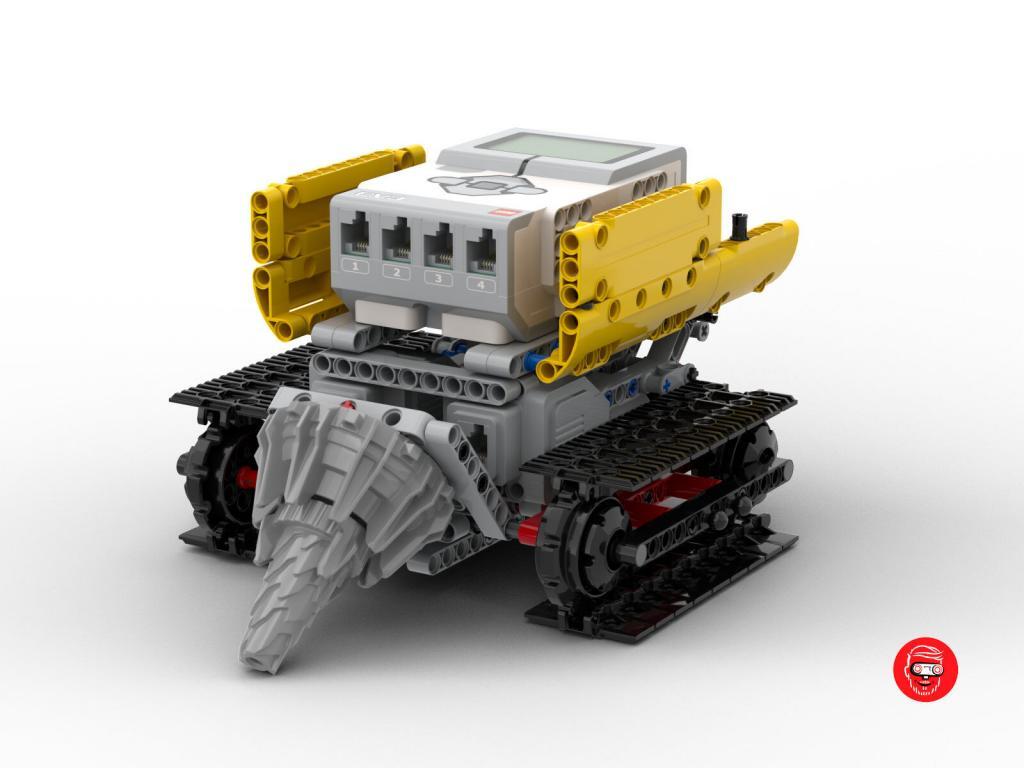
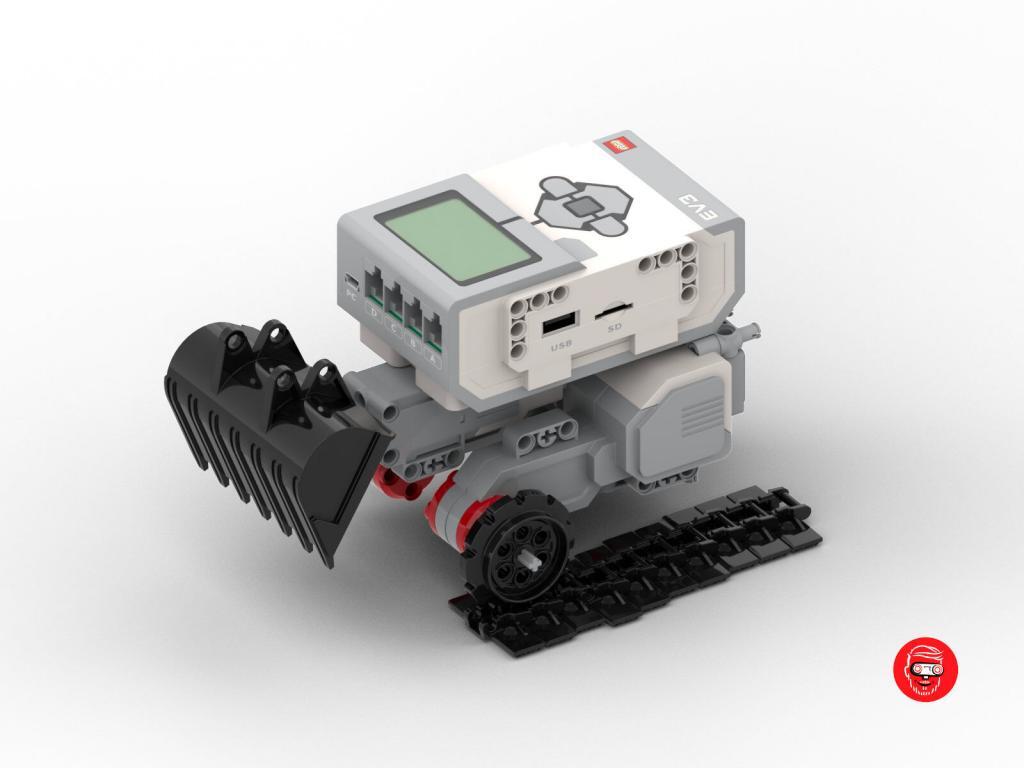
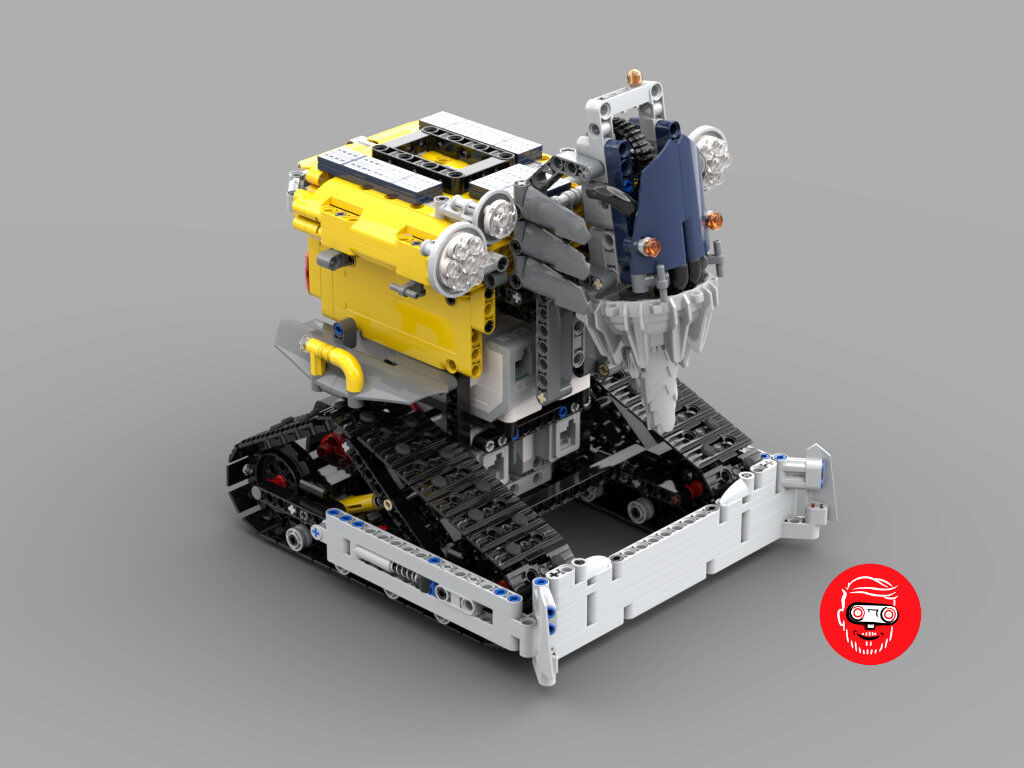
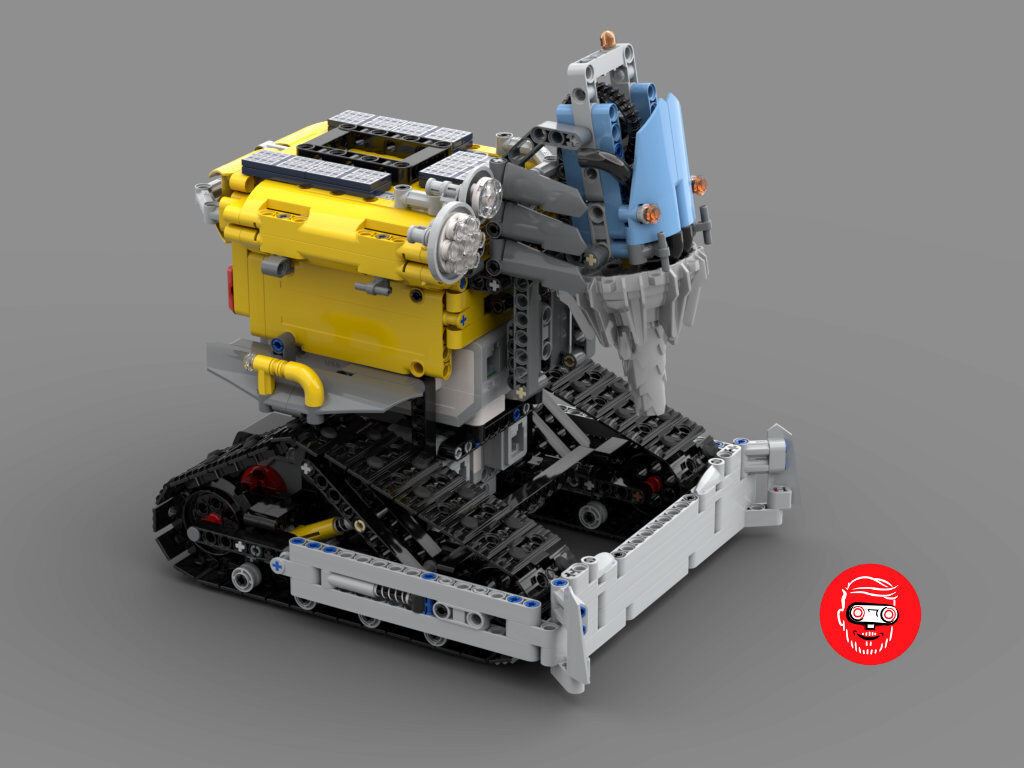
The team at the LEGO house found it hard to choose between the two design directions. They liked them both! After much deliberation, they went for the model with the vertical drill. This was the start of the detailing phase. My next challenge was to make the robot solid, easy to build, easy to maintain, good looking, AND ensure that all parts were available. I was not allowed to use older parts that were unavailable in the LEGO warehouse.
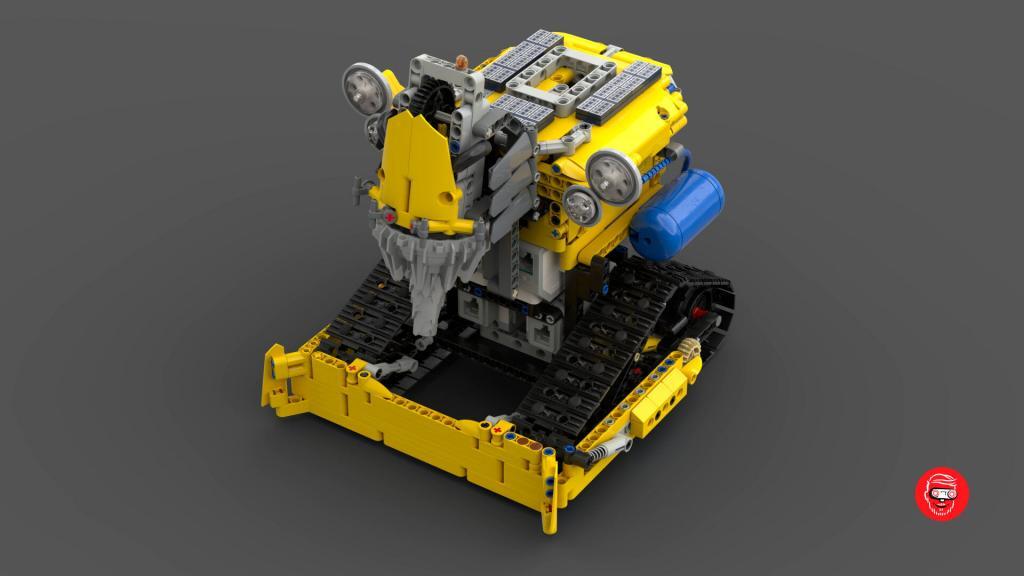
For the detailing phase, I alternated between Studio and the real robot, ordering new parts as I went, and checking the availability in the LEGO warehouse. The robot footprint needed to be as small as possible. A small footprint maximizes the maneuvering space on the playing field.
I assembled and disassembled the robot countless times. Because of the time pressure, I didn’t photograph every iteration. However, I did save all Studio models I made in between building real models. You can see those below.
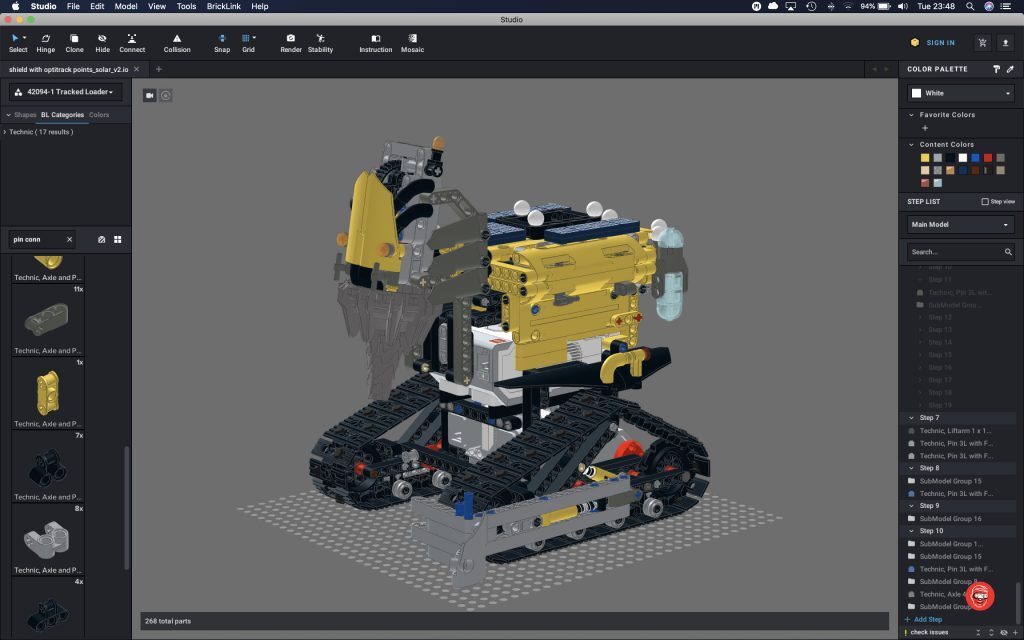

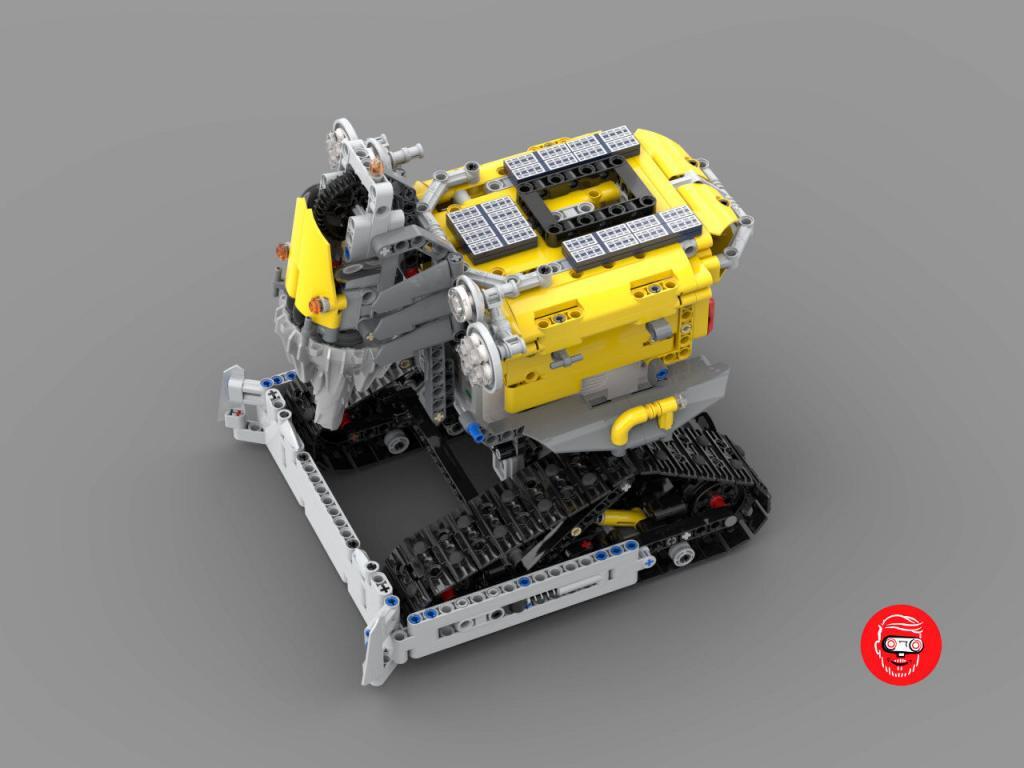


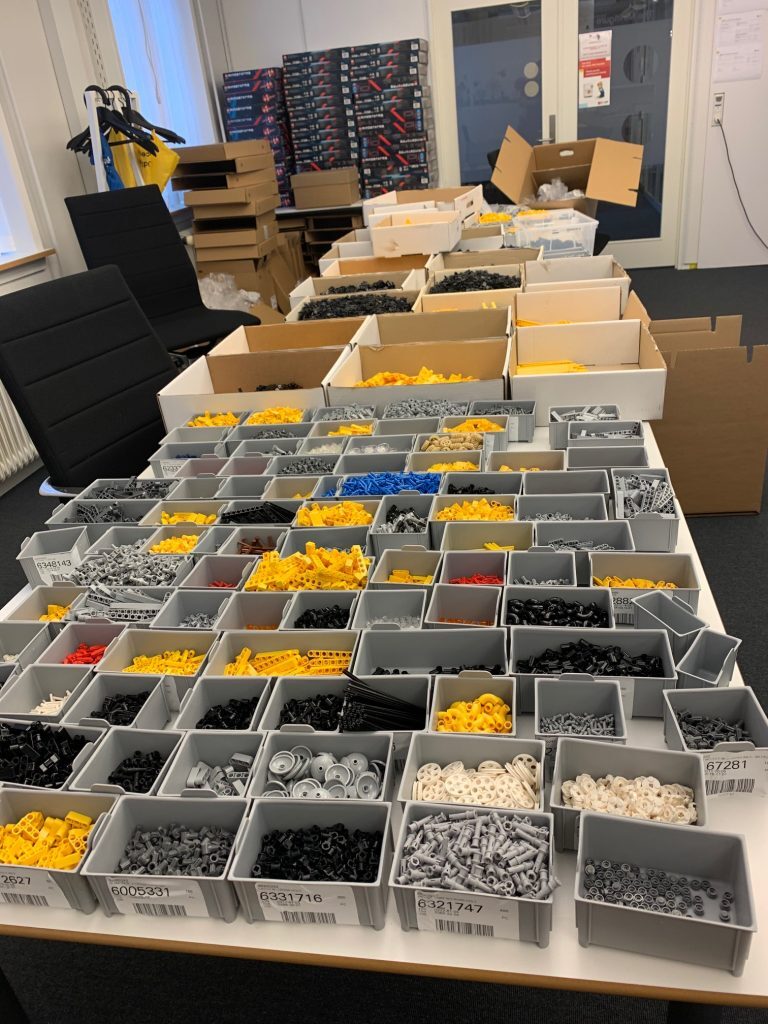
Studio was a big help in the Robo Lab beekeeper design story. The part lists it generated were crucial in checking part availability and ordering parts online. The LEGO House team asked me to use as many of the parts from the 31313 MINDSTORMS set as possible. To streamline the part orders I did some advanced Google Sheet Pivot tables. The tables subtracted the 31313 kit parts from the part list of the new Robo Lab.
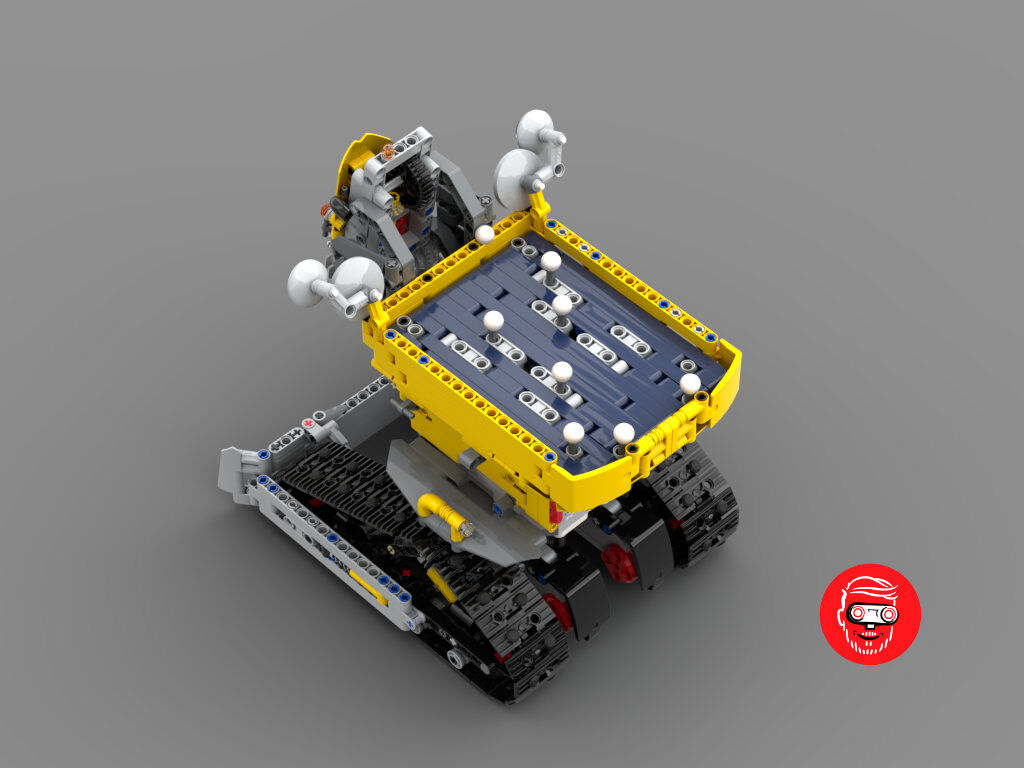
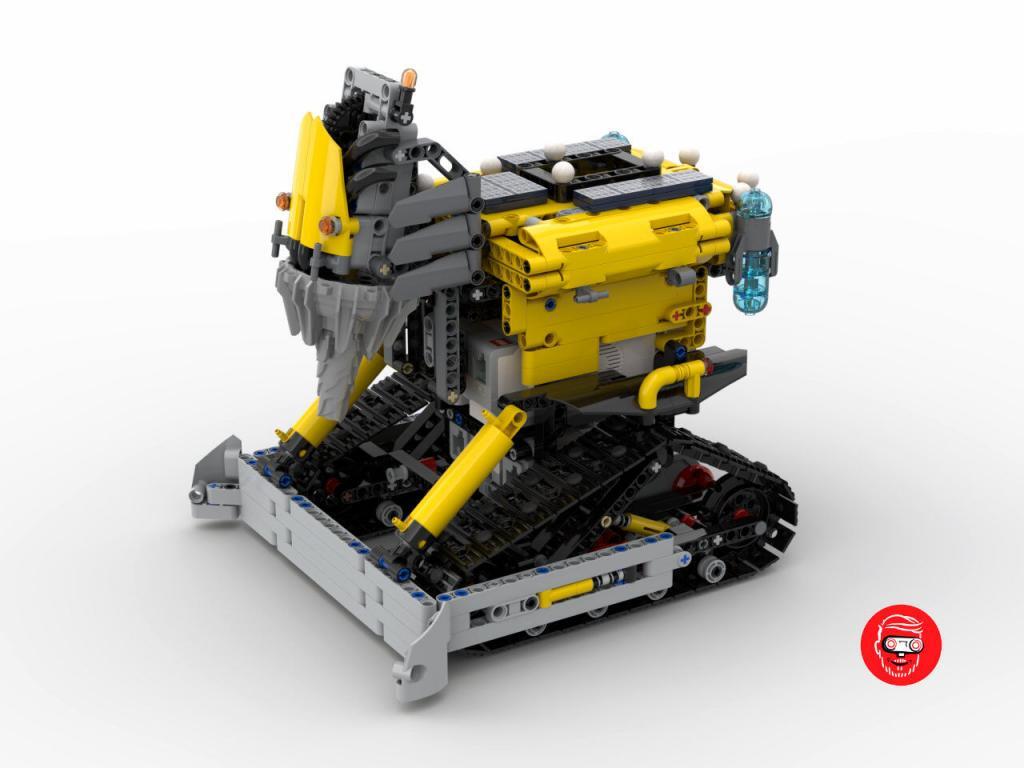
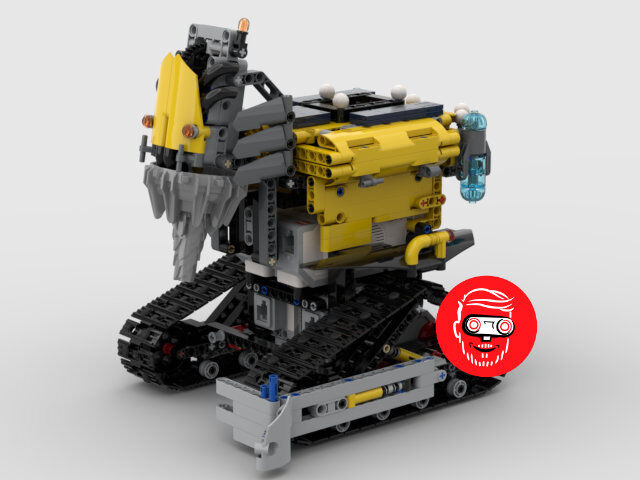
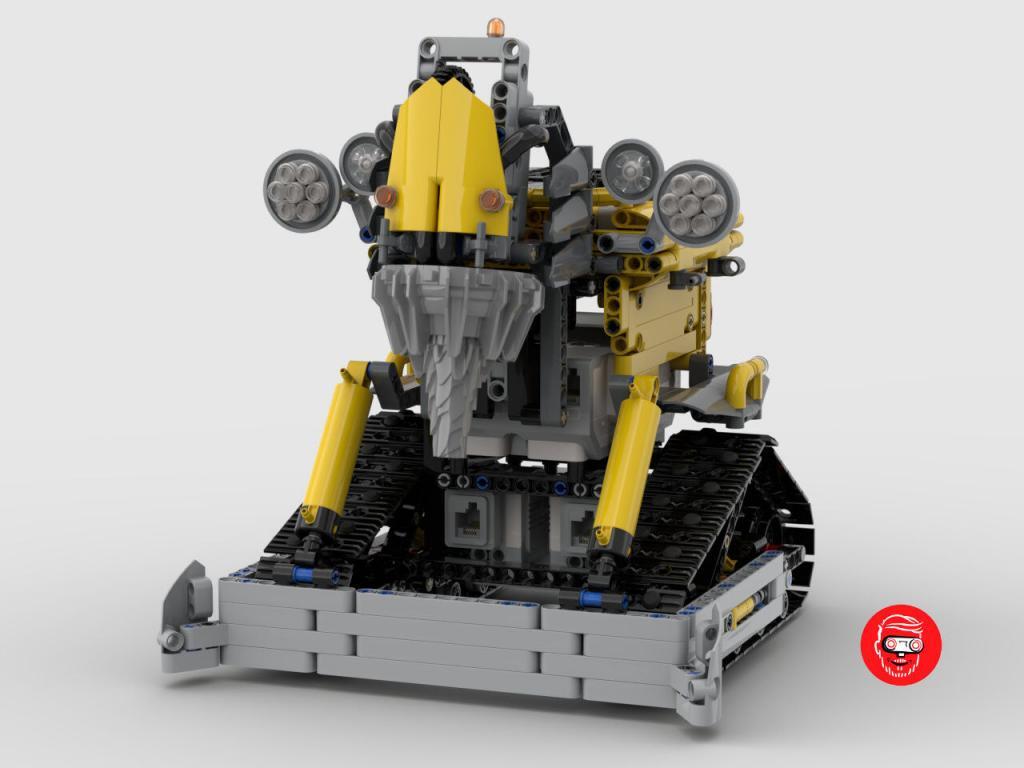
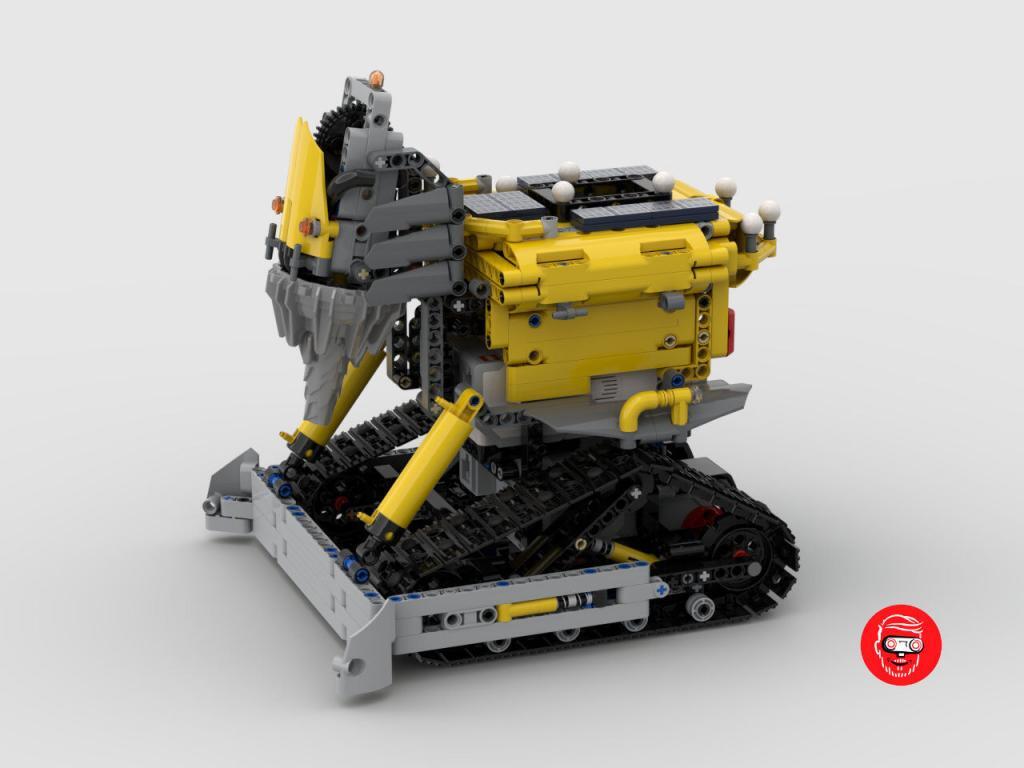
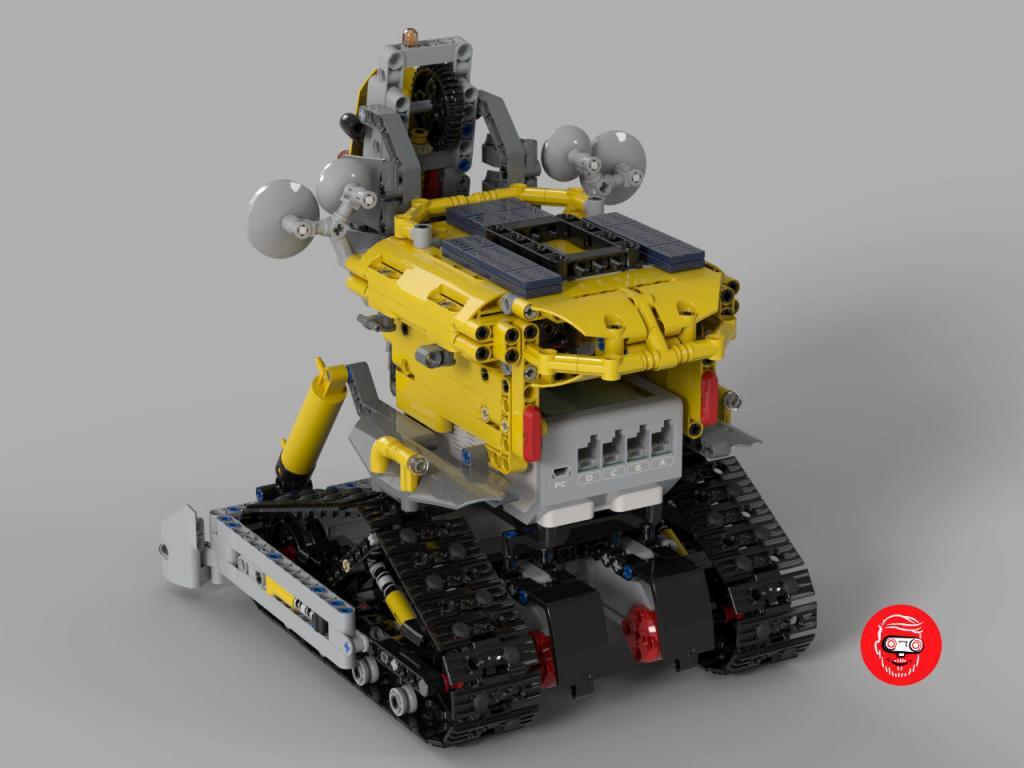
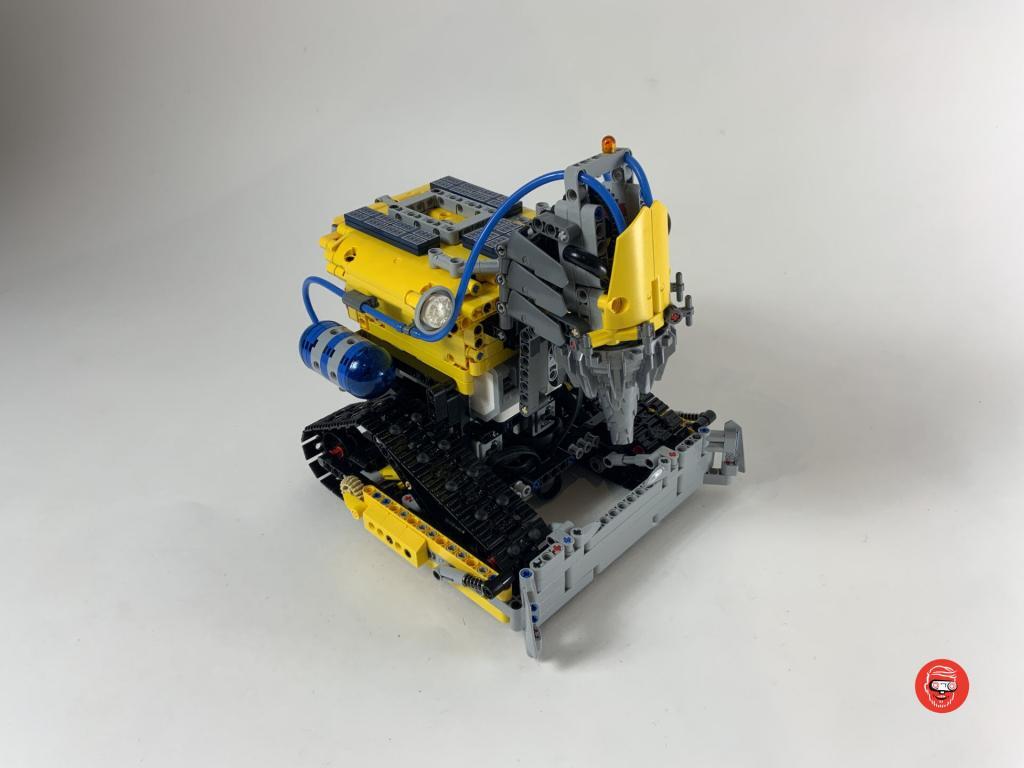
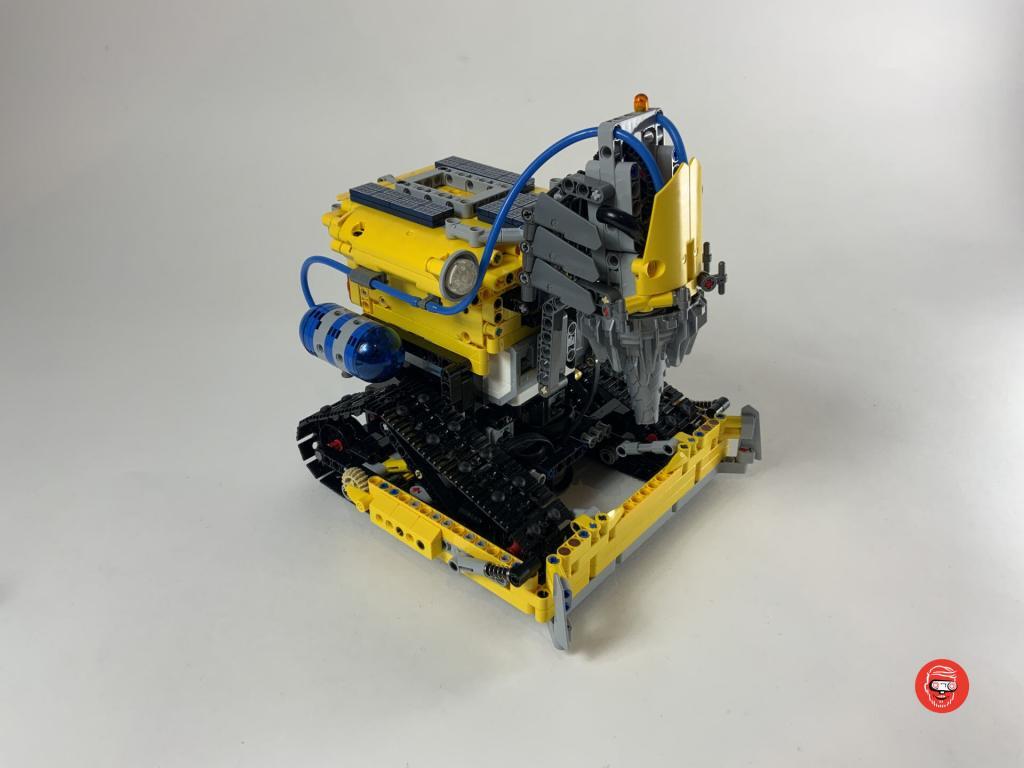
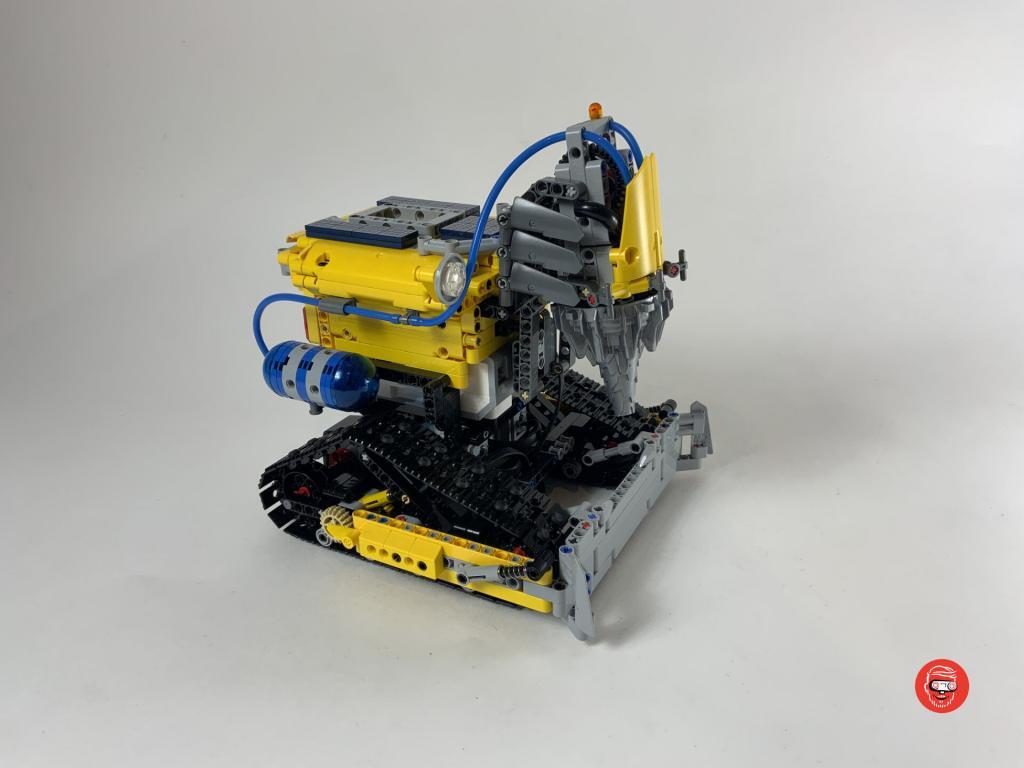
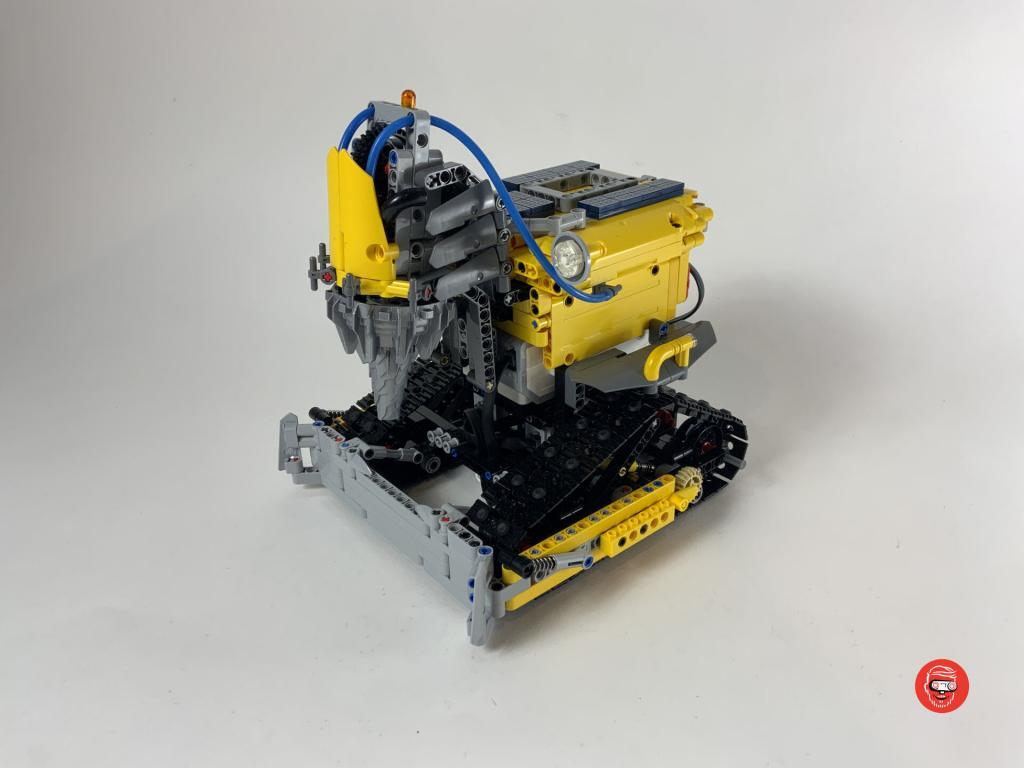
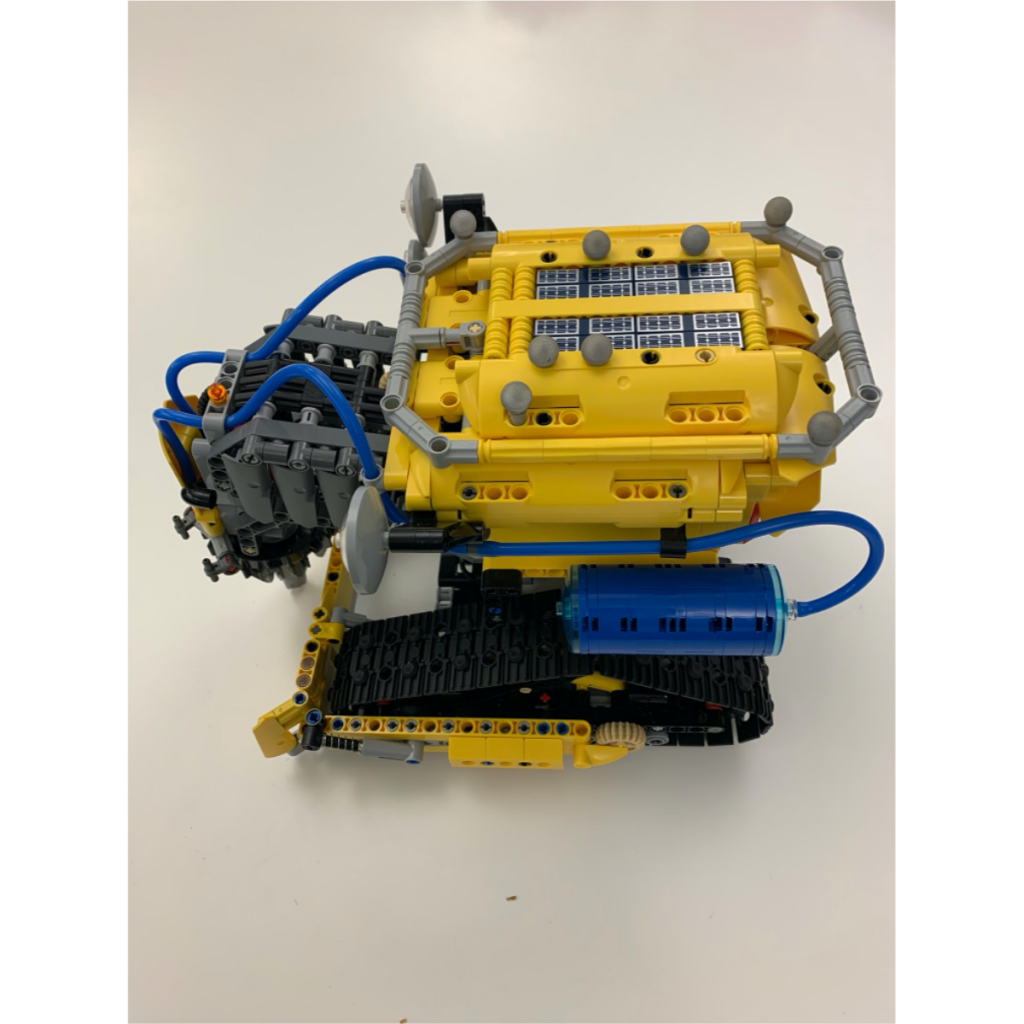
Nearly done Robo Lab Beekeper robot, ready for duplication
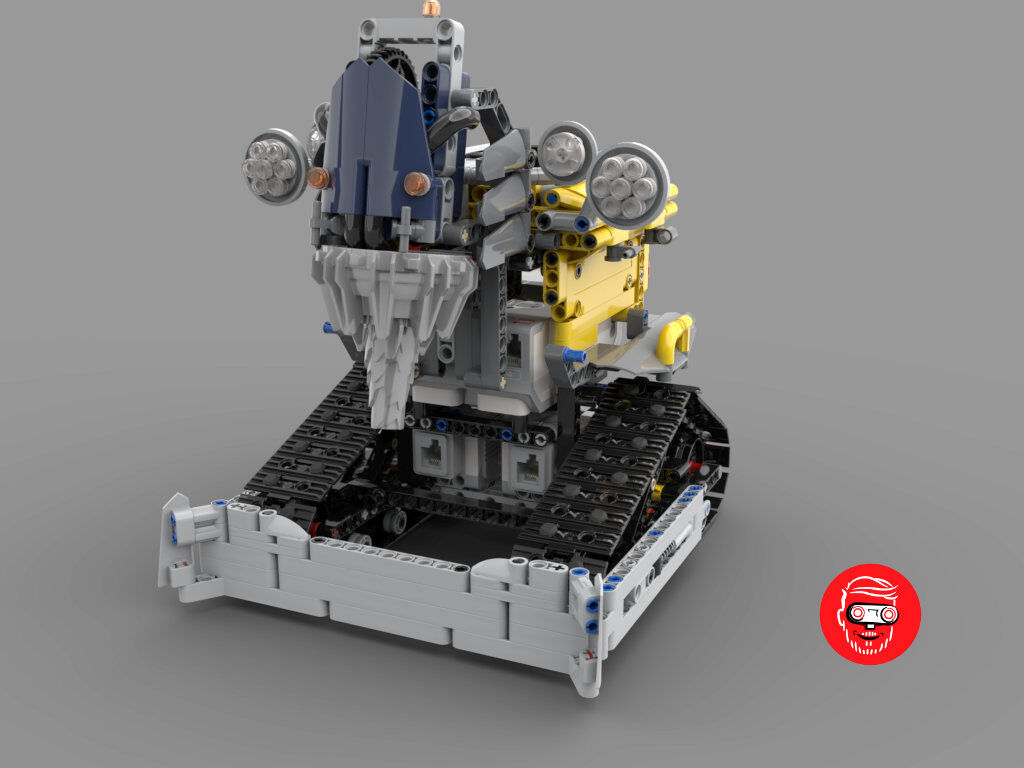
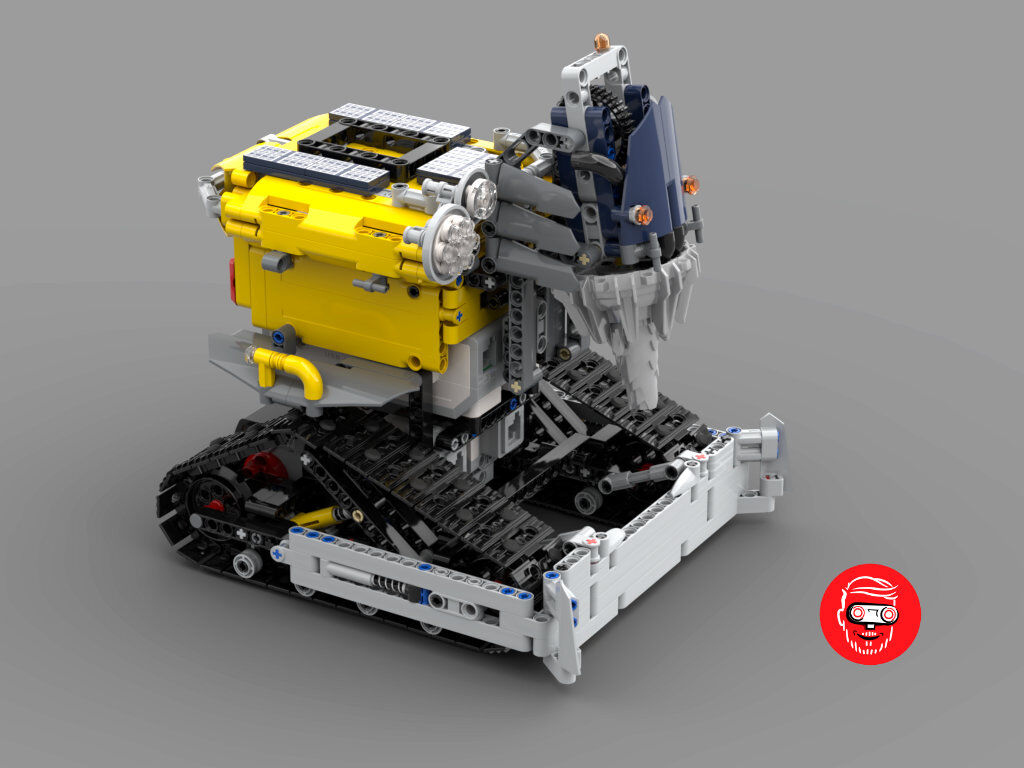
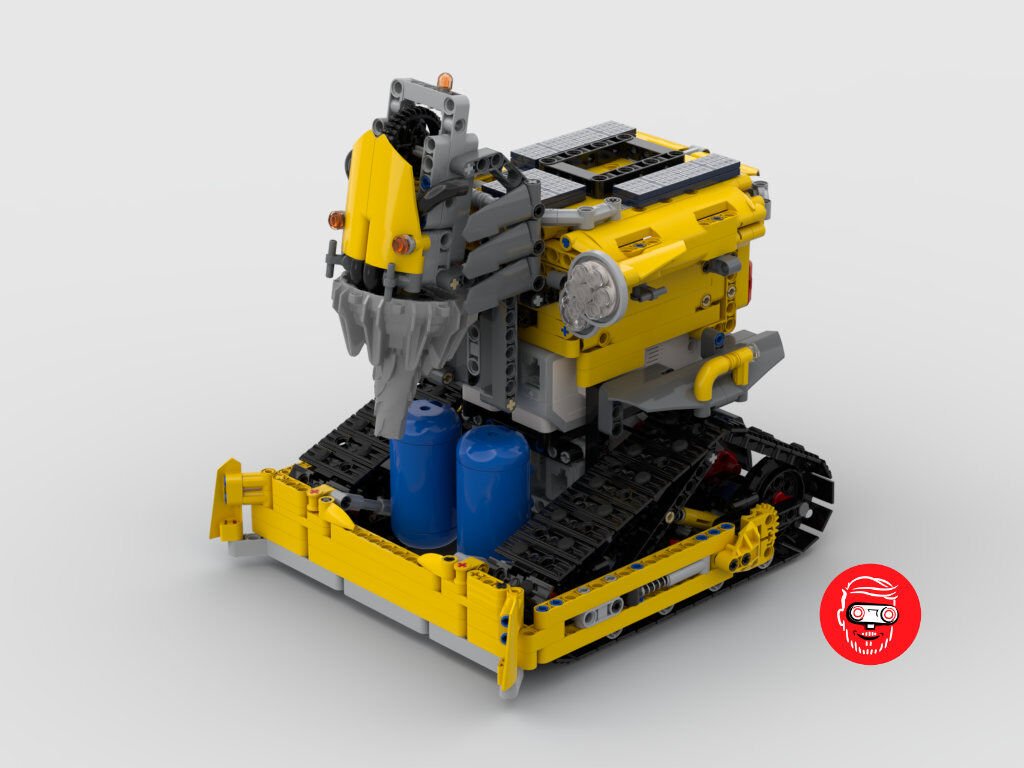
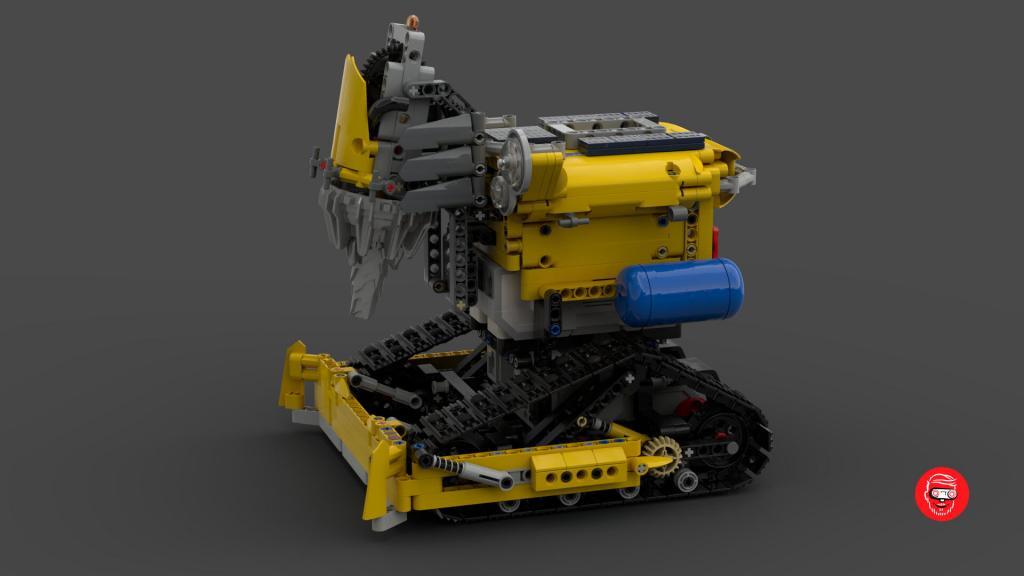
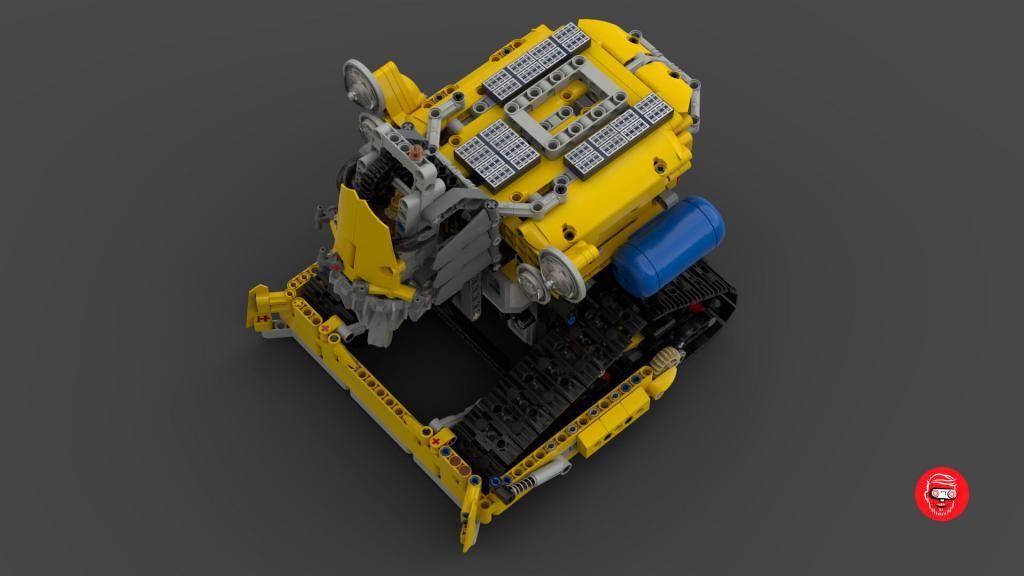
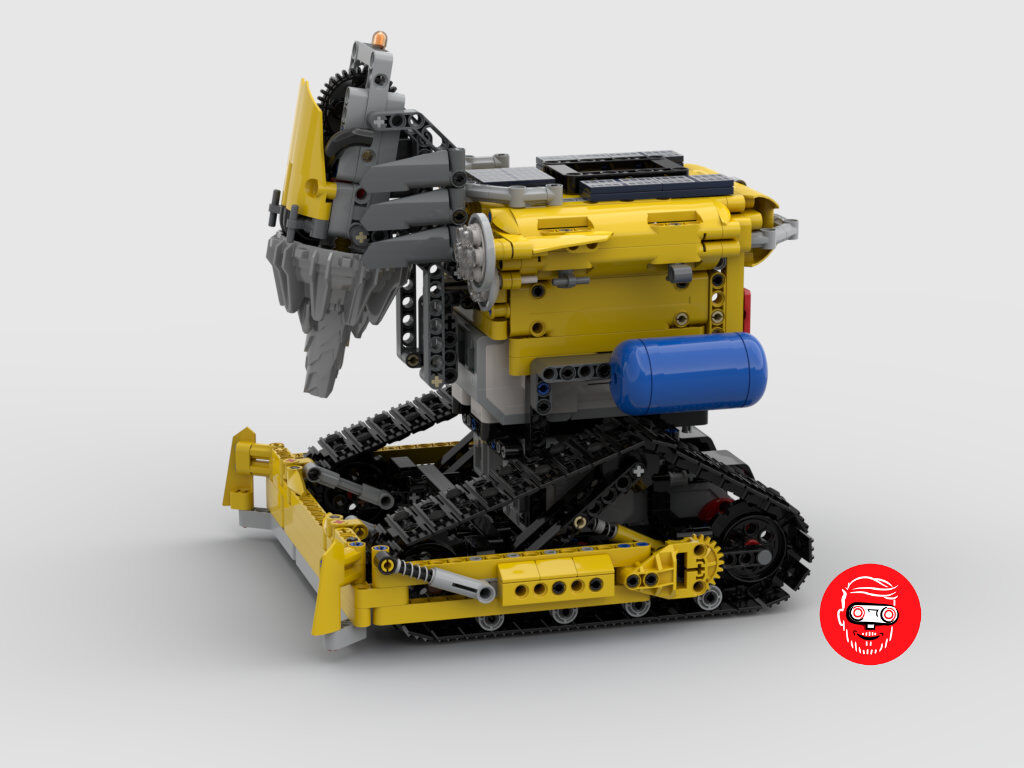
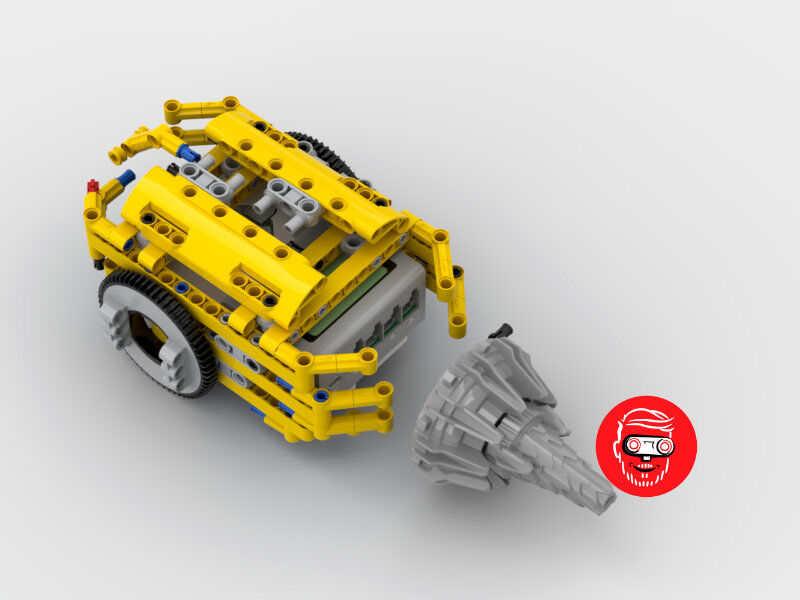
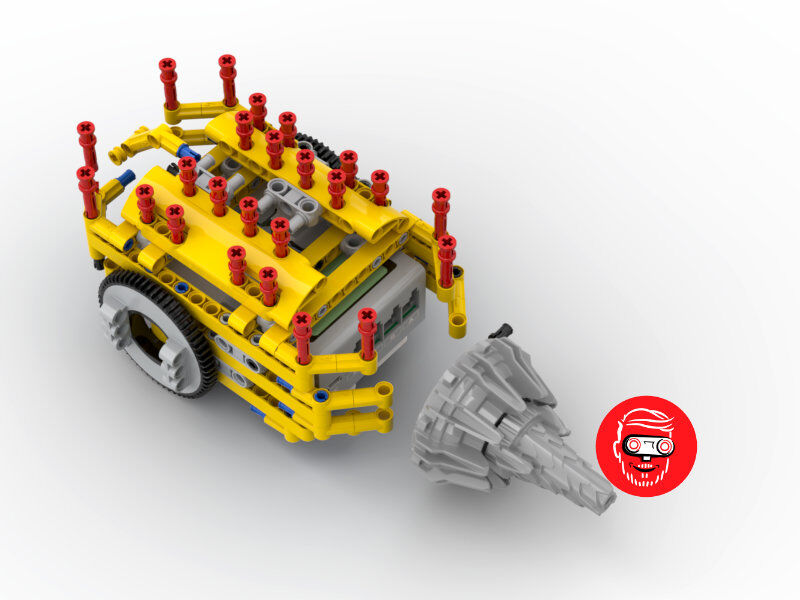
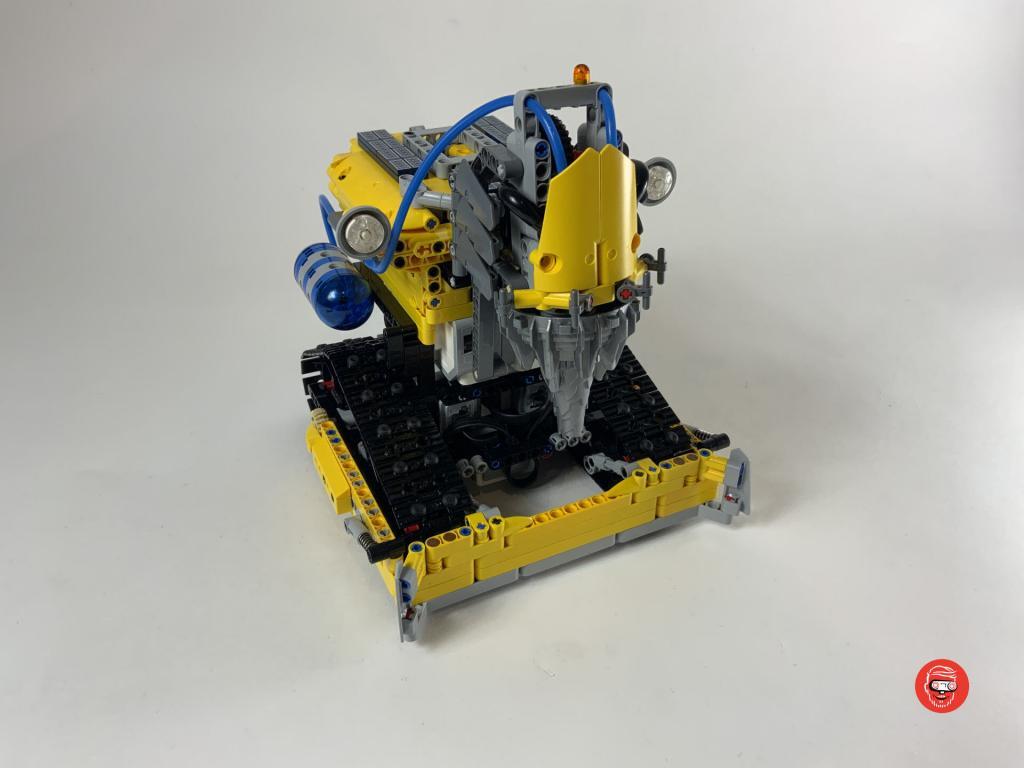
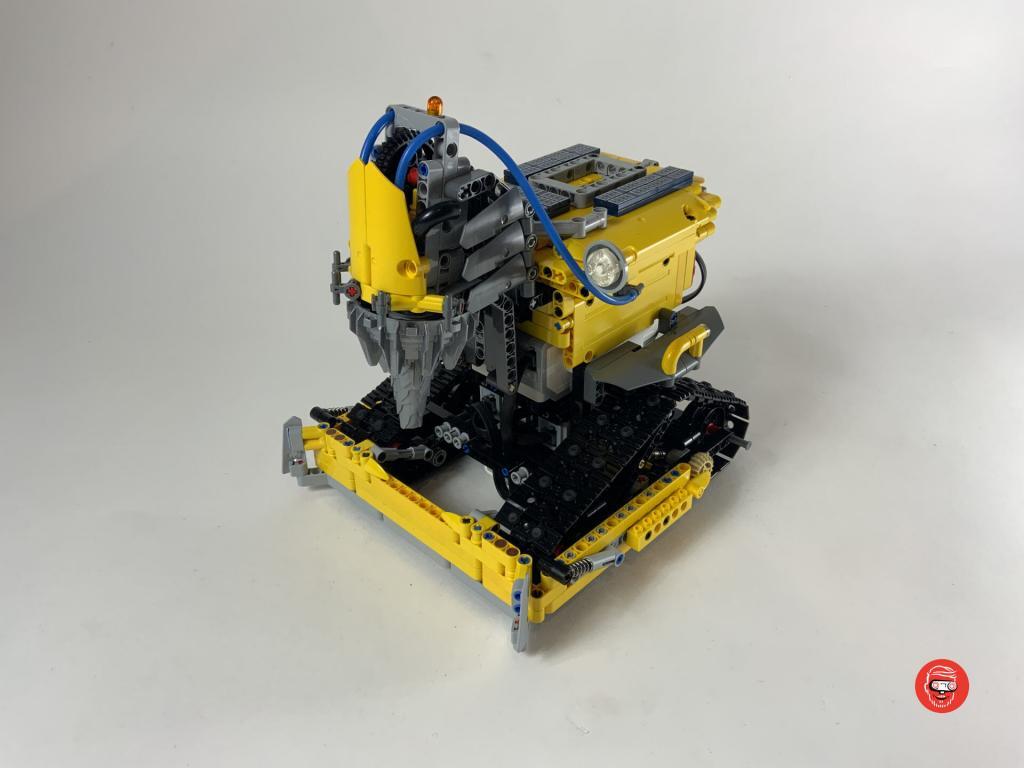
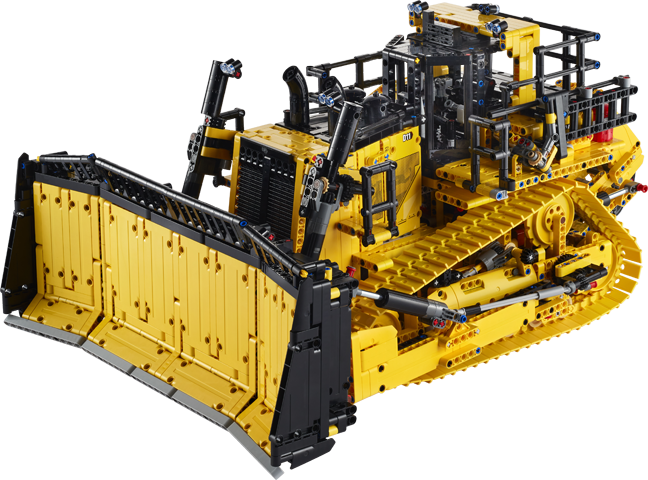
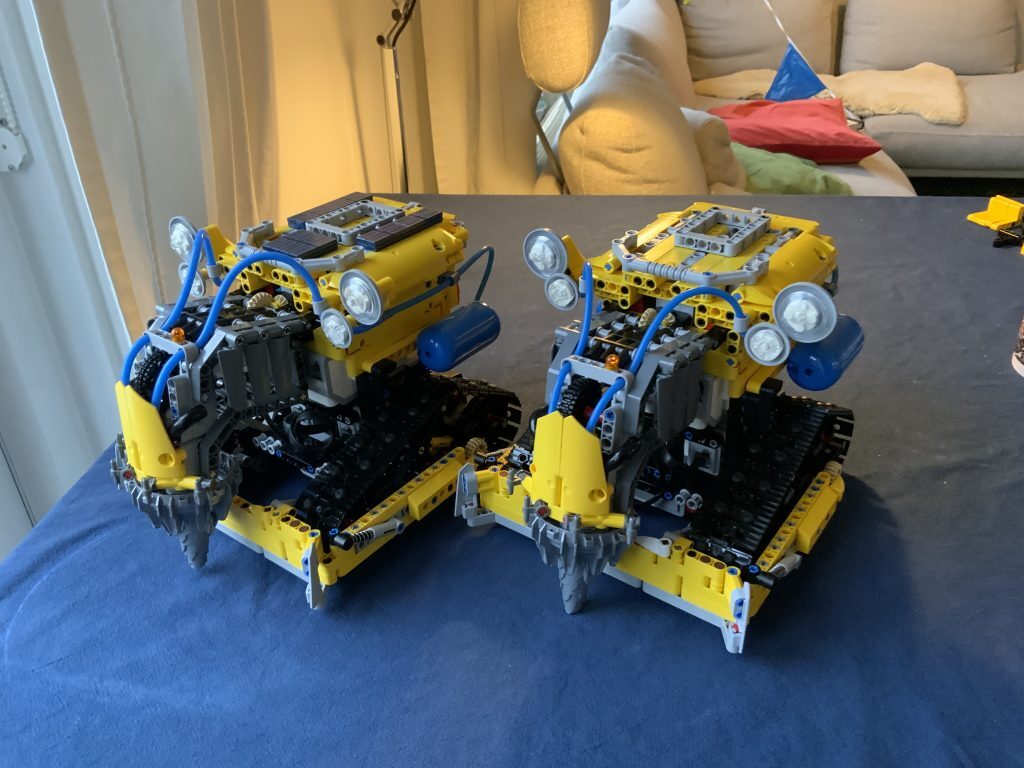
Finally, I built two Beekeeper robots when both I and the team at LEGO house were completely satisfied with the design. In the pictures below you can see that we had one final decision to make: the color of the pushing blade. I liked the grey color because it gave the robot a rugged, metal look. The LEGO team preferred the yellow one because it looked friendlier and unified the model. We settled for a yellow blade with a grey metal line at the bottom, much like the 42131 Cat D11 Bulldozer.
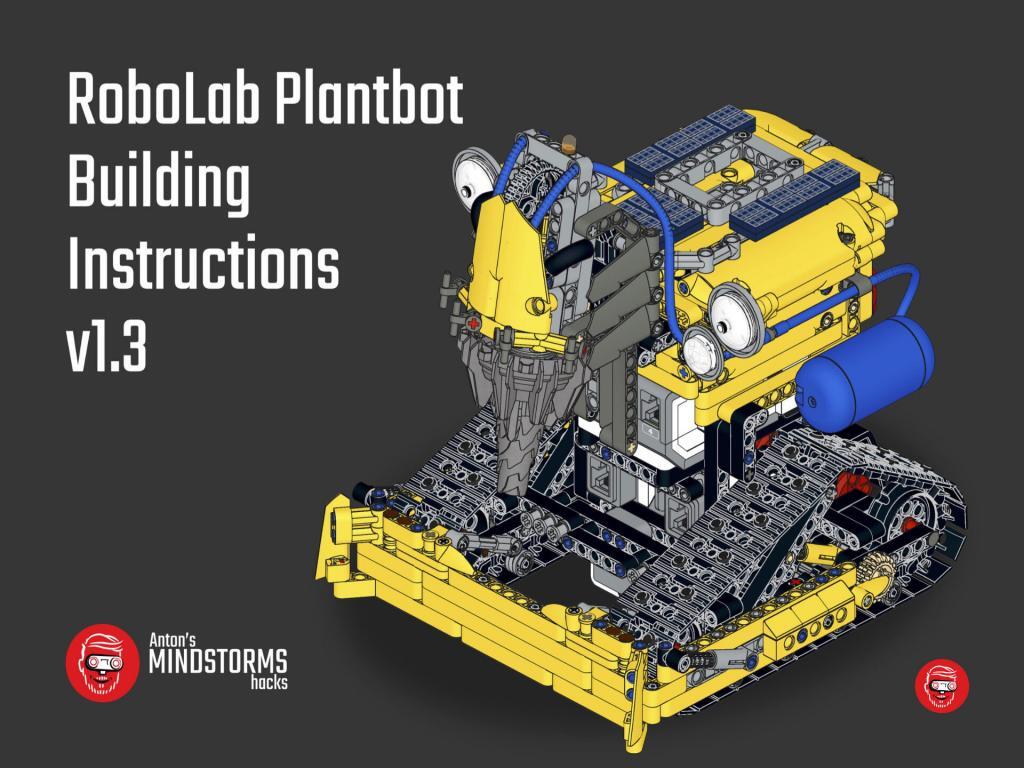
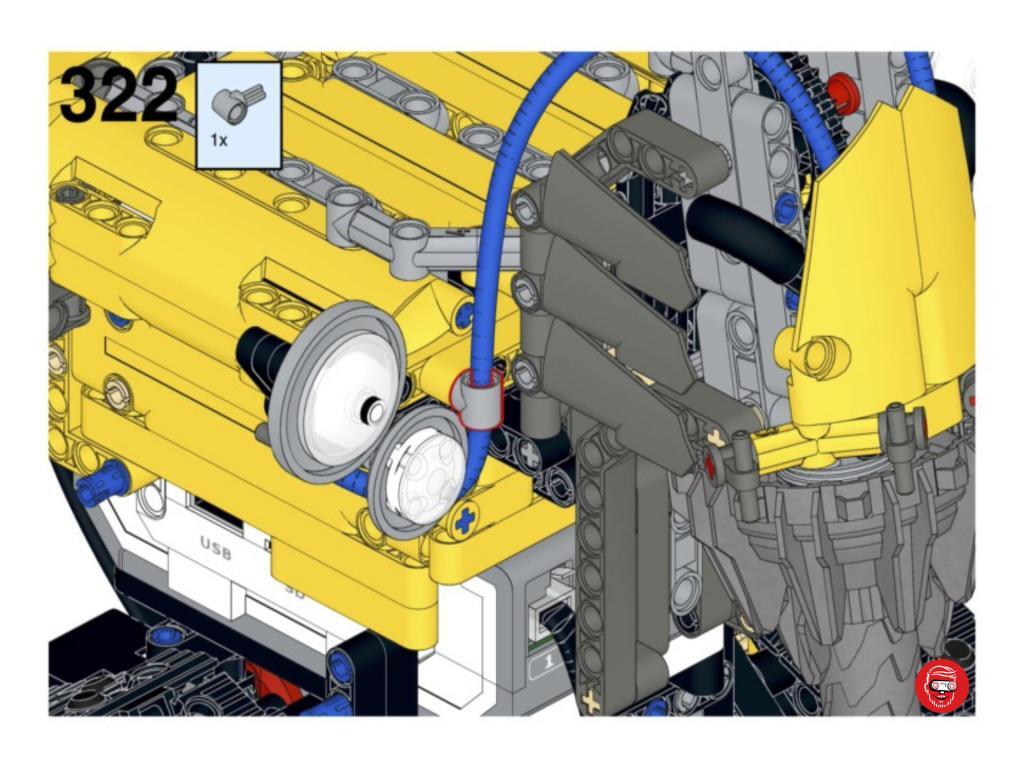
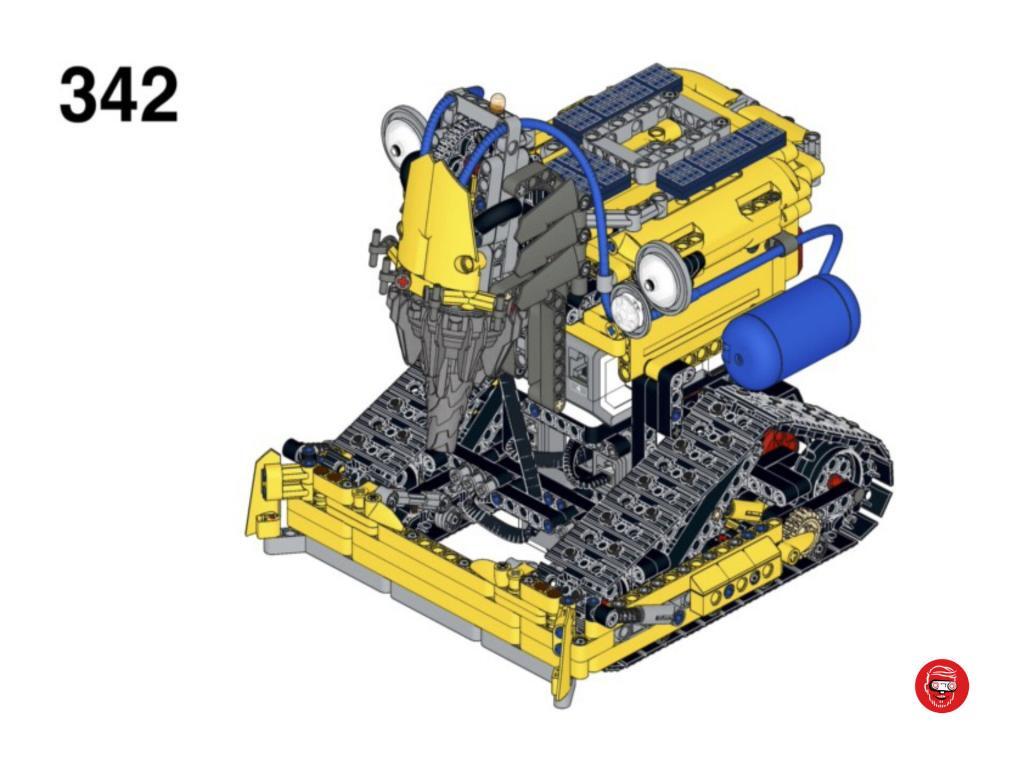
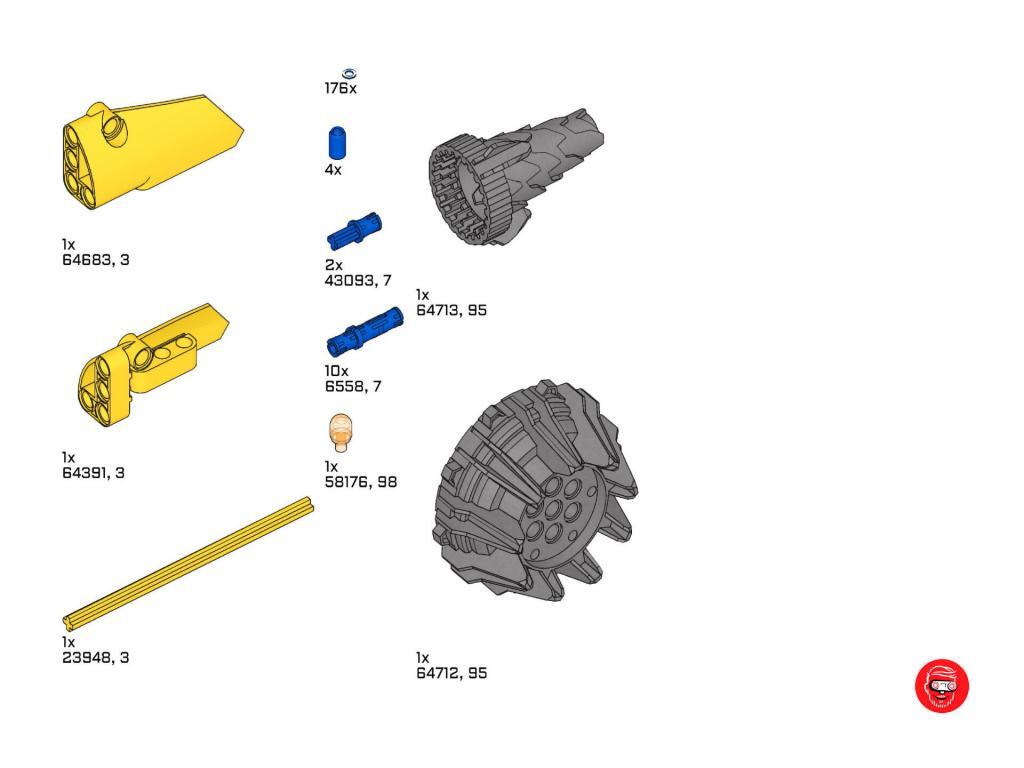
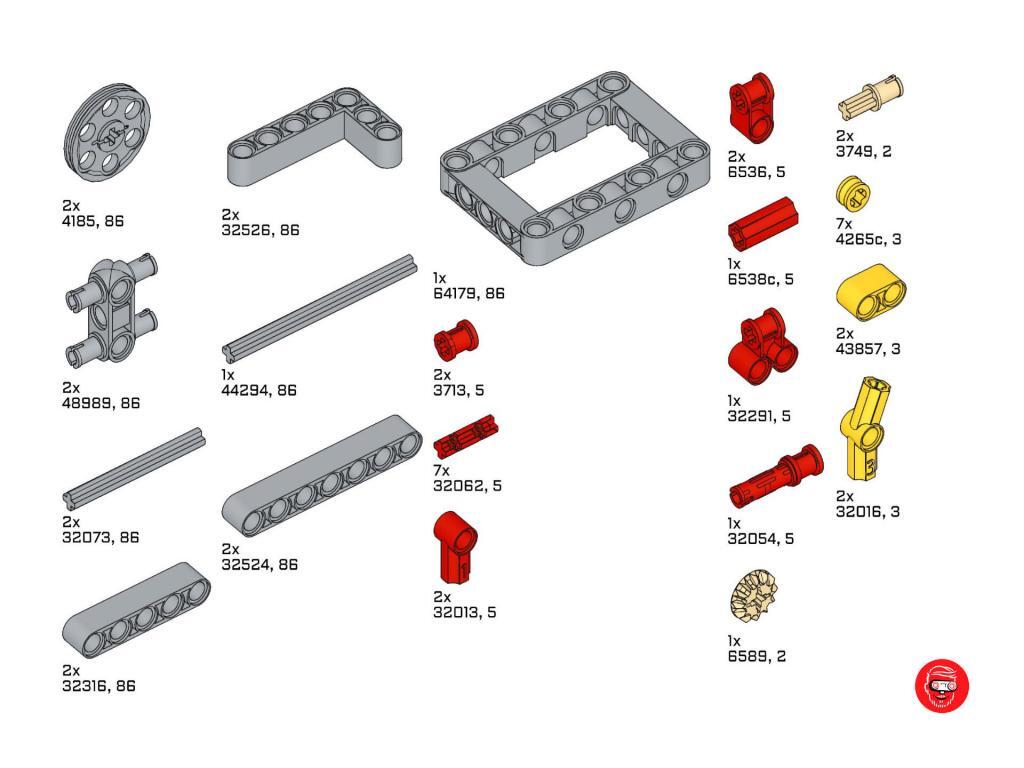
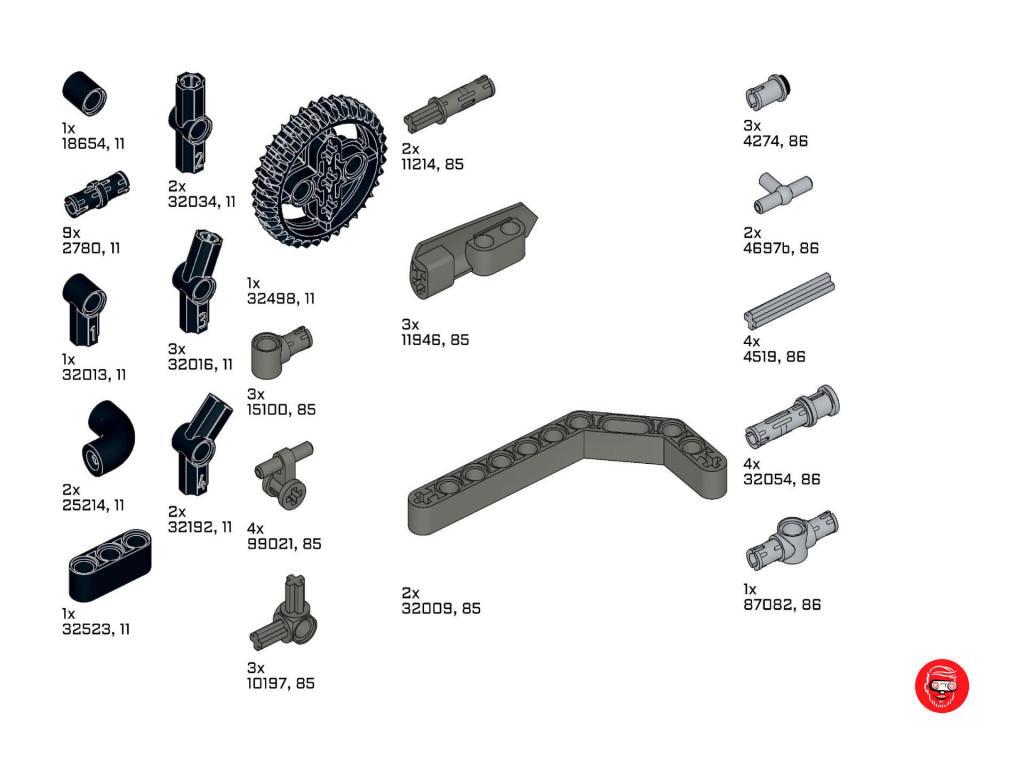
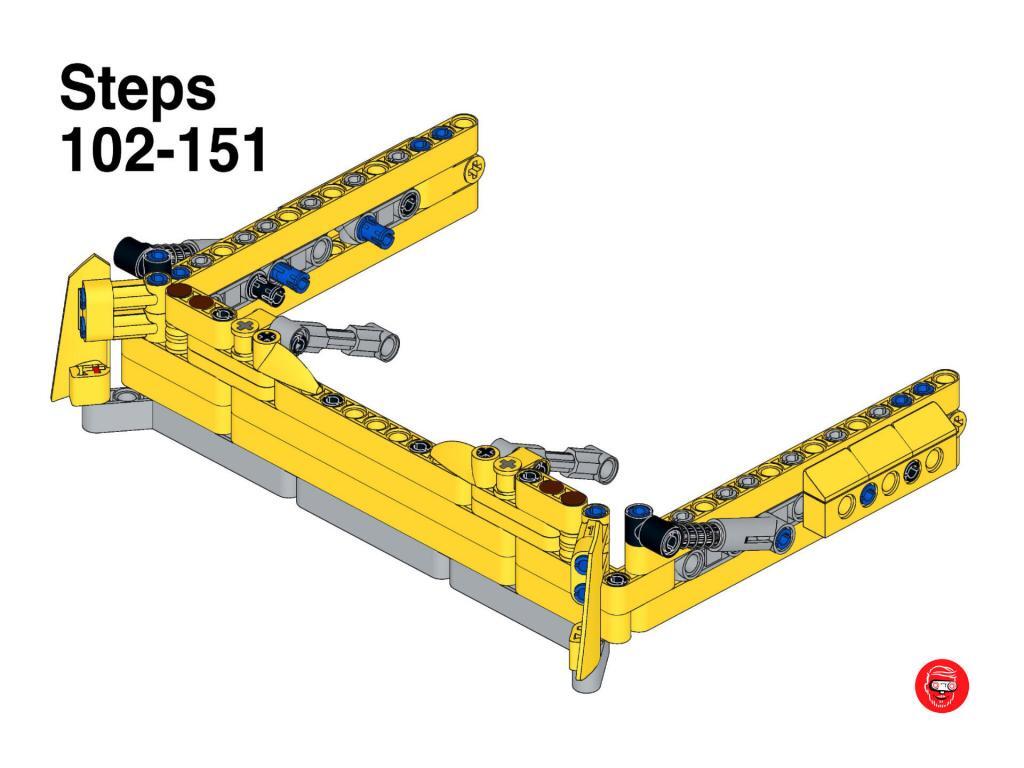
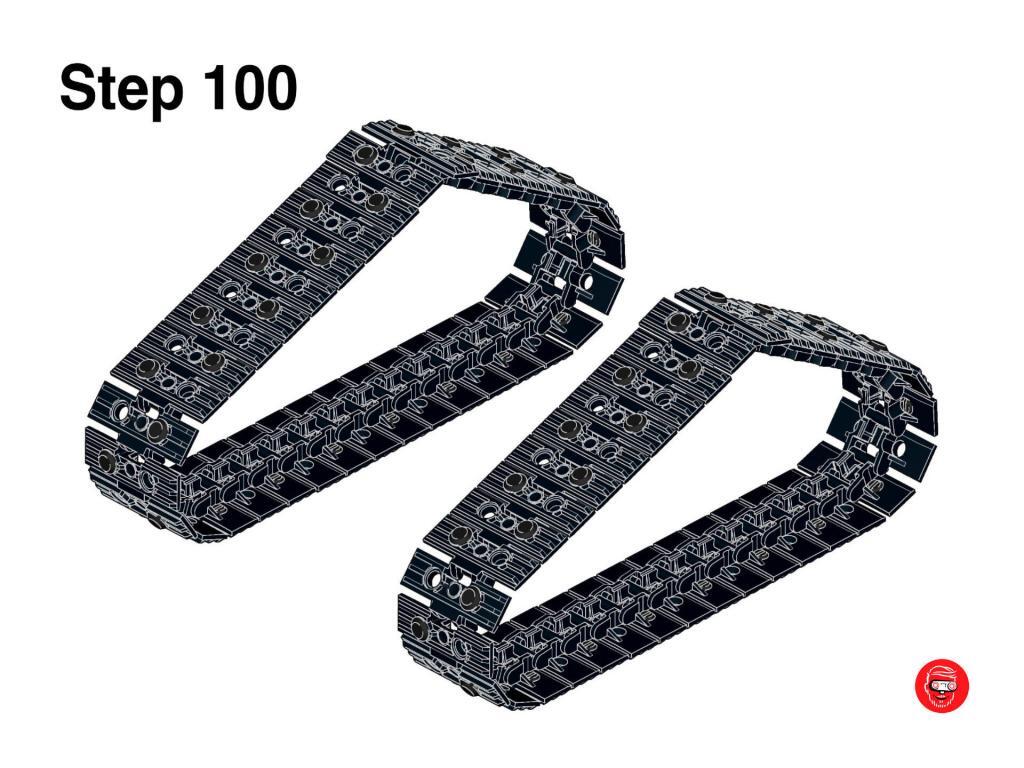
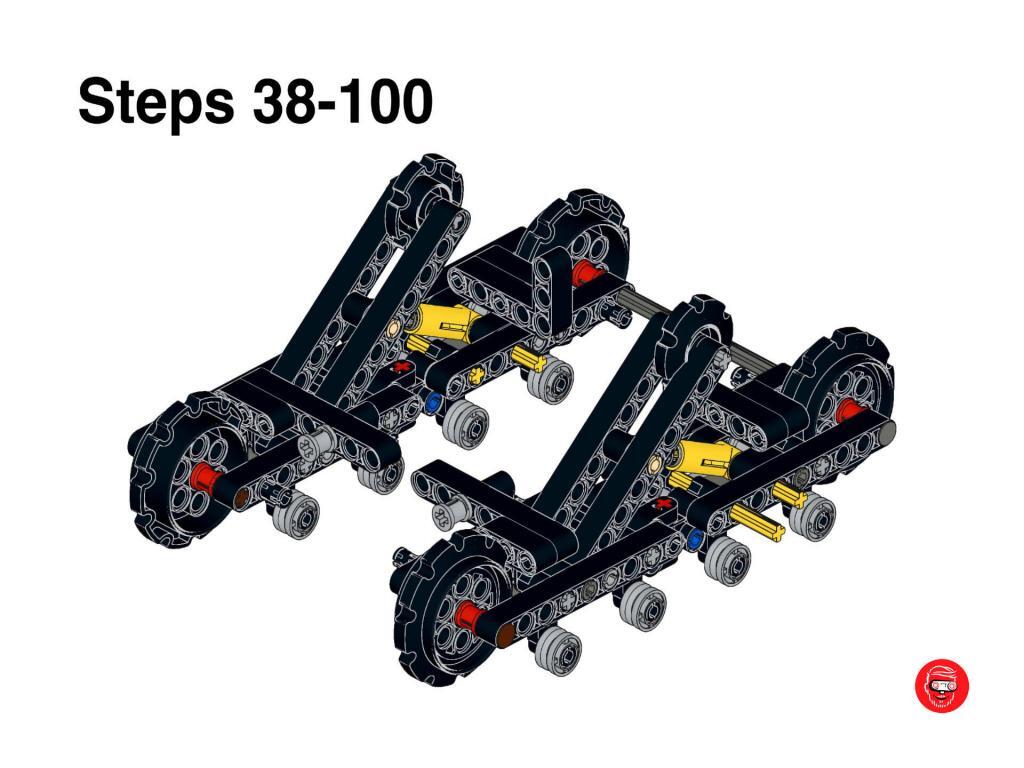
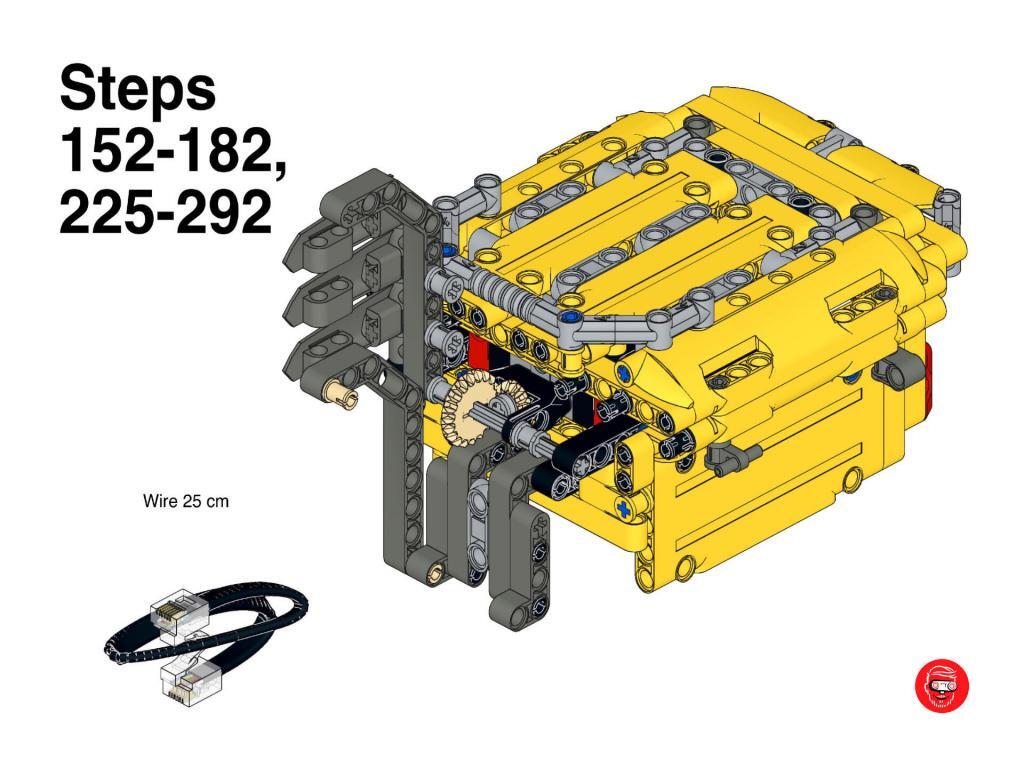
Making the Beekeeper robot building instructions
Finally, I generated 342 steps of building instructions for the Beekeeper robot. To allow for parallel building, I split the model up into 6 submodels, with separate part list pages. A lot of LEGO house employees assisted in the building process! If you want to build your own beekeeper, I have also published the building instructions for the beekeeper.


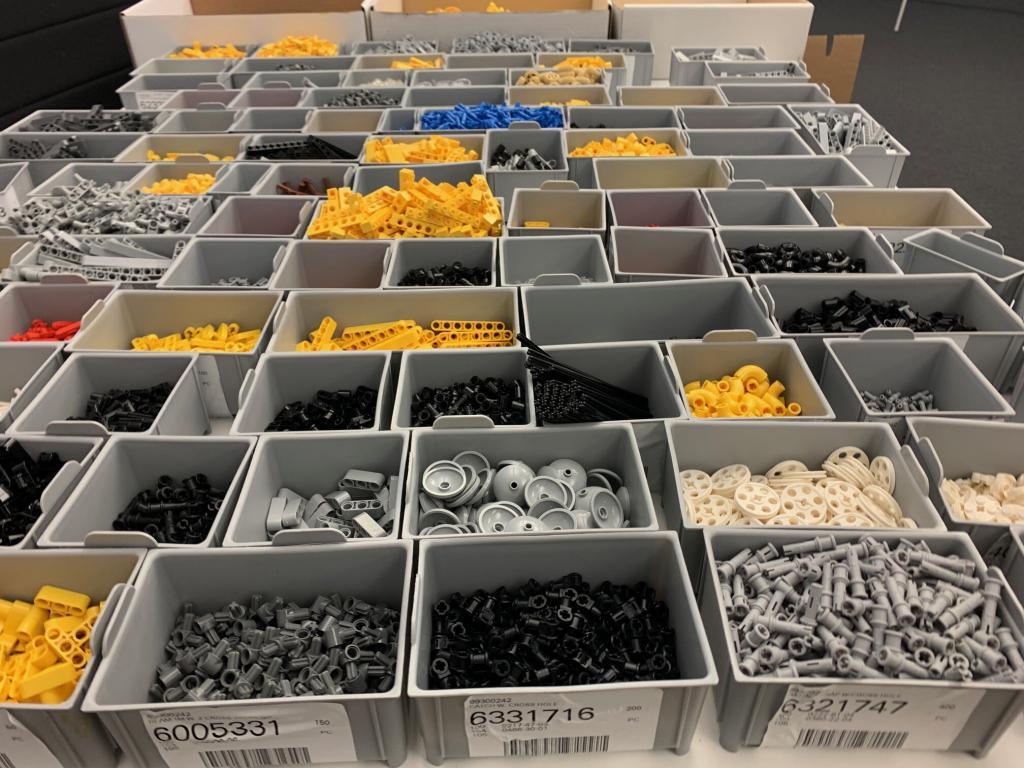
Producing 50 Robo Lab Beekeeper robots and testing them
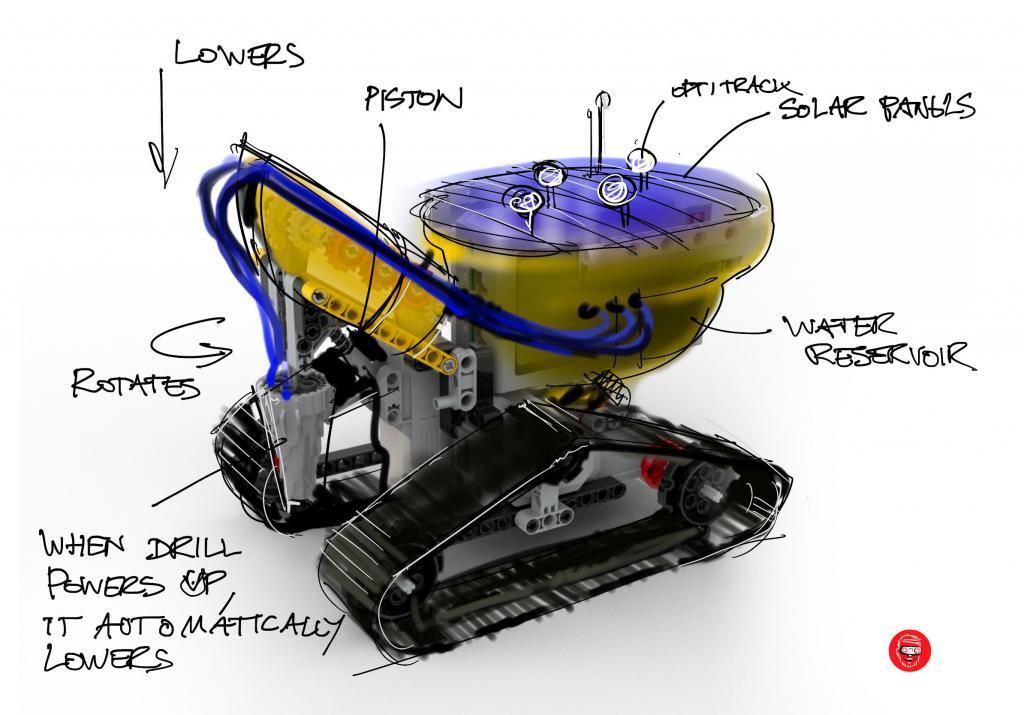
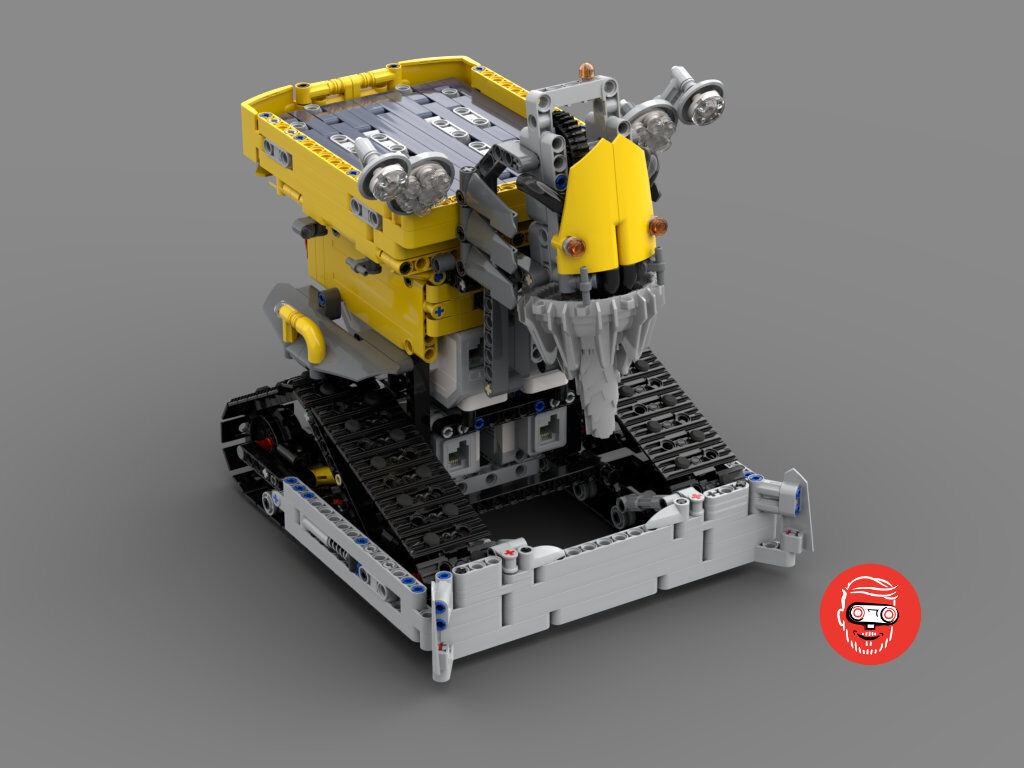
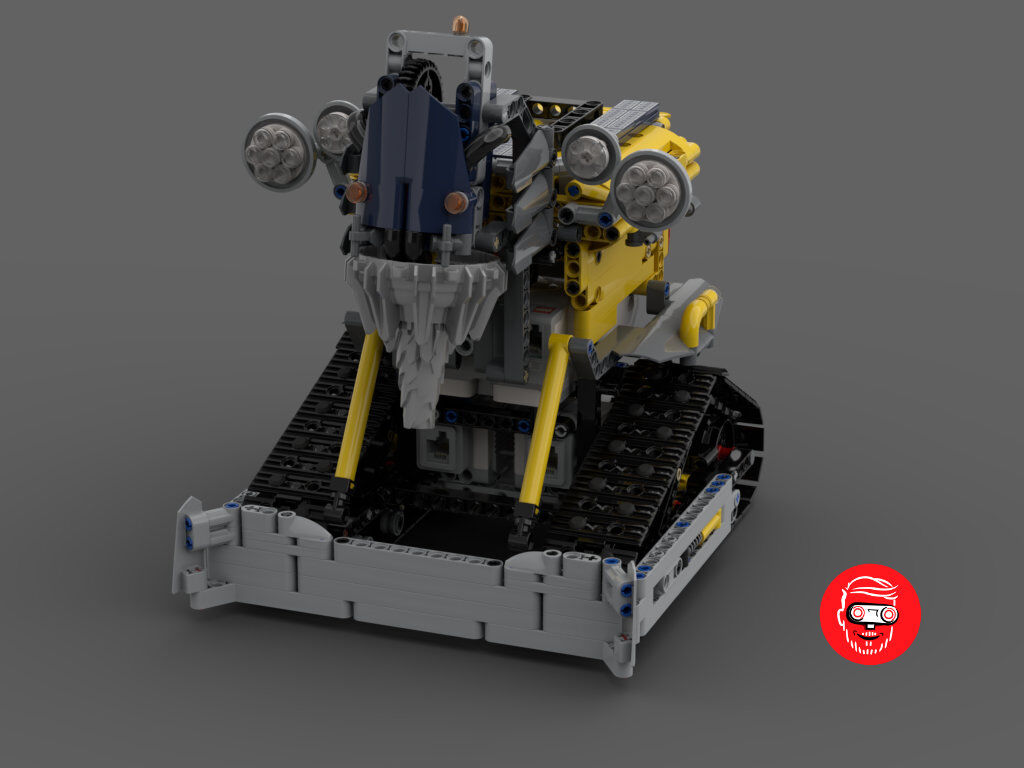
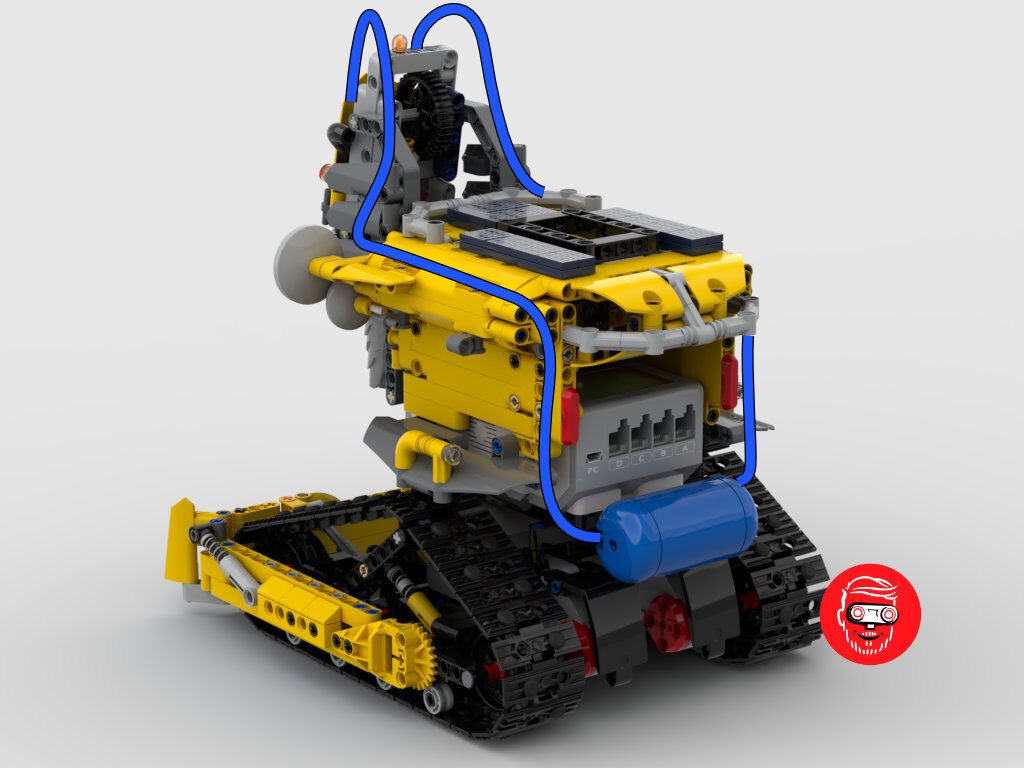
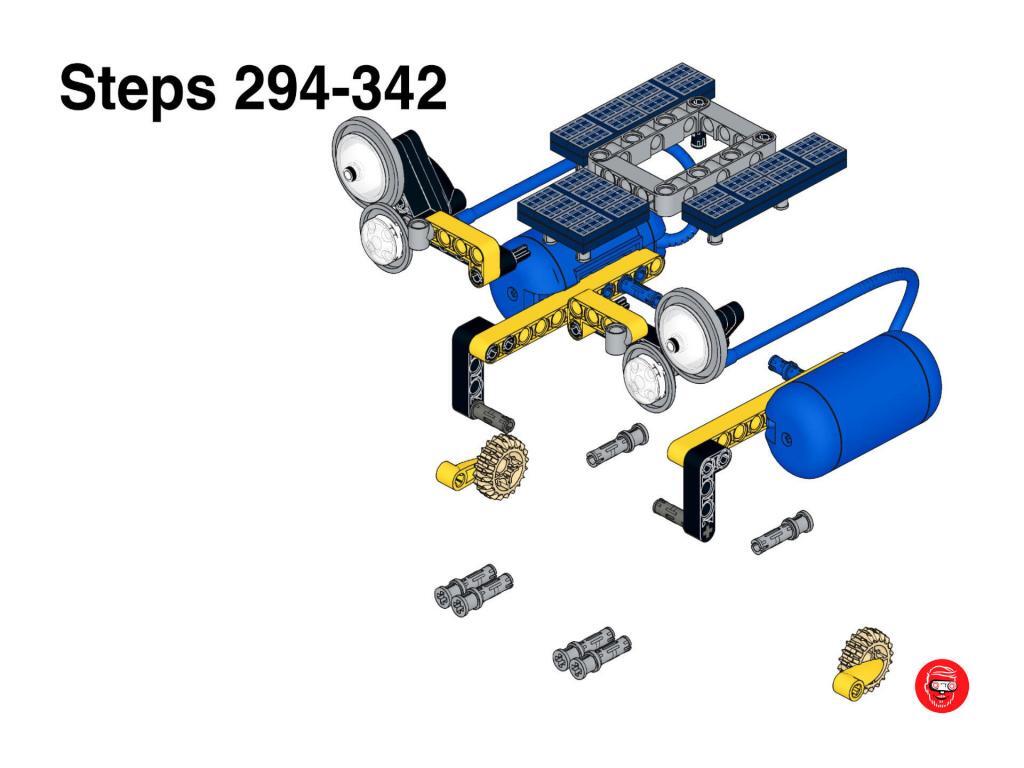
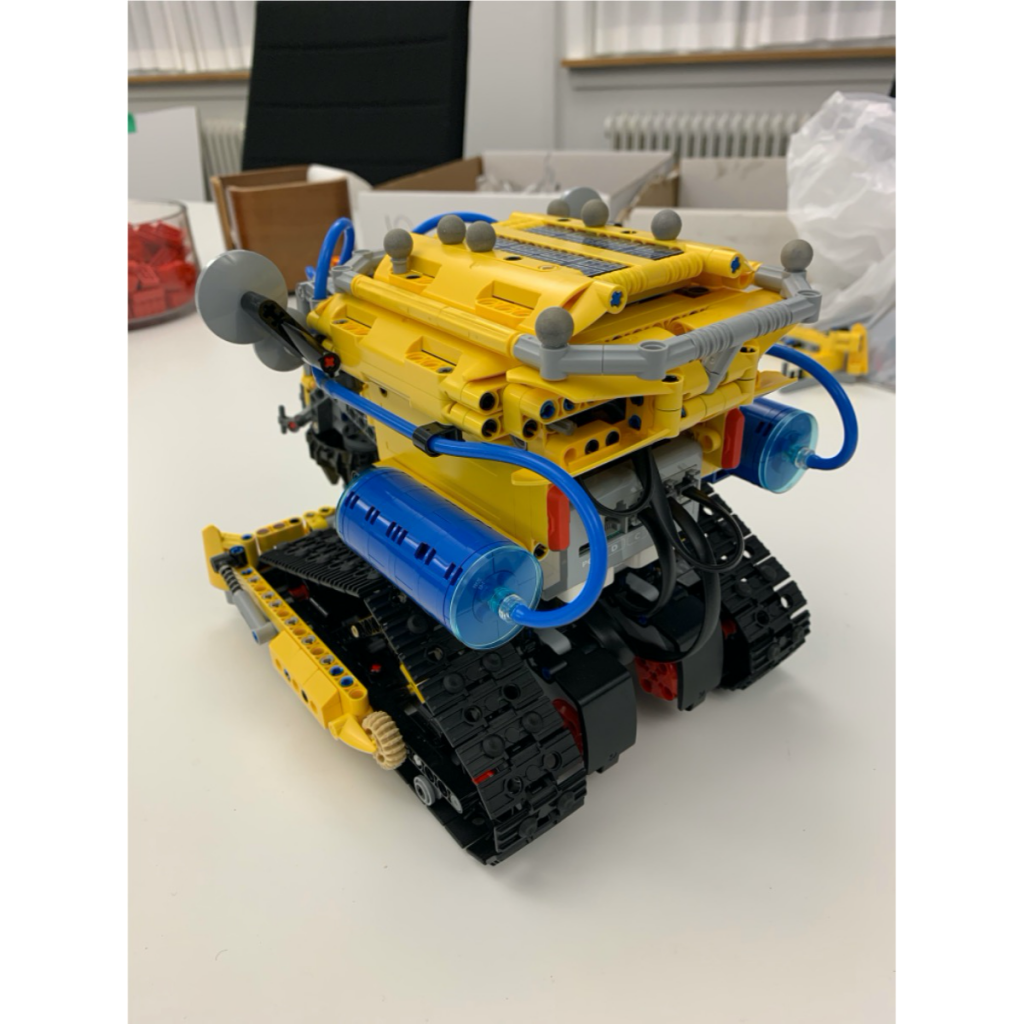
Up until the very last moment we were unsure if there would be enough blue pneumatic tubing. It is a part that is out of production now. Luckily someone was able to locate the very last spindle of the blue silicone tubing in the basement of some LEGO warehouse. The tubes really make this robot stand out, so I was happy they made it to the production model.
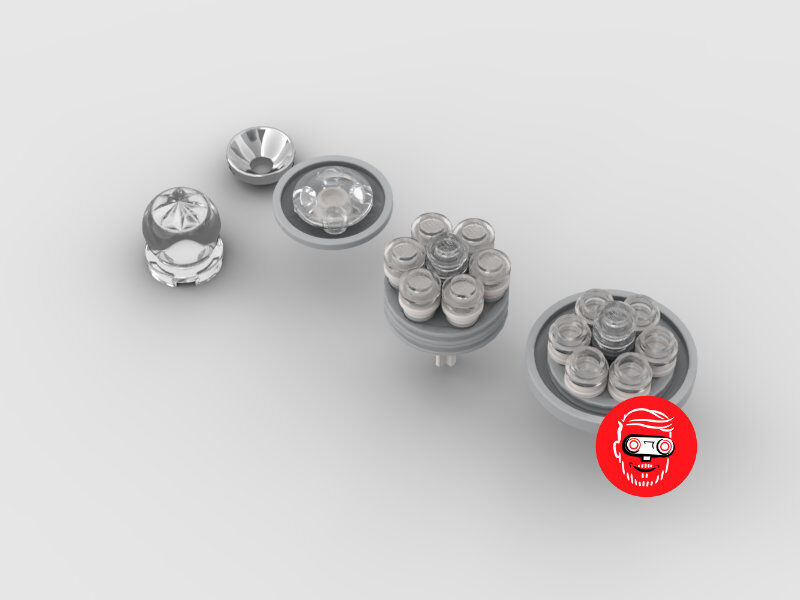
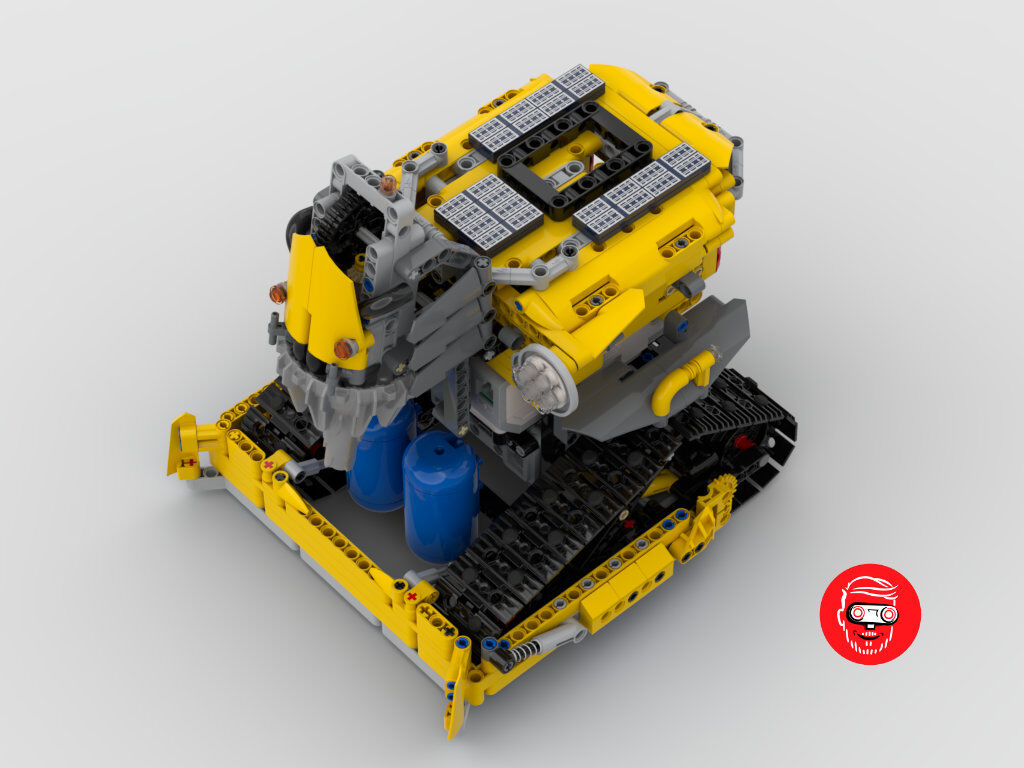
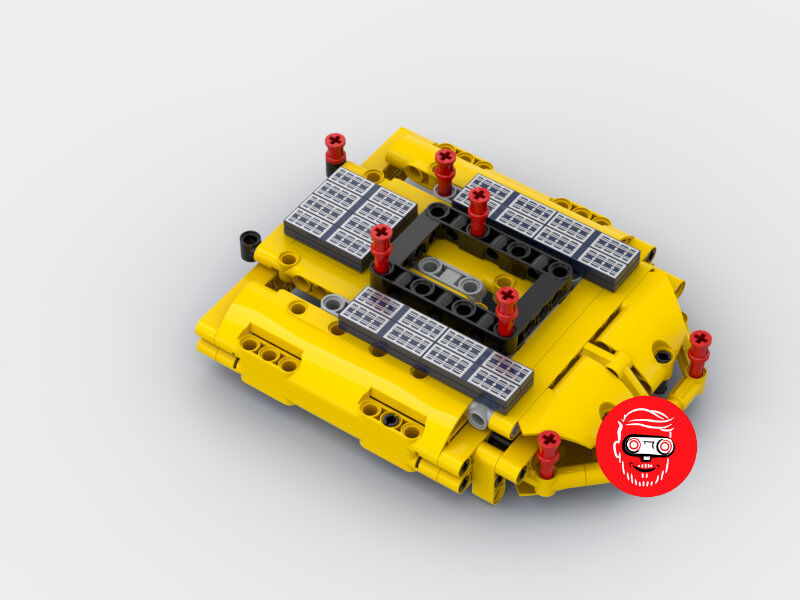
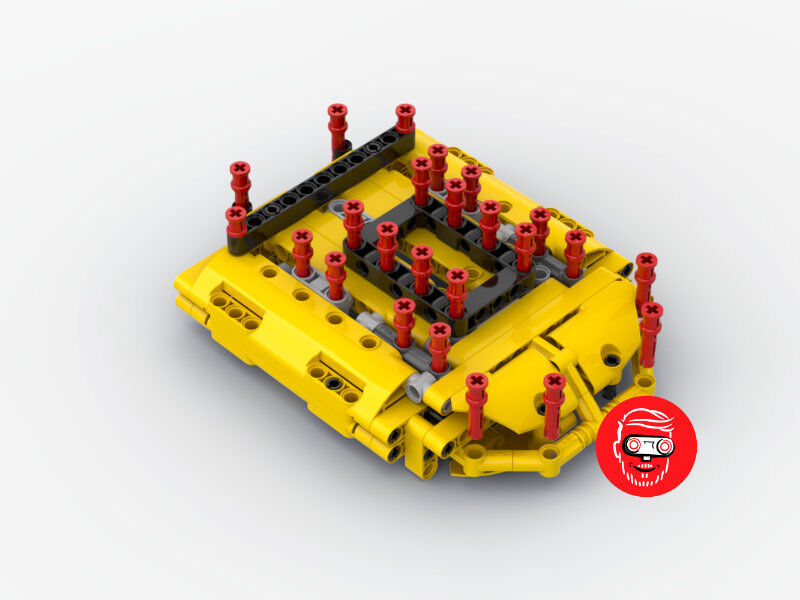
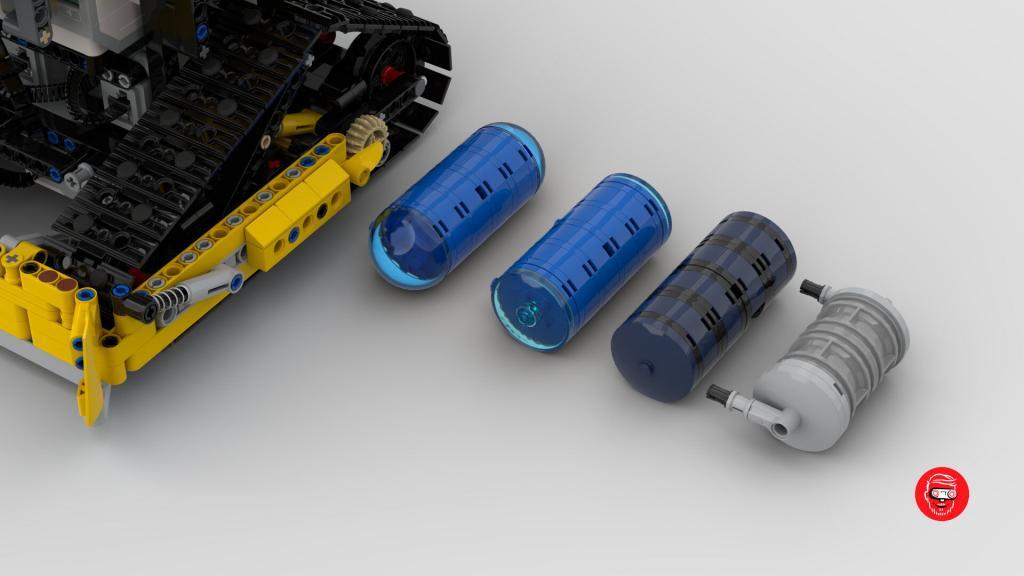
One part that didn’t make it to production was the blue pneumatic tank. That part has been out of production for too long, and there was not enough stock in the LEGO warehouse anymore. Producing new ones would take months, so we couldn’t wait for that. Stuart and I frantically designed alternative water tanks. I proposed the ones with the Rock Raiders blue hemisphere, but that part was out of production too. So we settled for the 4×4 transparent blue dishes.
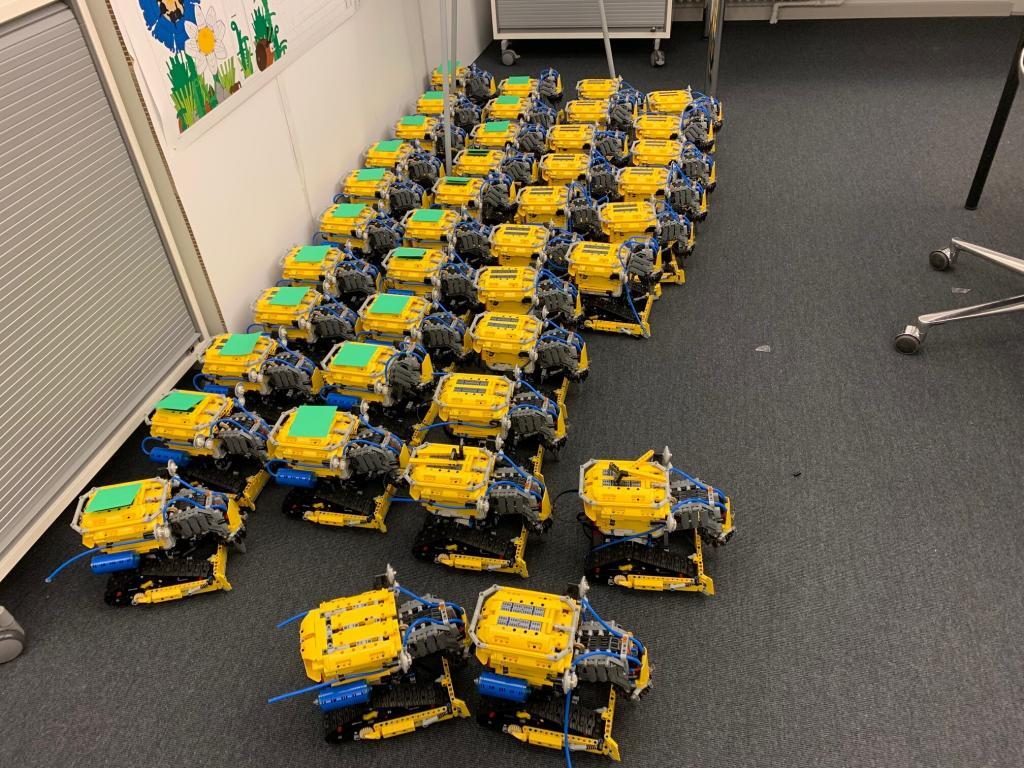
In the pictures, you can see the size of the operation. It was a huge undertaking to produce 45 Beepkeeper robots! Why 50, you may ask? At any given time only 15 robots are in operation, but every operating robot needs two back models. This way they can be swapped instantly during the day when batteries run out, or when there’s a technical problem.
Looking back on the Robo Lab beekeeper design
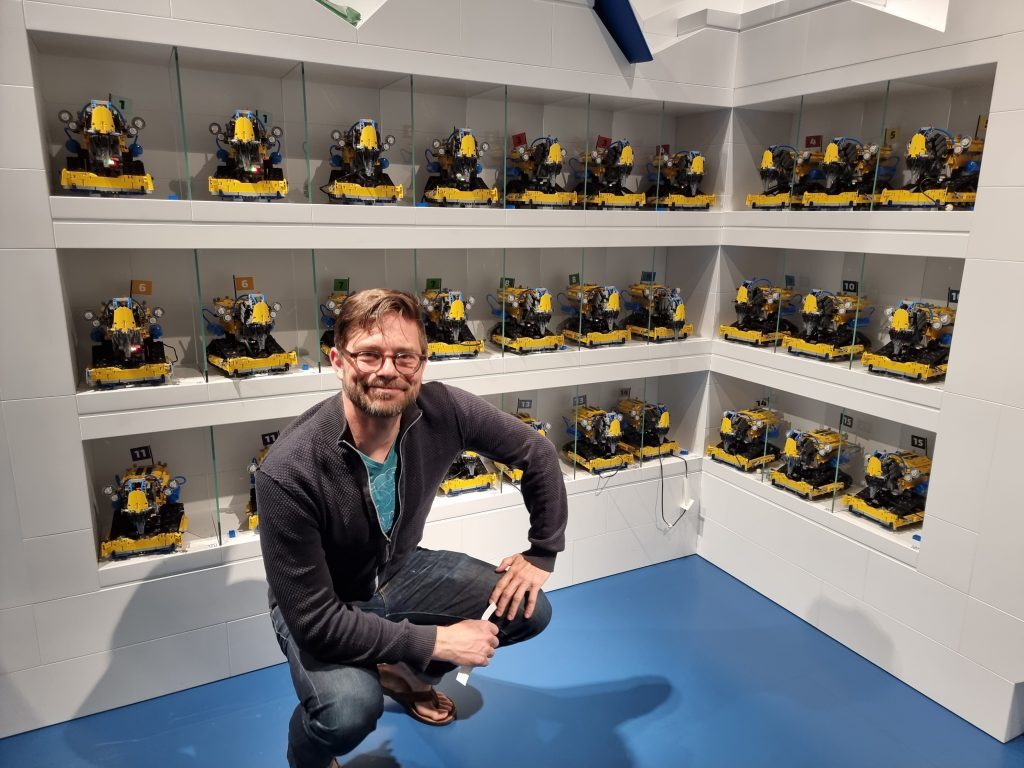
Last May I finally was able to visit the LEGO house. My visit kept being postponed because of covid. Here’s me, proudly next to 30 copies of the beekeeper robot!
For me, this build was an amazing experience. I enjoyed the thoughtful feedback of the LEGO team and the semi-limitless amount of bricks at my disposal for building the model. After a year of operation, the robot is still going strong, needing almost no repairs. Even if the robots are handled every day they are kept together without glue!
Want to know more?
Here are some interesting links about the LEGO and the Robo Lab:
- More about the Robo Lab at The LEGO House
- The Netflix documentary about the LEGO House
- Building instructions for the Beekeeper robot
Also, be sure to share this story and ask questions in the comments. I’m looking forward to it!


and were to got the instructions 😀