We are happy to introduce our new ESP32 expansion board for Lego Mindstorms robots: LMS-ESP32-v1.0. We built the board because the Lego Mindstorms Robot Inventor 51515 and the Lego SPIKE Prime (Inventor and Prime for short) have limited possibilities to be extended with non-Lego branded sensors or motors. This post will introduce you to the new board we have developed. That board allows you to hook up almost any sensor, RGB led strings, and servo motors and deploy Wifi and Bluetooth BLE or Classic with your Lego robot.
We will discuss the following:
- Some use cases of the LMS-ESP32-v1.0 board:
- The hardware possibilities of the LMS-ESP32-v1.0 board
- The software libraries we provide for the LMS-ESP32-v1.0 board to get you started quickly!
Use cases for the LMS-ESP32-v1.0 board on LEGO MINDSTORMS and SPIKE
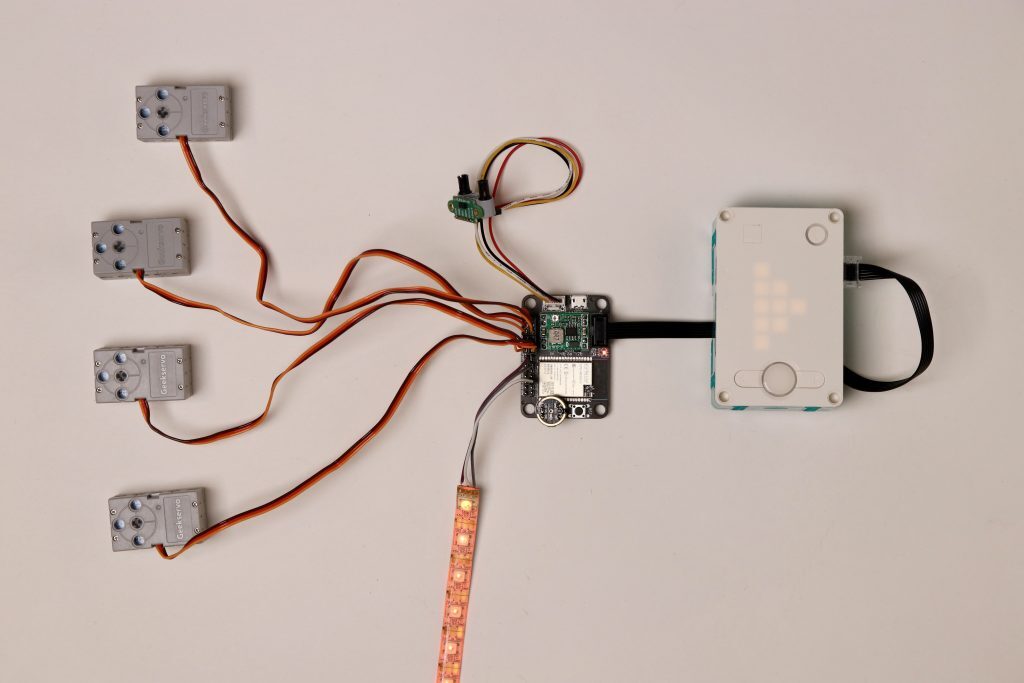
What would you be able to do with the ESP32 expansion board? The possibilities are best illustrated by giving a few examples. We will elaborate on these examples in later posts and explain the hard- and software needed to build it.
Etch-a-Sketch with ws2812 neopixel leds
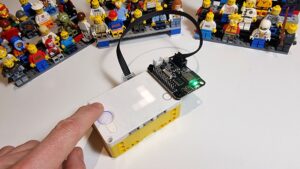
You can drive up to 64 WS2812 or SK6812 based LEDs. You can program the Lego robot to give each individual LED its own RGB color with a speed of approximately 30 fps. The LEDs can be powered from the buck converter driven by a motor output of the Lego robot. This example shows how to use the 8×8 led matrix as an Etch-a-Sketch.
A LEGO MINDSTORMS spectrum analyzer with a digital MEMS microphone
The ESP32 board can be equipped with a digital MEMS microphone. This microphone allows your robot to act on sounds audible in the environment. As an example, we build an audio frequency analyzer showing the power in five different frequency bands on the 5×5 display of the robot. The audio processing is performed on the ESP32 expansion board using a Micropython implementation of numpy.
I2C device demo: i2c keyboard
The ESP32 board supports a Grove-type I2C port. The connectors are used by many suppliers of sensors and I2C devices, such as the M5Stack Units. In this example, we show how you can use a small I2C keyboard to control the robot. The I2C keyboard generates a single I2C data value when a key is pressed. That value is passed y the ESP32 board to the robot, where a program translates the values to movement or visualizing a character on the screen.
On-board voice controlled LEGO MINDSTORMS
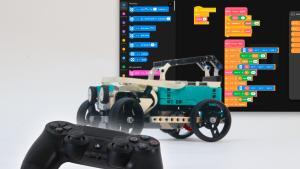
The ESP32 processor is powerful enough to implement a machine learning model. We use the model as implemented by atomic14. The model can distinguish between 4 different commands: left, right, forward and backward. These commands are forwarded to the Lego robot over UART. Voice control of LEGO SPIKE robots has been done before, but always online with the help of Alexa or Google. This demo is fully self-contained and offline! No internet is needed.
Hardware of the LMS-ESP32-v1.0 board
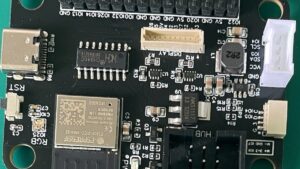
To get an idea of the capabilities of the LMS-ESP32-v1.0 board, we briefly introduce the hardware components as shown below.
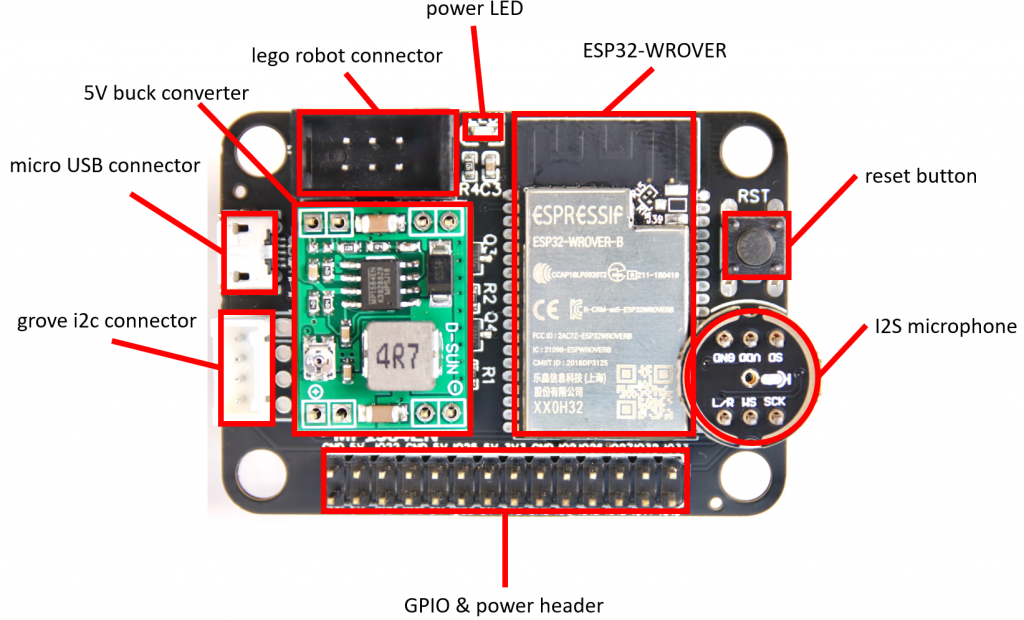
- Lego holes:
Easy to mount as the the PCB fits on a 5×7 lego frame. - ESP32-WROVER:
This is the microcontroller we use on the board. It is an Esspressif dual core MCU running at 240MHZ with 520kB SRAM, 4MByte flash and an extra 4Mbyte of PS-RAM memory. - Power LED:
This LED is connected to the 3.3V power ad will light up when the board is powered. - Micro USB connector:
Used for connecting the board through the build-in usb-uart convertor and for powering the board with 5V - 5V buck convertor:
The buck convertor efficiently converts 8V input supplied by the Motor interface of the robot to a stable 5V supply that can be used to drive LEDs or servo motors. - GPIO/power header:
This is the header where you connect your hardware such as servo motors , displays and sensors. There are 5V and 3.3V power pins present on the header. Four groups each with a single GPIO, GND and 5V pin, are grouped together to facilitate connections woith servo motors or RGB LEDs - Grove I2C header:
This is a Grove connecter that can be used to connect I2C devices to the board. The connector uses 3.3V power supply. - I2S microphone:
We provide two 3-pin headers for connecting an INMP441 MEMS microphone. - LEGO robot connector:
This connector is used to connect the board to your Lego robot. It connects to the 3.3V power, the UART pins and the M+ pin of the robot. For SPIKE prime and Robotic Inventor a special cable is provided. A special converter board for EV3 connectors will e available later on. - Reset button:
If all else fails, press the reset button. This button is connected to the reset signal of the ESP32.
Software for the ESP32 board
We invested quite some time designing a software library for the communication between the Lego Robot and the ESP32 expansion board. The ESP32 runs MicroPython, just like the SPIKE Prime and Robotic Investor robot. When you are used to programming your robot in MicroPython, you will experience little trouble getting started with the ESP32 board.
The library and special compiled firmware are available from GitHub/antonvh/uartremote. The API of the UartRemote library is described in uartremote.readthedocs.io.
The UartRemote library is also available for the Arduino program environment. This UART library allows the Lego robot to interact with native Arduino applications running on the ESP32.
Interested? Get a board for yourself
We produced this board mainly because we love to play around with all these sensors and LEDs. We ordered a few extra to sell to enthusiasts like ourselves. Get yours before our stock sells out!


Hi,
Thank you for this article this looks great. I haven’t owned a Lego Mindstorms kit since the yellow one when I was a kid so I am a bit lost. I also read your article about EV3 vs Robot Inventor. Would I be correct in saying that combining Robot Inventor with this board I could get the best of both worlds?
I would be mostly interested in writing Machine Learning algorithms / Reinforcement Learning algorithms (I saw that Robot Inventor now has a library for ML but I don’t think this allows to write your own ML models).
My idea is that I would use the Robot Inventor Brick for all motor and lego sensors commands, and the EPS32 board for heavier computational tasks / communication with a computer running even heavier ML models. In the latter case I’m thinking of communication over WIFI.
Does that seem viable to you?
It seems viable to me. Some things to note:
Hi, My Wifi-ESP32 board arrived. I’d like to use the I2C keyboard like what you describe here: https://www.antonsmindstorms.com/2022/02/13/hook-up-any-i2c-sensor-hobby-servo-and-more-to-your-lego-robot-with-the-esp32-board/#etch-a-sketch-with-ws2812-neopixel-leds. However, I have not been able to locate sample code in any of the git repos, demonstrating me to use I2C successfully on my ESP32. Could you please point me to the same code?
Hi Thilaka Sumanaweera, good that you mention that you could not find the demo code for these examples that we show here. I will clean up the code and put the example code for both the LMS-ESP32 and the SPIKE prime on our github repository. I will post the link here in the comments.
We have put example code on our github repository for the demo’s we show here (except for the voice activation demo). Please find the code for both LMS-ESP32 and for the lego SPIKE Prime or Mindstorms Inventor here: https://github.com/antonvh/LMS-uart-esp/tree/main/Projects/BlogExamples
Thanks!
I am analyzing and testing the Spike Prime and various third-parties components to create education program about machine learning using Lego Spike Prime.
I am planning a project that involves creating a robot operated through voice control using the LMS-ESP32 board and Spike Prime. (I have seen your project “On-board voice controlled LEGO MINDSTORMS” and reference about atomic14 model you mentioned.) However, in this project, you used Mindstorms, and I am facing difficulties as there are no specific examples or guides available. I would greatly appreciate it if you could share any helpful guides or information related to this project. Thank you in advance for your assistance!