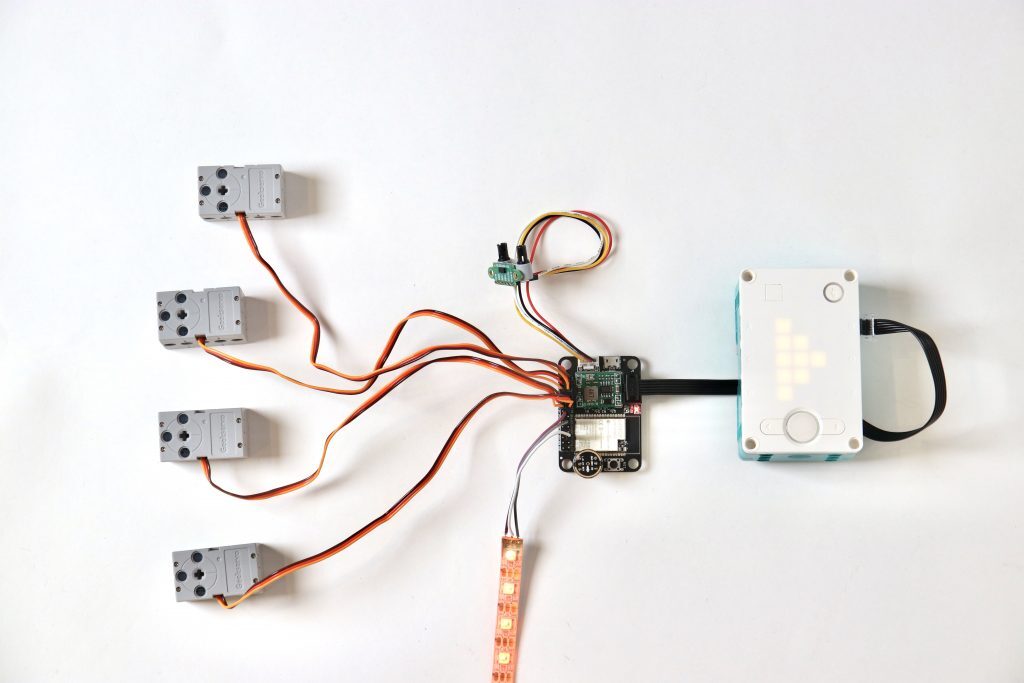
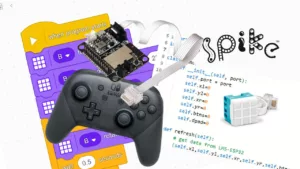
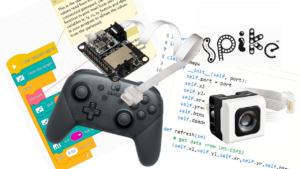
We developed the LMS-ESP32 hardware module to extend the Lego Mindstorms Robotic Inventor or Lego SPIKE Prime hubs (short Lego hub) so that you can use non-Lego peripherals such as RGB LED, Servo motors or I2C sensors.
This is the first of a series of 4 tutorials to guide you through the steps to realize projects where you interact from the Lego Robot with the LMS-ESP32 module using our UartRemote library.
The tutorials will cover the following things:
- Part 1: Basic UartRemote library usage
- Part 2: Connect a circular RGB LED matrix
- Part 3: Connect an I2C joystick
- Part 4: Remotely load modules on LMS-ESP32
Getting things ready
Before diving into the content, ensure you have the basic setup working. The setup consists of the following:
- Check the firmware version and, if necessary, flash firmware on the LMS-ESP32
- Installing Thonny IDE used in these tutorials
- Installing the UartRemote library on the Lego hub
- Connect the LMS-ESP32 with the Lego hub
Check the firmware version on LMS-ESP32
When you connect the LMS-ESP32 to your computer for the first time, you can easily check the firmware version on the module by using this online Serial Terminal. Make sure you know what Serial port the module is connected to. On Windows computers, you can check the port number by looking in the device manager (Windows key+x), and you will see under Ports:

/dev/ttyUSB0, under Mac-OS, it looks like /dev/cu.wchusbserial*. When starting the online Serial Terminal, you can press the ‘Connect’ button and select the serial port used by the LMS-ESP32 module:

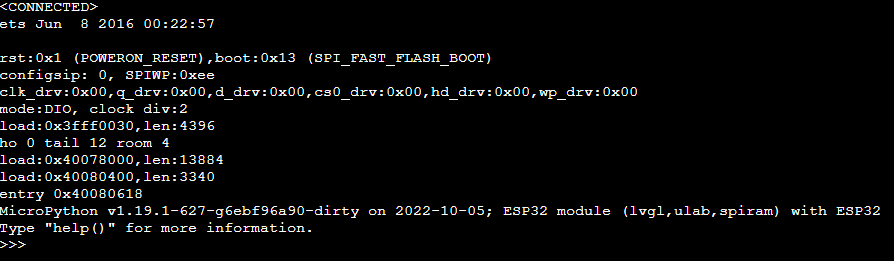
Above, you see the software version Micropython v1.19.1. Version 1.18 is also just fine for this tutorial.
flashing new firmware
When you like to flash the latest firmware on the LMS-ESP32, you can go to our online firmware flasher. You will see the following content. Select the MicroPython option and press CONNECT. Select the correct serial port (make sure you disconnected from the Serial Monitor).
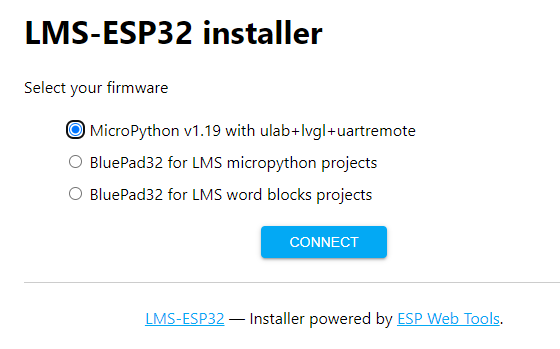
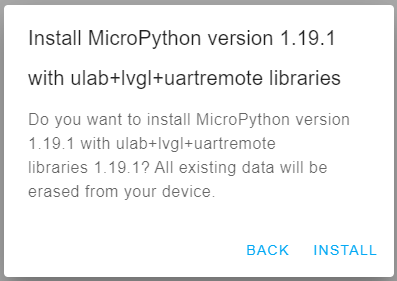
Select ‘WITH ULAB+LVGL+UARTREMOTE’
Press INSTALL on the next screen.
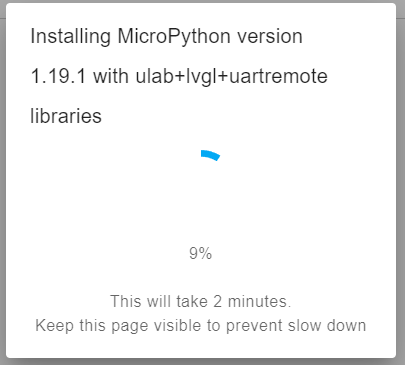
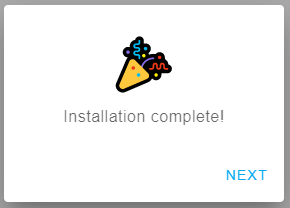
Press ‘NEXT’ and leave the browser page. Now you can check if the firmware is the correct version.
Installing the UartRemote library on the Lego hub.
Now that you prepared the LMS-ESP32, the UartRemote library should be installed on the Lego Hub. In this tutorial series we use only install the UartRemote library on the Lego Hub. Head over to our GitHub repository: https://github.com/antonvh/UartRemote/tree/master/MicroPython/SPIKE and follow the steps described in the README on that GitHub page. When using this UartRemote library, you should load the module using this command:
from projects.uartremote import *There is a more eleborated set of libraries availalable in the mpy-robot-tools repository. The UartRemote library is one of the many libraries in this tool box. In the repository you will find how to install the mpy-robot-tools on the SPIKE Prime or Mindstrorms Robot Inventor hub. When using the UartRemote library from this tool set, you should load it by using the following command:
from projects.mpy_robot_tools.uartremote import *Install Thonny IDE
In these tutorials, we will be using Thonny IDE. It has the advantage that you can use it as an IDE (interactive development environment) to program both the LMS-ESP32 and Lego Hub in MicroPython while having an interactive REPL (Read-Eval-Print Loop) prompt. This allows you to quickly test small parts of your program interactively.
Thonny IDE can be downloaded from https://thonny.org. It is free to use.
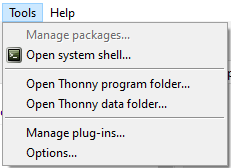
Because we use Thonny simultaneously for programming the LMS-ESP32 and the Lego Hub, you should deselect the ‘Allow only single Thonny instance’ option that can be found in the Tools menu
The setting should look similar to the image below.

For Mac OSX this works differently and as pointed out in a comment by Marc Helfman. The solution seems to type: /Applications/Thonny.app/Contents/MacOS/thonny into the command line of the Terminal for the second instance.
Using Thonny for LMS-ESP32
Select the interpreter for ESP32.
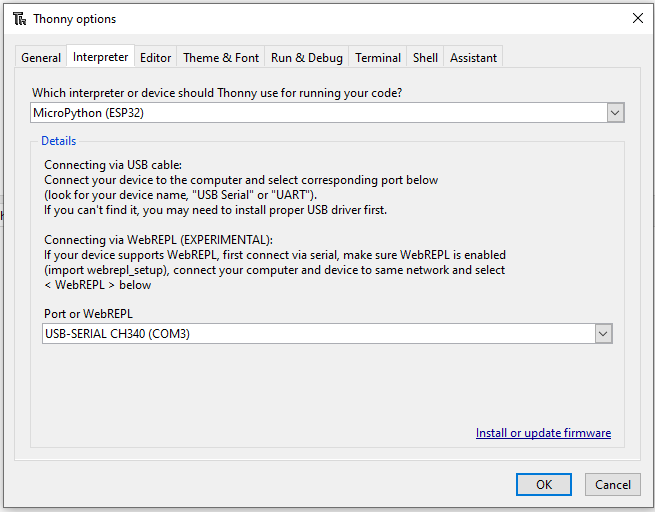
Select MicroPython (ESP32) as the interpreter and choose the USB port. Now you might not see anything happening until you click on the ![]() button. You should see the MicroPython prompt in the Shell window.
button. You should see the MicroPython prompt in the Shell window.
In Thonny, you can easily paste multiple lines of code from the program window to the interactive Shell window and have these lines executed. On the left side of the IDE, you see the files stored on the internal flash file system of the ESP32. It should at least show boot.py.
Using Thonny for the Lego Hub
Follow the procedure for the LMS-ESP32 module described above, but now we will select the MicroPython (generic) interpreter and the serial port corresponding to the Lego hub.
Once connected (maybe you should click on the STOP button), you either see the MicroPython prompt or you might see two lines of numbers that keep updating and that show the values of the sensors connected to the Lego Hub. Press CTRL-C to break and get to the prompt. You won’t see the MicroPyhton prompt in some cases, and CTRL-C might break whatever process the Lego Hub is executing. Now you have a thru interactive session with the Lego Hub.
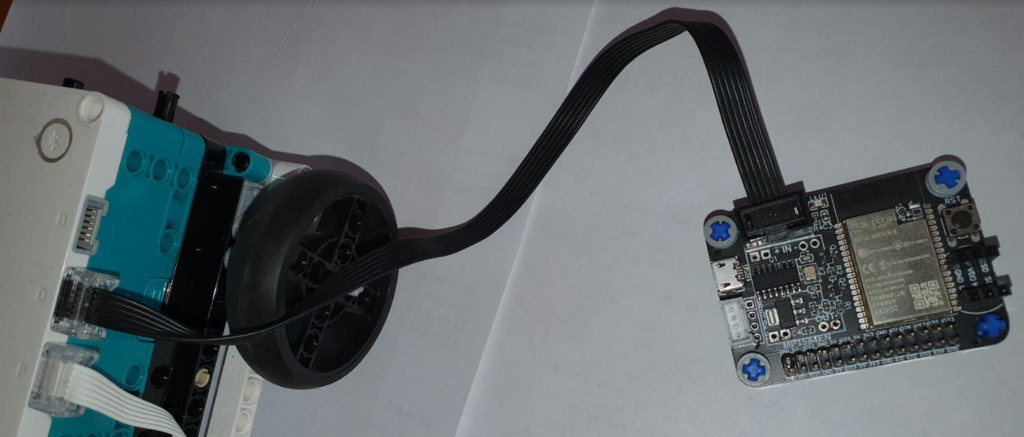
Connect the LMS-ESP32 with the Lego Hub
Use the flat cable with on one end the LPF2/WeDo connector that fits in a Lego Hub port and on the other end the 6-pin female connector that fits the boxed 6-pin header on the LMS-ESP32 board. Below you see the LMS-ESP32 connected to port D of the Lego hub.
Need more help with MicroPython, LEGO MINDSTORMS Hubs, and the LMS-ESP32 board?
Now you have your environment ready for heading to part 1 of the tutorial: communication between LMS-ESP32 and the MINDSTORMS hub through the serial port protocol (UART).
This tutorial is part of a multi-part tutorial. First, we set up the hardware, then we explain communication; next, you’ll learn about controlling RGB LEDs and then about i2c joysticks. You can also load MicroPython modules dynamically with our library. And there are more libraries to come.
We’d love to see what you build, and maybe we can help you with some questions. Drop us a line on Facebook!


Hello:
I had flash my LMS-ESP32 a while back to try your joystick using your blocky code. Unfortanetly, I have not had any time to try it. Will try it later. I did want to try your new LMS-ESP32 tutorials. After much struggling I managed to get the computer to see the LMS-ESP32 board — I had a device already exists error. Thoney does not see the device (says it is busy). So, I thought maybe it is the joystick firmware that is causing the problem. I then click on your link – online firmware flasher, but I get a 404 website not found error. I did install the MPY-robot-tools script onto my Spike Prime. Does this also contain the UartRemote.py LIbrary that the tutorials are using or do I need to install it separately?
Mike,
Hello Mike,
unfortunately the firmware server was temporarily out of service. It should be online again on http://firmware.antonsmindstorms.com. Thonny expects that the device is flashed with MicroPython (first option on the firmware server). Beacuse you flahed your device with the BluePad firmware, you should flash it with MicroPython first before you can start using Thonny to program the LMS-ESP32. The MPY-robot-tools installs, among other libraries, the UartRemote library, but in another subdirectory. To be sure to have the same library on your Spike Prime as we use in the tutorial, follow the instructions you will find on this github page. Hopefully you can get things working now.
Regards, Stefan
Hello Stefan:
I tried a bit later and was able to flash the LMS-ESP32 with the appropriate firmware. Just to be the same as the tutorials I also ran the uartremote installer on my Spike Prime. so far the I am able to the first tutorial. Thank you for the reply. Hopefully there will be more tutorials, especially for controlling motors and sensors attached to the LMS-ESP32 from the Spike Prime. Maybe than I will be able to get Spider robot to work, or some other multi-legged/wheeled robot.
Thank you for creating the tutorials. They are giving me a better understanding of how the Spike and the LMS-EPS32 can communicate with each other.
Mike,
Mike,
Do you have any projects using geeksevro motors as i see them on the top picture:)? Are they a good replacement for lego motors? considering torque, speed and accuracy?
I just published a project here: https://www.antonsmindstorms.com/product/servo-spider-pdf-building-instructions/
I like the Geekservos because of their servo-like behavior. Accuracy is great. Torque is ok, but the limiting factor is how much power the LEGO Hub can deliver.