Lego is phasing out the Mindstorms Robot Inventor, and Lego upgraded the SPIKE Prime Lego to SPIKE version 3, which does not yet support Python. Both developments urged us to consider how we will support the LMS-ESP32 module with the Mindstorms Robot Invetor and the SPIKE Prime hub. The obvious answer would be: moving with both hubs to Pybricks. In this article, you can read how we work around the limitations of Pybricks to program communication with an external device like our LMS-ESP32 module. We will use the LPF2 protocol and some hacks in the PUPDevice() class.
The result: a powered LED array working the MINDSTORMS Hub Gyro data
In this video, the MINDSTORMS hub runs Pybricks. The hub powers an LMS-ESP32 board and transmits accelerometer data using the LPF2 protocol.
Pybricks, the alternative LEGO hub firmware
Pybricks is a MicroPython platform for Lego hubs. Among the supported hubs are the SPIKE Prime and Mindstorms Robot Inventor Hub and smaller Bluetooth hubs such as the Lego Boost and Lego technic Hub. To support all the hubs, the guys of Pybricks stripped down the MicroPython firmware to its bare minimum, still supporting all sensors and motors in an even better way than the original Lego firmware.
Why Pybricks support poses some challenges?
We developed the UartRemote and the SerialTalk libraries to support remote function calls in both directions: from the hub to the LMS-ESP32 and vice versa. This communication relies on the native UART (serial port) support of the Hubs ports. The ports can be configured to full duplex serial ports using this mode hub.port.MODE_FULL_DUPLEX= 1. This allows us to use serial communication for the protocol with which function calls, their parameters, and return values are exchanged.
Unfortunately, PyBricks does not (yet) support configuring the Hub ports as native serial ports. This refrains us from using the libraries, as mentioned before.
Another challenge is the external power supply of the LMS-ESP32 board. We use the motor PWM output voltage (`hub.port.A.pwm(100)’) to feed LEDs or servo motors. The Pybricks firmware does not support directly driving the PWM output of the motor pin on the hub ports.
So, we need to figure out how to circumvent these two limitations of the Pybricks firmware:
- No support for serial communication
- No direct support for controlling the PWM motor outputs. The following two sections will show how we support Pybricks firmware.
Communication using LEGO Powered Up UART Protocol
Using the LEGO Powered Up UART Protocol, the Lego sensors and motors communicate with the lego hubs. We call this protocol LPF2 (Lego power function). This protocol is similar to the Lego Wireless Protocol version 3. Using the LPF2 protocol, Lego sensors can advertise their capabilities to the hub. The hub can read or write to specific modes of operation to retrieve sensor values or control, e.g., LEDs in the sensor. A sensor typically supports multiple modes. Each mode specifies the number and type of data to be exchanged and the ranges for RAW values, percentage values, and SI (like cm or inch) units. As native data types, single Bytes, 2-byte integers, and floats are supported.
The idea is that the LMS-ESP32 emulates a Lego sensor and uses the LPF2 protocol to exchange data in both directions between the LMS-ESP32 and the Lego Hub. LPF2 is limited to 16 bytes per exchange. So we have to squeeze the information we want to exchange into these 16 bytes.
The cool thing is that this protocol will also work in the debug mode with the LEGO block language.
How to externally power the LMS-ESP32 using the motor output
The second challenge is to feed the LMS-ESP32 with 8V from the motor output of the Lego hub. We mentioned this problem to the Pybricks developers, who suggested that we use the special flags in the specific mode name that allows setting constant power on the motor output. These flags can be added by adding a \x00 byte and the 6-byte flags. A typical mode name that powers the M+ pin looks like this:
name=b"POWER\x00\x80\x00\x00\x00\x00\x00"Where the \x80 byte sets bit 7, which enables the option: ‘requires constant power on pin 2‘. This seems to work fairly well.
SerialTalk LPF2 library
We developed a stripped-down version based on the generic SerialTalk library that uses LPF2 communication. The serialtalk_lpf2.py library runs on both the Pybricks hub as well as on the LMS-ESP32. This is a quick hack for this proof of concept, and we’ll probably change the architecture of the SerialTalk API in the future.
Typical communication between the Pybricks hub and LMS-ESP32 looks like the example below. This is an example where the IMU of the Pybricks is used to draw pixels on an 8×8 NeoPixel matrix connected to the LMS-ESP32.
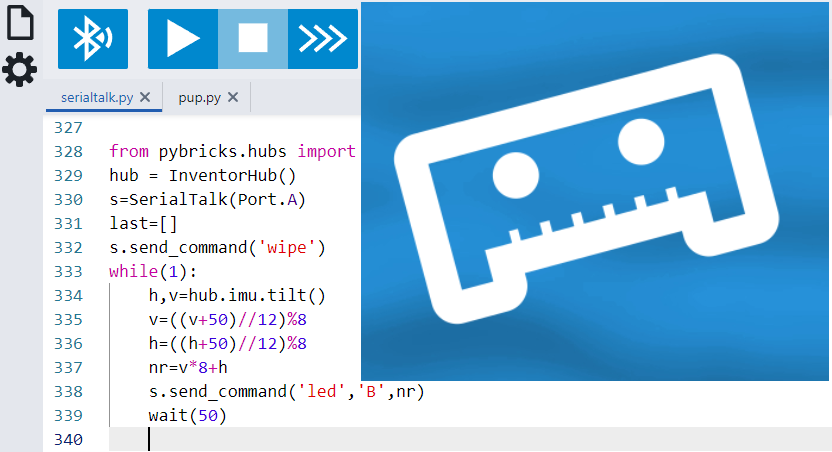
On Pybricks, the code from the file pybricks_demo_neopixel.py is pasted after the serialtalk_lpf2.py library. This is needed because Pybricks only uploads a single Micropython file. We use s.send_command, instead of s.call for performance reasons. We pass a single unsigned Byte to the led-function which is packed using the B format string.
<included serialtalk_lpf2.py>

from pybricks.hubs import InventorHub
hub = InventorHub()
s=SerialTalk(Port.A)
last=[]
s.send_command('wipe')
while(1):
    h,v=hub.imu.tilt()
    v=((v+50)//12)%8
    h=((h+50)//12)%8
    nr=v*8+h
    s.send_command('led','B',nr)
    wait(50)
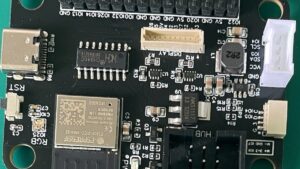
On the LMS-ESP32, we connected a NeoPixel matrix to pin GPIO(21) having 64 LEDs. Three functions are defined and configured as commands in the SerialTalk library: led, wipe, and show. We use the option power_motor=True in the SerialTalk initializer. This enabled power output on the M+ pin in the LPF2 connector allowing to power of the NeoPixels from the hub.
from serialtalk_lpf2 import *
from time import sleep_ms
from machine import Pin
from neopixel import NeoPixel

np=NeoPixel(Pin(21),64)

last=[]

def led(nr):
    global last
    print(nr)
    last.append(nr)
    last=last[-20:]
    for i,nri in enumerate(last):
        b=int(i*2)
        #print(nr,b)
        np[nri]=(b,b,b)
    show()

def show():
    np.write()


def wipe():
    np.fill((0,0,0))
    np.write()

s=SerialTalk(1,power_motor=True) # enable external power
s.add_command(led)
s.add_command(show)
s.add_command(wipe)

while True: # keep lpf2 sensor alive
    if not s.lpf2.connected:
        print("reconnecting lpf2")
        s.lpf2.sendTimer.deinit()
        #led.on()
        sleep_ms(200)
        s.lpf2.baud=2400
        s.lpf2.initialize()
    sleep_ms(200)
The while True loop keeps the emulated sensor alive by re-initializing the sensor when the connection is lost. At the moment of writing, this option does not work correctly.
Try it yourselves
The work shown in this blog is a ‘work in progress.’ Some instabilities occur after running the demo code for some time. We need to go through the code to fix these issues. But if you like to try this proof of concept, and if you want to play with the Pybricks firmware and the LMS-ESP32, you can do the following:
- Upload Pybricks to your hub
Head to the Pybricks start coding page. Click on the gear symbol and choose Install Pybricks Firmware.
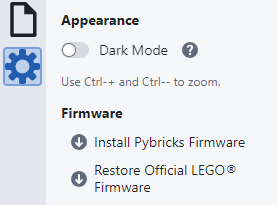
The Pybricks website guides you through the uploading process. Verify that you can connect your brick from within the online Pybricks IDE.
If you want to restore the original firmware, you can choose Restore Offical Lego Firmware. After this step, you might need to update the firmware from the official Lego application. - Paste Serialtalk library in Pybricks IDE.
Open the Pybricks IDE and create a new file. Paste the raw code of the serialtalk_lpf2.py library in the IDE.
- Append Pybricks serialtalk demo code to the IDE
In the Pybricks IDE, browse to the end of the library and paste the pybricks_demo_neopixels.py code after the library.
- Upload serialtalk_lpf2.py and LPF2_esp32.py to LMS-ESP32
Connect your LMS-ESP32 module to your PC and use e.g. Thonny to upload these libraries from the repository:
serialtalk_lpf2.pyLPF2_esp32.py - Upload ESP32 serial talk demo to LMS-ESP32
Upload the esp32_demo_neopixel.py code to the LMS-ESP32 and rename it to
main.py. Every time you boot your LMS-ESP32 module, themain.pyfile gets executed automatically.
Reboot (press the boot button) your LMS-ESP32 board to execute the demo code. - Run your code on Pybricks
Using the Pybricks ide, run the code from step 1
Background on SerialTalk_LPF2 library
Keep reading if you are interested in how we implemented the new SerialTalk_LPF2 library.
The LMS-ESP32 emulates a Lego LPF2 Sensor. It creates a mode that allows to receive and send 16 unsigned bytes. Some applications on the LMS-ESP32 need 5V power through the buck converter. The M+ motor pin powers the buck converter. This can be accomplished by extending the mode name according to mode flags. We use the required constant power on pin 2 flag, which is bit 7 of the first byte. The so-called motor information field is 6 bytes long. The name of the mode becomes: “POWER\x00\80\x00\x00\x00\x00\x00”, where a zero byte is inserted between the name and the motor information flags. This is how the mode of the emulated sensor looks:
name=b"POWER\x00\80\x00\x00\x00\x00\x00"
mode_16bytes = [name,[16,LPF2.DATA8,3,0],[0,1023],[0,100],[0,1023],'RAW',[LPF2.ABSOLUTE,LPF2.ABSOLUTE],False]
modes = [mode_16bytes]
where mode_0 has a dataset of 16 DATA8 bytes in both direction (map_in and map_out is LPF2.ABSOLUTE. Now, we can measure approximately 8V on the M+ output. It seems that this only works properly when the mode name is called POWER.
PyBricks
On the Pybricks hub, the same serialtalk_lpf2 library is running. Here we use the PUPDevice class with its read and write methods to receive and send 16 bytes chunks from and to the LMS-ESP32.
Files
serialtalk_lpf2.py is the library that runs both on the LMS-ESP32 as well as the PyBricks PrimeHub. On the Pybricks hub, you have to paste the code of this library (select raw mode) in the editor of PyBricks and append the example code below it. On the ESP32, you have to upload this library to the root of the flash filesystem together with the LPF2_ESP32.py library for emulating a native Lego LPF2 sensor.
Protocol
Because of the nature of LPF2 communication, the SerialTalk protocol running on top of LPF2 is also asymmetrical. The LMS-ESP32 acts as a slave (like a lego sensor). Calls can be initiated from the Pybricks side. A call to the LMS-ESP32 will initiate a call-back function asynchronously on the LMS-ESP32. The command is processed and executed in that callback function, and the response is sent back to the Pybricks hub. The hub does not get any interrupt when a packet arrives from the LMS-ESP32. By polling the received messages, it can see by an increase in the counter field that a new packet has arrived.
Packet Layout
Because we only have 16 bytes, we compressed the SerialTalk protocol further. The following restrictions apply:
- We support only raw packing and packing using a format string similar to
struct.pack - The total bytes of a single command, format string, and packed variables cannot exceed 15 bytes
- On the LMS-ESP32, a call-back function will be called when receiving a command from the hub
- On the hub, the commands received from the LMS-ESP32 should be polled. A counter is used to see whether the received message is updated
- Because the LMS-ESP32 simulates an LPF2 sensor; it must continuously update the sensor data; consequently, it runs an endless loop
The basic layout of a packet with a command string cmd, a format string, and the packed variables. The following fields can be distinguished:
- A single byte counter field which increases by 1 every command that is sent
- A single byte combined length field with the lower 4 bits for the command length and the upper 4 bits for the format string length.
- The packed variables field with packing according to the format string field.
- Padding with
\x00to a total length of 16.

What’s next?
If you like where this is going and want to contribute, please contact us on Facebook or by email. In the future, we plan to put all LPF2 complexities in an abstracted library. Preferably, you will be able to set up a connection like this st=SerialTalk(LPF2Serial("A"))


Hi there, you mention in the article that “The while True loop keeps the emulated sensor alive by re-initializing the sensor when the connection is lost. At the moment of writing, this option does not work correctly.” Has this been resolved so the LMS-ESP32 does not disconnect from the Spike hub?
I am very interested in the development of this project. I wonder what the current progress is.
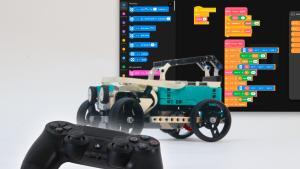
Check out the newest blog post about PS4, Pupremote and the technic hub: https://www.antonsmindstorms.com/2023/09/19/remote-control-lego-technic-hub-with-gamepad-ps4-sixaxis/
The library is here: https://github.com/antonvh/PUPRemote/
Thank you, amazing job!
One thing that puzzles me. 😉 To power the board from the hub pin, you need to set the appropriate mode. But to set the appropriate mode, the board must be powered. What powers the board before the appropriate mode is set?
Hi Invenisso, the LMS-ESP32 board is powered from the +3V3 coming from the hub. When the board emulates a sensor, it can request power on one of the motor pins. In our case, M+ will get powered to 8V. This 8V gets converted to 5V using the Buck converter. In our new LMS-ESP32v2 board, we have two voltage switches to select from which source the board (+3V3) and the external devices devices (+5V) are powered.