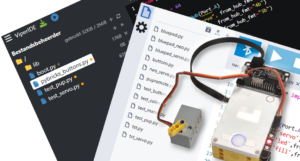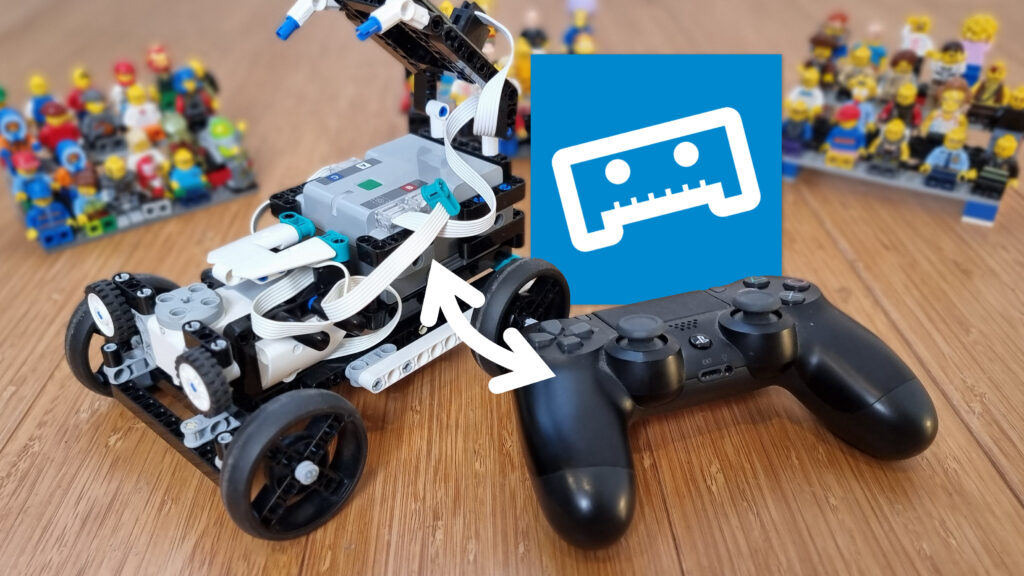
Want to control your next project with a gamepad and light up some NeoPixel LEDs? How about adding servo motors managed by your Lego hub? You can do it all with our LMS-ESP32 board and Pybricks software for the Lego Hub. Our new BluePad32 firmware lets you skip programming the ESP32 and dive right in.
In this comprehensive tutorial, you will discover the exact steps to harness the full potential of the BluePad32 firmware on the LMS-ESP32 board. To gain a clear understanding of the process, I highly recommend checking out this insightful post: Remote Control LEGO Technic Hub with Gamepad (PS4 Sixaxis).
Step 1: Flash your LMS-ESP32 with the Bluepad32 firmware
For this tutorial, we assume you are the proud owner of an LMS-ESP32 board. By default, it comes with MicroPython firmware. For this tutorial, we need special firmware that connects to gamepads.
To install the new firmware, link your LMS-ESP32 module to your computer and visit our firmware webpage. Choose the BluePad32 LPF2 for Spike3 and Pybricks option, select the serial port, and initiate the firmware installation.
Step 2: Flash Pybricks onto your LEGO SPIKE or MINDSTORMS hub
Pybricks offers both Python and block language to as an alternative to the LEGO SPIKE programming environment. You can easily revert to LEGO firmware later. To flash Pybricks, go to code.pybricks.com and click the gear icon. Follow the instructions. After completing this process, connect the LMS-ESP32 to your Lego hub.
Step 3: Install the Bluepad libraries in Pybricks
In the Pybricks programming environment, you need to upload a few libraries.
- Create a new file in Pybricks (by clicking on the small ‘+’ symbol). Name it
bluepad.py. - Copy the contents of
bluepad.pyfrom GitHub and paste them into a new Pybricks program with the namebluepad.py. This is a library script that helps to read gamepad data and control NeoPixels and Servo motors connected to the LMS-ESP32.
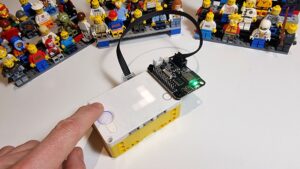
Step 4: Pair your gamepad to the LMS-ESP32 module
In this example we assume that you connected your LMS-ESP32 to Port A of your Lego hub. Connect your Gamepad to the LMS-ESP32 by pressing the pairing button. This differs per type of gamepad. For the PS4 gamepad, you have the press the PS and share buttons at the same time.
Step 5: Run test code to see if Pybricks receives gamepad data
Once the gamepad is connected via Bluetooth, test its connection and data reading from Pybricks. Create a new Pybricks command, remove the template lines, and paste the code below in the empty window.
from pybricks.parameters import Button, Color, Direction, Port, Side, Stop
from pybricks.tools import wait, StopWatch
from pybricks.hubs import PrimeHub

from bluepad import BluePad

bp=BluePad(Port.A)

while True:
   print(bp.gamepad())
You should see a scrolling list with values read from the gamepad. If you move the joysticks or press the buttons, you will see some of these values change. That’s great. You have taken the first step.
Step 6: Change the color of Neopixel RGB LEDs connected to the LMS-ESP32
Now let’s connect the NeoPixels to the LMS-ESP32. The firmware is designed to allow the LMS-ESP32 to receive power from the Lego hub port at a converted 5V, which is enough to drive multiple NeoPixels. You can use any WS2812 NeoPixels, like the NeoPixel strips we offer. Connect the ground and power of the NeoPixels to GND and 5V respectively. Connect the data-in from the NeoPixels to an available GPIO pin on the LMS-ESP32 extension connector.
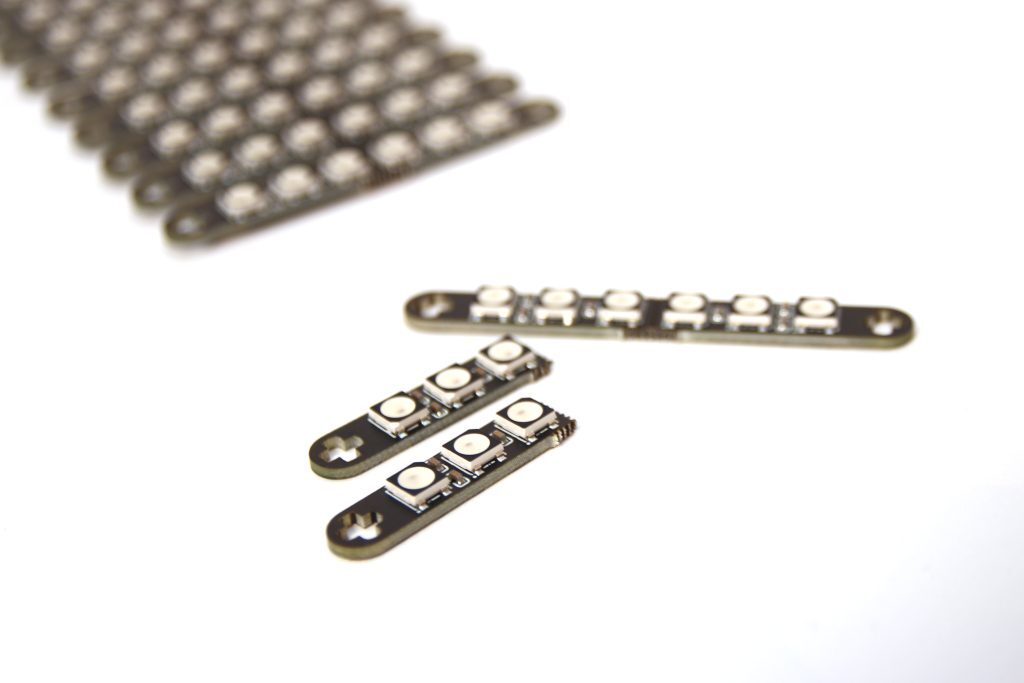
5 x 6 RGB ws2812 Neopixel LEDS in Technic size
Solder your own interactive lighting with these LEGO MINDSTORMS size multi-color RGB Neopixel leds. The leds are we2812 so you can chain them with a minimum of wiring. The easiest way to control them from your LEGO MINDSTORMS is with the LMS-ESP32 board, but any microcontroller with a neopixel/ws2812 …
Suppose you connect a strip of 3 LEDs to pin GPIO12 of the LMS-ESP32, then with the following code you can get these pixels to life.
from pybricks.parameters import Button, Color, Direction, Port, Side, Stop
from pybricks.tools import wait, StopWatch
from pybricks.hubs import PrimeHub

from bluepad import BluePad

bp=BluePad(Port.A)

nr_leds = 3
led_gpio = 12
# change the number of leds and the GPIO pin according to your setup.
bp.neopixel_init(nr_leds, led_gpio)  # initialize neopixels
bp.neopixel_set(0,(20,0,0)) # red pixel
bp.neopixel_set(1,(0,20,0)) # green pixel
bp.neopixel_set(2,(0,0,20)) # blue pixel
Now you should see three LEDs light up in the colors red, green, and blue.
Step 7: Test drive some hobby servo motors on your LMS-ESP32
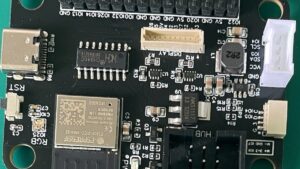
The LMS-ESP32 has four ports for Servo motors. Locate the area labeled “servos” at the back of the LMS-ESP32 board. You will find four smaller areas marked with the letters ‘S’, ‘5’, and ‘G’. These indicate the signal pin, +5V pin, and Ground pin respectively. Usually, the GND wire is brown or black. The +5V wire is red and the Signal wire can be white or orange (See e.g. this website on servo’s for an overview of wire colors). The servos are internally numbered 0 to 3 and correspond to GPIO pins GPIO21, 22, 23, and 25 for LMS-ESP32v1 and GPIO19, 20, 21 and 22 for LMS-ESP32v2.
In the example below we assume you use an LMS-ESP32v2 and you connect a servo moor to GPIO21 (which is Servo 2). The following code can be run to see how the Servo can be moved from the Pybricks environment and how the gamepad values can be read.
from pybricks.parameters import Button, Color, Direction, Port, Side, Stop
from pybricks.tools import wait, StopWatch
from pybricks.hubs import PrimeHub

from bluepad import BluePad

bp=BluePad(Port.A)

servo_nr=2 # attach servo signal to GPIO21 on LMS_ESP32v2

for x in range(5000):
     bp.servo(servo_nr, x%180)
     print(bp.gamepad())
This program lets the angle of the servo increase from 0 to 180 and starts over (the modulo % operator takes care about that). Simultaneously, we read the values from the gamepad using the bp.gamepad method and print these values. So, while driving the servo, the values from the gamepad can still be read.
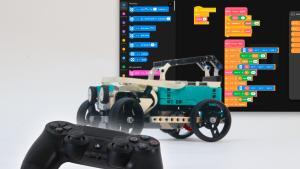
Watch the video tutorial to see it all in action!
You can see the above examples in the video tutorial. The code is in the Bluepad examples in the Bluepad repo.
A big thanks to Ricardo for the basic BluePad32 firmware
The firmware is based on Ricardo Quesada’s BluePad32 project. This project allows for the easy connection of different game pads to an ESP32. We used the Arduino Library that Ricardo developed and integrated our LPF2 Arduino Library into the new firmware. You can find the source code in the bluepad32 LPF2 repo.
We provide you with a single file ready-to-use firmware image (Bluepad32 for Pybricks and SPIKE3) that can be downloaded from the firmware.antonsmindstorms.com website.
If you have ideas about other features that you would like to see in this firmware, please respond below in the comments.