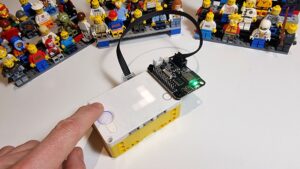
We created some custom blocks in Pybricks Block Coding, to make it easy for you to integrate a gamepad controller in your block code. Any kid can do it! In this blog you get an overview of all blocks we created and the way they work. The only things you need for lagless remote control are an LMS-ESP32 board and any Bluetooth gamepad controller.
Downloading the PyBricks Custom Blocks
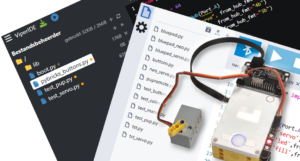
We have a step-by-step tutorial for gamepad controller block coding with Pybricks. The tutorial is easy for beginners.
In the Pybricks programming environment, you need to upload our bluepad library and the block template first.
- Create a new file in Pybricks (by clicking on the small ‘+’ symbol). Name it
bluepad.py. - Copy the contents of
bluepad.pyfrom GitHub and paste them into the new Pybricks program with the namebluepad.py. - Download the bp_template.py from our github and upload it to the Pyricks IDE to get started with our predefined bluepad blocks.
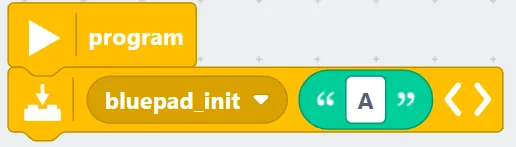
Initialization of BluePad
bluepad_init(port)
This block initializes the BluePad library and must be used once in, the beginning of your program.

Reading the Gamepad
gamepad()
The gamepad values are continuously sent to the Lego brick. The gamepad function processes these values.
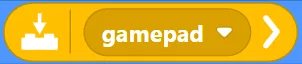
It returns an list with the following values: [left_joystick_x, left_joystick_y, right_joystick_x, right_joystick_y, buttons, dpad].
get_left_stick_horizontal()
This gives the x-coordinate of the left joystick. Usually, this is a value between -512 and +512.

get_left_joystick_vertical()
This gives the y-coordinate of the left joystick.

get_right_joystick_horizontal()
This gives the x-coordinate of the right joystick.

get_right_joystick_vertical()
This gives the y-coordinate of the right joystick.

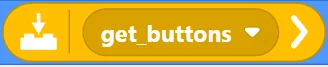
get_buttons()
Read the integer value representing the buttons that are pressed. Each button is represented by a specific bit value. You can figure out the values for your gamepad, by printing the get_button values in a loop.
get_directional_pad()
Read the integer value representing the dpad buttons that are pressed. Each button is represented by a specific bit value. You can figure out the values for your gamepad, by printing the get_direction_pad values in a loop.

Controlling NeoPixels
init_neopixel(nr_pixels, gpio_pin)
To initialize the NeoPixels, use the following function call, where nr_pixels is the number of NeoPixels in your setup, and GPIO pin is the hardware GPIO pin to which you connect the data line of the NeoPixel array.

Here we initialize 3 NeoPixels connected to GPIO 12. You can use the on-board NeoPixel of the LMS-ESP32v2 by choosing nr_pixels equal to 1 and gpio_pin equal to 25.
set_neopixel(n, Color, intensity = 1, write = True)
Sets the n-the NeoPixel to the color Color. Color is a 3-tuple (r,g,b) and you can use the standard colors from Pybricks blocks under Input → Light and Color. The Intensity can vary from 0 to 1. The write boolean deter

color_rgb(r, g, b)
This function allows you to generate a color from the individual red, green and blue components. here is an example how it is used was an argument to the set_neopixel call.

neopixel_fill(Color, intensity=1, write=True)
Fills all NeoPixels with the same color Color.

Controlling Servo Motors
set_servo(servo_nr, angle)
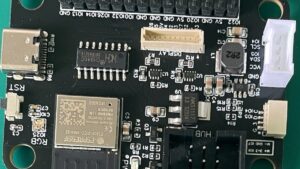
The first parameter indicates the servo motor number servo_nr ( where servo number 0 to 3 are mapped to GPIO pins 21, 22, 23, and 25 for LMS-ESP32v1 and to GPIO pins 19, 20, 21, and 22 for LMS-ESP32v2). The second parameter angle is the angle to which the servo is set (usually between 0 and 180).

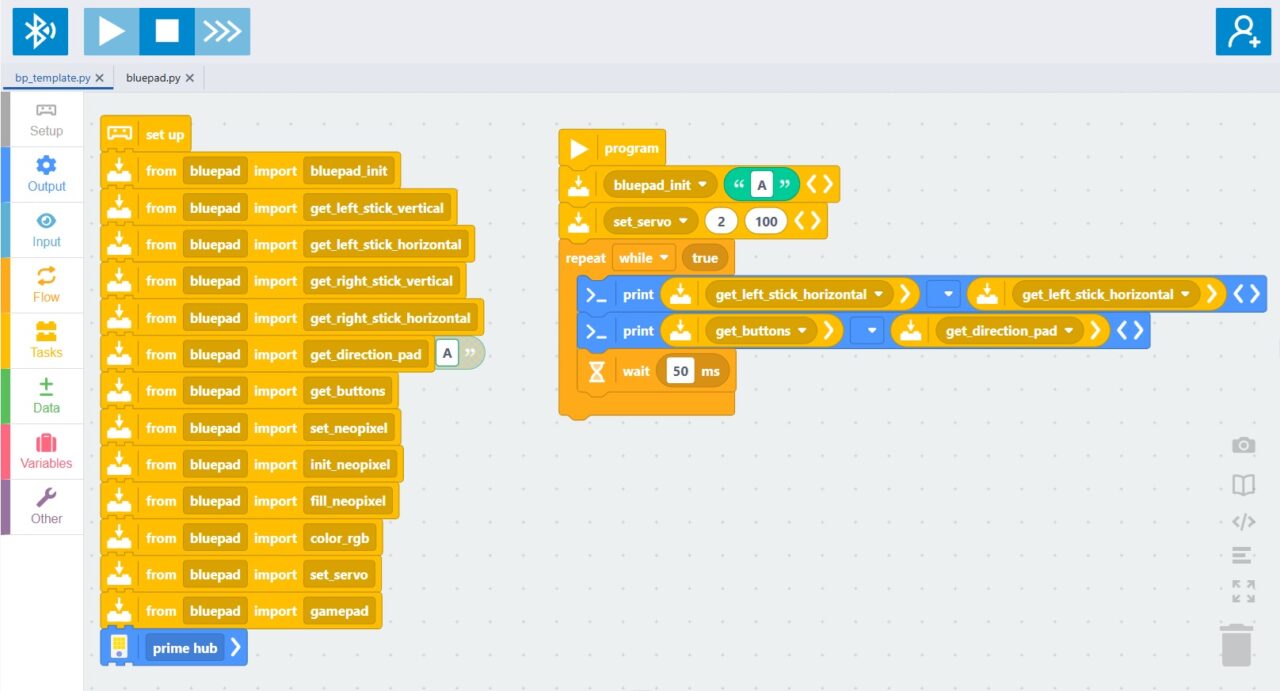
Initialize the Bluepad library for Pybricks Custom Blocks
Before you can use any of the Bluepad functions, you need to initialize the Bluepad library. Below, you can see a typical initialization where the LMS-ESP32 is connected to Port A.
In the main loop of your program you can add wait block. Usually 20 ms is about right for reading the gamepad. If you have a lot of NeoPixel or Servo motor instructions in the loop, you might need to increase the wait time to 50ms to throttle the traffic that is send to the LMS-ESP32.
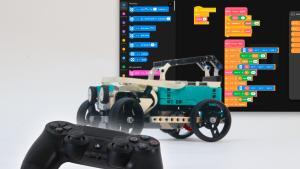
Watch the video to see the Pybricks Custom gamepad Blocks in action
You can see the usage of Blocks Pybricks in the video tutorial. All the code is available in our PUPRemote Github repository.
Have Fun with your own gamepad-controlled Pybricks robots
Now it is time to build your favorite robot and start programming it with the Blocks Pybricks. Equip your robot with NeoPixels or Servo Motors and connect a Bluetooth gamepad. Take the template or one of the example files as a starting point.