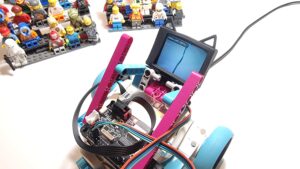
I attended the local RoboCup Junior challenge in my hometown of Delft, and I found it curious how hard the line following challenge was for the kids. All teams had some kind of light sensor pointing at the floor, and I asked myself: wouldn’t it work better with a camera? So I borrowed some Robocup tiles and tried to build a camera line follower with SPIKE Prime
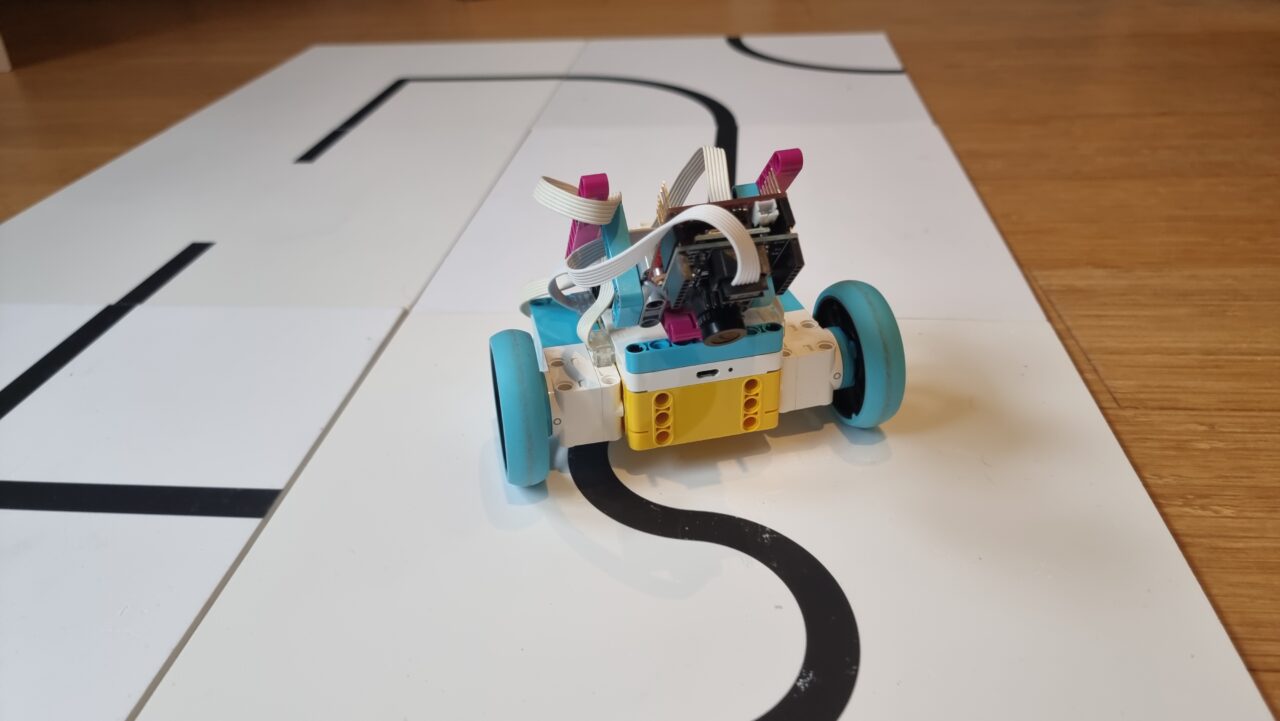
The line following was a bit harder than I thought. Some Robocup tiles are really tricky. In the end, I succeeded at a reasonable speed, but I imagined a much, much faster robot.
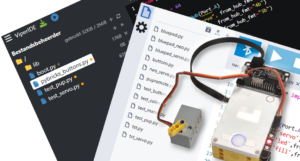
Hardware for the SPIKE Camera Line Follower
- OpenMV H7 Plus camera
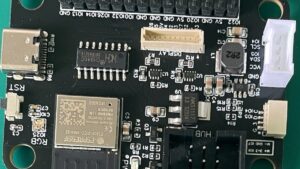
- Spike OpenMV shield
- SPIKE Prime hub with two motors, running Pybricks
Pybricks Line Follower Code with Camera data
The Pybricks side is fairly simple. I used and imported PUPRemote, then I converted all incoming data to the driving parameters of a DriveBase.
from pybricks.hubs import PrimeHub
from pybricks.pupdevices import Motor, ColorSensor, UltrasonicSensor, ForceSensor
from pybricks.parameters import Button, Color, Direction, Port, Side, Stop
from pybricks.robotics import DriveBase
from pybricks.tools import wait, StopWatch
from pupremote import PUPRemoteHub

pr = PUPRemoteHub(Port.F)
pr.add_channel('cam',to_hub_fmt='hh')
lm = Motor(Port.A, Direction.COUNTERCLOCKWISE)
rm = Motor(Port.B)
db = DriveBase(lm,rm,56,120)
hub = PrimeHub()

while 1:
    turn, speed = pr.call('cam')
    print(turn, speed)
    db.drive(speed, turn*3.2)
OpenMV Line Follower code for SPIKE Prime
The OpenMV code is a bit longer. I started with the line follower code from the OpenMV examples menu. Then I tweaked the regions and I changed the code to add these features:
- Ability to deal with line interruptions by allowing for empty regions
- Ability to deal with ambiguous crossings, requiring a longer look ahead
- Ability to slow down in tricky situations
- More drawing to the screen to see what is going on
- PUPRemote code to communicate with Pybricks on SPIKE Prime hub
# Based on OpenMV line follower example

import sensor
import time
import math


# Set up comms to pybricks. Pose as a sensor.
from pupremote import PUPRemoteSensor
pr = PUPRemoteSensor()
# Set up data channel, named 'cam' with signed half ints h to send speed and turn_rate.
pr.add_channel('cam',to_hub_fmt='hh')

# Tracks a black line. Use [(128, 255)] for a tracking a white line.
GRAYSCALE_THRESHOLD = [(0, 64)]

# Each region of interest is (x, y, w, h).
# The line detection algorithm will try to find the
# centroid of the largest blob in each roi. The x position of the centroids
# will then be averaged with different weights where the most weight is assigned
# to the roi near the bottom of the image and less to the next roi and so on.
# Image size is QQVGA, 160x120

WROIS = [  # (ROI x,y,w,h, weight, angle weight) Weighted Regions Of Interest
    (0, 90, 160, 30,    15),  # Bottom area
    (20, 60, 120, 30,    10),  # Middle area
    (0, 35,     35, 60, 7), # Left of middle
    (80+45, 35, 35, 60, 7), # Right of middle
    (30, 25, 100, 30,   1), # Top area
]
N = len(WROIS)


# Camera setup...
sensor.reset()  # Initialize the camera sensor.
sensor.set_pixformat(sensor.GRAYSCALE)  # use grayscale.
sensor.set_framesize(sensor.QQVGA)  # use QQVGA for speed. w=160,h=120

# Rotate image 180 degrees
sensor.set_vflip(True)
sensor.set_hmirror(True)

sensor.skip_frames(time=500)  # Let new settings take affect.
clock = time.clock()  # Tracks FPS.

while True:
    clock.tick()  # Track elapsed milliseconds between snapshots().
    img = sensor.snapshot()  # Take a picture and return the image.

    centroids = [0] * N
    pixels = [0] * N
    weights = [0] * N
    angles = [0] * N

    for i in range(N):
        blobs = img.find_blobs(
            GRAYSCALE_THRESHOLD, roi=WROIS[i][0:4], merge=True, pixels_threshold=45
        )  # roi[0:4] is roi rectangle.
        #img.draw_rectangle(roi[:4], 0)
        if blobs:
            # Find the blob with the most pixels.
            largest_blob = max(blobs, key=lambda b: b.pixels())

            # Draw relevant blob information
            img.draw_line(largest_blob.major_axis_line(), 60, 3)
            img.draw_cross(largest_blob.cx(), largest_blob.cy())
            img.draw_string(
                            *WROIS[i][:2],
                            f"{largest_blob.pixels()}px\n{largest_blob.rotation_deg()}*" ,
                            255, scale=1, x_spacing=-3)

            centroids[i] = (largest_blob.cx() * WROIS[i][4])
            pixels[i] = largest_blob.pixels()
            weights[i] = WROIS[i][4] # roi[4] is the roi weight
            angles[i] = largest_blob.rotation_deg()-90

    if all(pixels[2:4]):
        # Compare side regions, if both have pixels in them
        # Only go to the side with most pixels
        if pixels[3] > pixels[2]:
            weights[2]=0
            centroids[2]=0
        else:
            weights[3]=0
            centroids[3]=0

    # The angle of the longest line through the blob in the middle region
    # helps determine the speed. If it is 0 (straight forward) we can go fast.
    speed = int(250-abs(angles[1])*1.7)

    if any(pixels[2:4]):
        # Pixels at the very edge. Better drive carefully.
        speed = 80

    if centroids:
        # Determine weighted steering target
        center_pos = sum(centroids)/(sum(weights)+0.001)
        turn_rate = round( (center_pos - 80))
    else:
        # No line seen.
        turn_rate = 0 # Just drive straight.
        speed = 80 # Slowly

    # Visualize calculated steering amount. Twice, for thickness.
    img.draw_arrow(80, 5, 80+turn_rate, 5, 255, 10)
    img.draw_arrow(80, 6, 80+turn_rate, 6, 255, 10)

    # Draw all rois
    for r in WROIS:
        img.draw_rectangle(r[:4], 0)

    # Draw speed and turn rate
    img.draw_string(0, 65,
                    f"spd:{speed}\ntrn:{turn_rate}",
                    255, scale=1, x_spacing=-3)

    # Send the computed driving instructions to the SPIKE hub
    pr.update_channel('cam', turn_rate, speed)
    pr.process()
Here is what the camera sees and how it attempts to steer.
Next steps for the Camera Line Follower
The current code only evaluates the situation frame by frame. But information from the past frames could be useful to interpret the current one. I hope to be able to speed things up by giving the robot a short-term memory. If you have more ideas to speed this up, please add a comment! Or post a video with your tweaks.