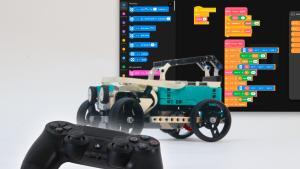
The EV3 OpenMV line follower project combines the power of LEGO MINDSTORMS EV3 with the advanced vision capabilities of the OpenMV camera. This guide will show you how to create a robot that follows a line using these two technologies. You will learn how to communicate between the EV3 brick and the OpenMV camera, paving the road for more complex projects like kicking a ball or even playing soccer.
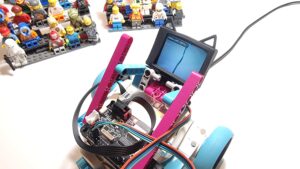
An OpenMV Camera for more reliable line following than a light sensor
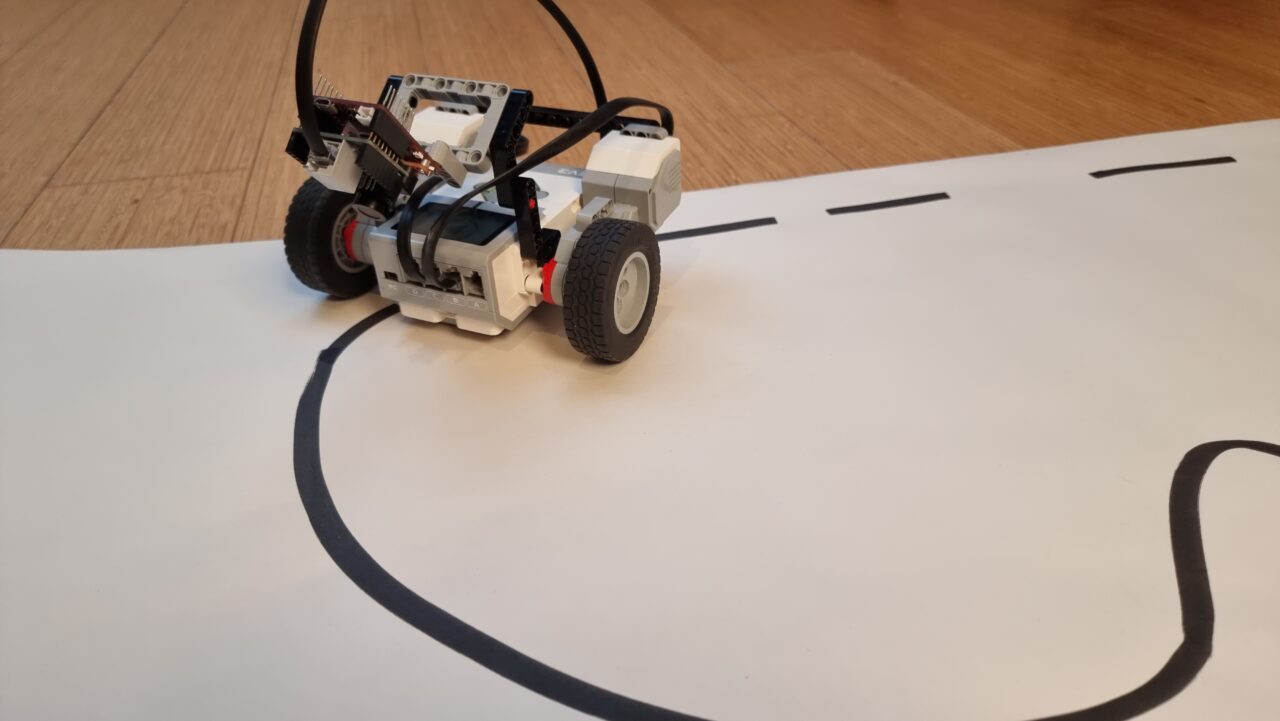
Using an OpenMV camera for line following offers several advantages over traditional light sensors. The camera can see more details and handle complex patterns on the track. See the line interruptions in the video below? A light sensor would have a hard time, but it’s no problem for a camera! This makes your robot more reliable and faster in competitions or classroom projects. I previously posted an article about a camera line follower with LEGO SPIKE Prime. This is the EV3 version of that program.
Hardware Requirements
To build this project, you need:
- LEGO MINDSTORMS EV3 set, education (45544) or retail (31313).
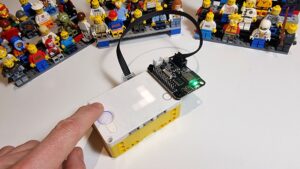
- OpenMV H7 Plus Camera
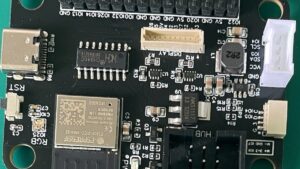
- EV3 adapter shield for the OpenMV camera
- SerialTalk library for communication
- Wi-Fi dongle for easy tweaking
Having a Wi-Fi dongle plugged into your EV3 brick allows you to make adjustments without dealing with cables, keeping your robot on the track while you fine-tune its performance.
SerialTalk communication protocol for the EV3 OpenMV connection
Instead of using the LEGO Powered Up Protocol (PUP) with PUPRemote, as with the SPIKE Prime version of the line follower, we’re using SerialTalk. SerialTalk is more relevant because the connection is a plain UART serial connection.
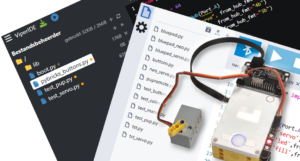
To set up the connection on the camera, copy the serialtalk folder (the one with __init__.py inside) to your OpenMV USB drive and insert this code in your script:
from serialtalk.auto import SerialTalk

st = SerialTalk()

cam_data = [0,0] # set up a variable

def cam(): # a function to return the content of that variable
    return cam_data

# let serialtalk know what function(s) to run and how to package the return data.
st.add_command(cam, "repr")

while True:
    # .... rest of the program
    cam_data = [t,s] # update global variable
    st.process() # process incoming remote procedure calls that might ask for data.
To package the data, I used "repr", which triggers the repr/eval packing and unpacking of python data objects. The repr() function returns a string representation of any data, and eval() will turn that string back into a usable python object. By using the "repr" argument, you don’t have to worry about this because SerialTalk does all of that in the background. I could also have used the struct formatting of "2h" in this case: two signed 16bit integers, but "repr" is more flexible.
In your pybricks/ev3dev script you can do a remote procedure call to get the camera data. Simply insert these statements into your script:
from serialtalk.auto import SerialTalk

st = SerialTalk(Port.S1)

while True:
    status, data = st.call('cam')
In the above example, status will be "err" if the call went wrong or "camack" if the cam call was acknowledged. In the later case, data will be equal to cam_data and therefore be a two-item list.
Setting Up Your EV3 Brick
First, install ev3dev on your EV3 brick and Visual Studio Code on your Mac or pc. Then, create a new project with the MINDSTORMS VS Code extension and paste the code below. While connected to your brick, run the code with F5 (run and debug). The script on the OpenMV camera is not running yet, so it will probably show an error message. You should at least hear the beep!
#!/usr/bin/env pybricks-micropython
from pybricks.hubs import EV3Brick
from pybricks.ev3devices import (Motor, TouchSensor, ColorSensor,
                                 InfraredSensor, UltrasonicSensor, GyroSensor)
from pybricks.parameters import Port, Stop, Direction, Button, Color
from pybricks.tools import wait, StopWatch, DataLog
from pybricks.robotics import DriveBase
from pybricks.media.ev3dev import SoundFile, ImageFile
from serialtalk.auto import SerialTalk

# This program requires LEGO EV3 MicroPython v2.0 or higher.
# Click "Open user guide" on the EV3 extension tab for more information.


# Create your objects here.
ev3 = EV3Brick()
st = SerialTalk(Port.S1)
lm = Motor(Port.B)
rm = Motor(Port.C)
db = DriveBase(lm,rm,62, 19*8)

# Write your program here.
ev3.speaker.beep()

while True:
    status, data = st.call('cam')
    if status == "err":
        print("Script not running on OpenMV or not connected to port S1")
        turn, speed = [0,0]
    else:
        turn, speed = data
    print(turn, speed)
    db.drive(speed, turn*1.5)
This code sets up communication between the EV3 brick and the OpenMV camera using SerialTalk.
Configuring Your OpenMV Camera
Next, configure your OpenMV camera to detect lines and send instructions back to the EV3 brick.
# Based on OpenMV line follower example
# Run this code on an OpenMV H7 plus camera. It probably works on the RT1060 too..

import sensor
import time
import math


# Set up comms to pybricks on the ev3 hub
# Be sure to copy the 'serialtalk' (lowercase) folder with all .py to the
# openmv USB drive.

from serialtalk.auto import SerialTalk

st = SerialTalk()

cam_data = [0,0] # turnrate & speed
def cam():
    # global cam_data
    return cam_data

st.add_command(cam, "repr")

# Tracks a black line. Use [(128, 255)] for a tracking a white line.
GRAYSCALE_THRESHOLD = [(0, 64)]

# Each region of interest is (x, y, w, h).
# The line detection algorithm will try to find the
# centroid of the largest blob in each roi. The x position of the centroids
# will then be averaged with different weights where the most weight is assigned
# to the roi near the bottom of the image and less to the next roi and so on.
# Image size is QQVGA, 160x120

WROIS = [  # (ROI x,y,w,h, weight, angle weight) Weighted Regions Of Interest
    (0, 90, 160, 30,    15),  # Bottom area
    (20, 60, 120, 30,    10),  # Middle area
    (0, 35,     35, 60, 7), # Left of middle
    (80+45, 35, 35, 60, 7), # Right of middle
    (30, 25, 100, 30,   1), # Top area
]
N = len(WROIS)


# Camera setup...
sensor.reset()  # Initialize the camera sensor.
sensor.set_pixformat(sensor.GRAYSCALE)  # use grayscale.
sensor.set_framesize(sensor.QQVGA)  # use QQVGA for speed. w=160,h=120

# Rotate image 180 degrees
sensor.set_vflip(True)
sensor.set_hmirror(True)

sensor.skip_frames(time=500)  # Let new settings take affect.
clock = time.clock()  # Tracks FPS.

while True:
    clock.tick()  # Track elapsed milliseconds between snapshots().
    img = sensor.snapshot()  # Take a picture and return the image.

    centroids = [0] * N
    pixels = [0] * N
    weights = [0] * N
    angles = [0] * N

    for i in range(N):
        blobs = img.find_blobs(
            GRAYSCALE_THRESHOLD, roi=WROIS[i][0:4], merge=True, pixels_threshold=45
        )  # roi[0:4] is roi rectangle.
        #img.draw_rectangle(roi[:4], 0)
        if blobs:
            # Find the blob with the most pixels.
            largest_blob = max(blobs, key=lambda b: b.pixels())

            # Draw relevant blob information
            img.draw_line(largest_blob.major_axis_line(), 60, 3)
            img.draw_cross(largest_blob.cx(), largest_blob.cy())
            img.draw_string(
                            *WROIS[i][:2],
                            f"{largest_blob.pixels()}px\n{largest_blob.rotation_deg()}*" ,
                            255, scale=1, x_spacing=-3)

            centroids[i] = (largest_blob.cx() * WROIS[i][4])
            pixels[i] = largest_blob.pixels()
            weights[i] = WROIS[i][4] # roi[4] is the roi weight
            angles[i] = largest_blob.rotation_deg()-90

    if all(pixels[2:4]):
        # Compare side regions, if both have pixels in them
        # Only go to the side with most pixels
        if pixels[3] > pixels[2]:
            weights[2]=0
            centroids[2]=0
        else:
            weights[3]=0
            centroids[3]=0

    # The angle of the longest line through the blob in the middle region
    # helps determine the speed. If it is 0 (straight forward) we can go fast.
    speed = int(250-abs(angles[1])*1.7)

    if any(pixels[2:4]):
        # Pixels at the very edge. Better drive carefully.
        speed = 80

    if centroids:
        # Determine weighted steering target
        center_pos = sum(centroids)/(sum(weights)+0.001)
        turn_rate = round( (center_pos - 80))
    else:
        # No line seen.
        turn_rate = 0 # Just drive straight.
        speed = 80 # Slowly

    # Visualize calculated steering amount. Twice, for thickness.
    img.draw_arrow(80, 5, 80+turn_rate, 5, 255, 10)
    img.draw_arrow(80, 6, 80+turn_rate, 6, 255, 10)

    # Draw all rois
    for r in WROIS:
        img.draw_rectangle(r[:4], 0)

    # Draw speed and turn rate
    img.draw_string(0, 65,
                    f"spd:{speed}\ntrn:{turn_rate}",
                    255, scale=1, x_spacing=-3)

    # Send the computed driving instructions to the EV3 hub
    cam_data = [turn_rate, speed]
    print(cam())
    st.process()
This code processes images from the camera to detect lines and calculates steering commands based on those images.
Testing and Tweaking Your Robot
Now comes the fun part: tweaking the robot for speed and reliability. To do so:
- Place your robot on a test track.
- Use the Wi-Fi dongle to connect remotely.
- Adjust parameters as needed. Start by tweaking speed and the factor for turn rate. Then play around with the weights for the Regions of Interest.
- Improve the strategy. Maybe you can increase speed on straight parts? Perhaps you can do the turn calculations on board of the EV3 brick, and transfer raw blob data?
Conclusion: Mastering Line Following with EV3 OpenMV
Combining LEGO MINDSTORMS EV3 with an OpenMV camera elevates your robotics projects by adding advanced vision capabilities. This guide shows how easy it is to set up communication between these devices and create a reliable line-following robot. Whether you’re preparing for competitions or teaching STEM concepts in class—this project empowers you with practical skills in computer vision and robotics.