In this blog post, you will learn how to connect a HuskyLens to your LEGO MINDSTORMS EV3 and create a line follower robot. We will provide you with Python code that makes the process straightforward. The amount of code you need is minimal, so even 11-year-old kids can probably do it. By the end of this guide, you’ll be able to watch your robot follow a line smoothly.
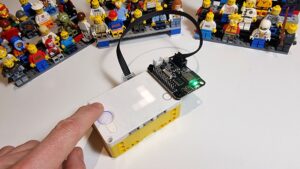
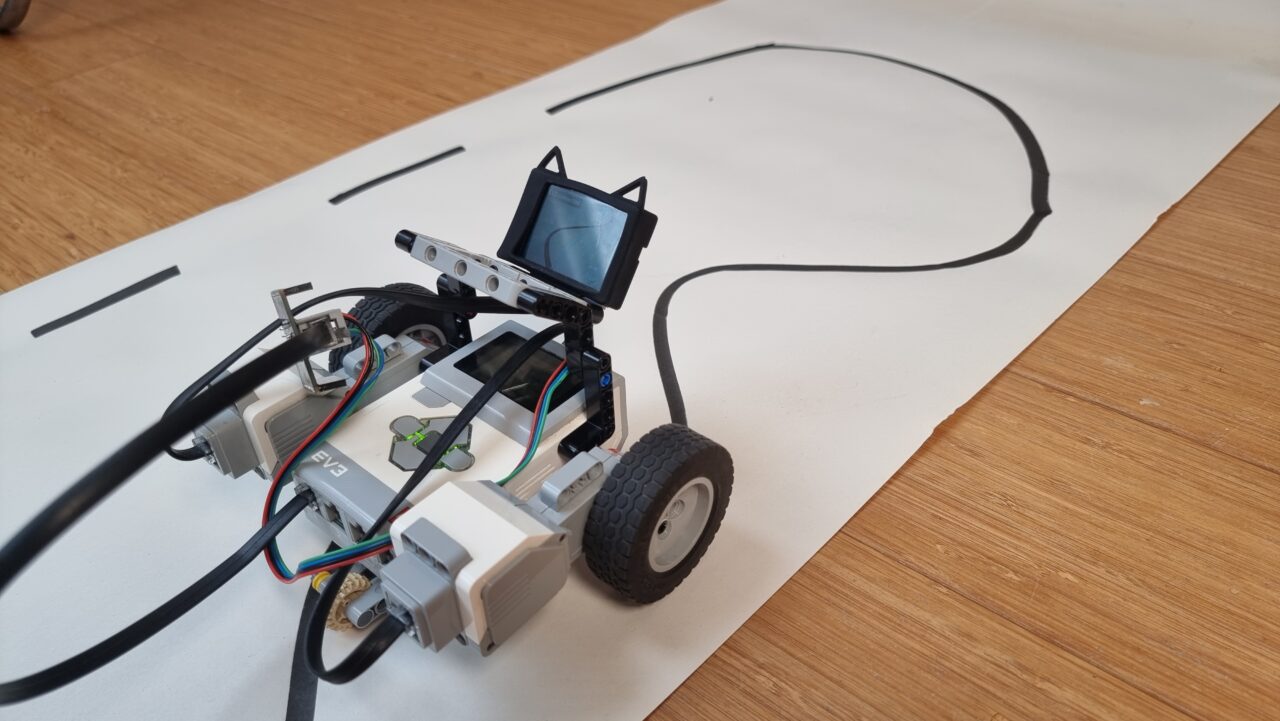
I made a video of the result of this project. I took a large sheet of paper and drew a random circuit with a fat pen. Then I ‘taught’ the HuskyLens what the line looked like with the teach button on the camera. This is enough for the EV3 program to pick up learned arrows and steer accordingly. By itself, the HuskyLens algorithm can deal with interrupted lines.
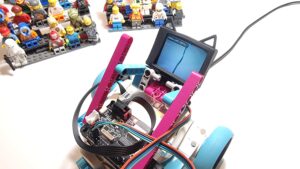
Required Hardware: HuskyLens, EV3-OpenMV Breakout, EV3 Kit
Before diving into the setup, let’s gather all the necessary hardware. You will need:
- A HuskyLens camera
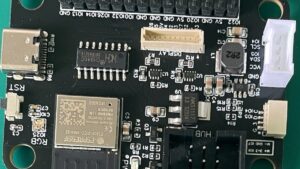
- An EV3-OpenMV Smart Camera breakout board
- A LEGO MINDSTORMS EV3 kit, education or retail.
Having these components ready ensures that you can follow along without any interruptions.
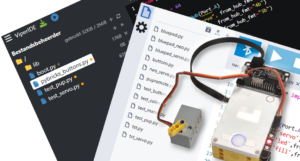
Setup VSCode to run Pybricks python on EV3
The easiest way to run simple Python scripts on EV3 today is using VSCode and ev3dev. In a different article, I have provided a step-by-step guide for setting up Visual Studio Code and EV3. Remember that you can connect with Wi-Fi or USB. I prefer using a Wi-Fi dongle because it makes testing more convenient as it allows quick adjustments while your robot remains on the table.
Connecting the HuskyLens to your EV3 brick
Connecting the HuskyLens is as simple as plugging an EV3 wire into the EV3 OpenMV Breakout board and using the jumper wires that are included with your HuskyLens. I have a different article that goes into more detail about the Huskylens-EV3 connection.
Understanding the Code for a Camera Line Follower with EV3 huskylens
Here is the Python code you’ll use for creating your line follower. Let’s dive right into it.
#!/usr/bin/env pybricks-micropython

# This program is for a robot with motors on ports b and c,
# and a huskylens connected to port S1, in serial mode 9600 baud.
# On the huskylens 'learn' the line with the teach button.
# Then run this program to follow the learned line.

# Use VSCode with the MINDSTORMS extension to run it

from pybricks.hubs import EV3Brick
from pybricks.ev3devices import (
    Motor,
    TouchSensor,
    ColorSensor,
    InfraredSensor,
    UltrasonicSensor,
    GyroSensor,
)
from pybricks.parameters import Port, Stop, Direction, Button, Color
from pybricks.tools import wait, StopWatch, DataLog
from pybricks.robotics import DriveBase
from pybricks.media.ev3dev import SoundFile, ImageFile
from pyhuskylens import HuskyLens, ALGORITHM_LINE_TRACKING

# This program requires LEGO EV3 MicroPython v2.0 or higher.
# Click "Open user guide" on the EV3 extension tab for more information.

# Create your objects here.
ev3 = EV3Brick()
hl = HuskyLens(Port.S1)
lm = Motor(Port.B) # left motor
rm = Motor(Port.C) # right motor
db = DriveBase(lm, rm, 56, 150)

# Initialize.
ev3.speaker.beep()
hl.set_alg(ALGORITHM_LINE_TRACKING)
hl.show_text("EV3 connected")

# Continuously read arrow data and steer accordingly.
while 1:
    arrow_list = hl.get_arrows(learned=True)
    # Test if the list of arrows contains at least one item.
    if len(arrow_list) > 0:
        arrow = arrow_list[0]
        head_off_center = arrow.x_head - 160
        tail_off_center = arrow.x_tail - 160
        # Steer the robot onto the line. The tail is more important than the head.
        steer = (head_off_center * 3 + tail_off_center * 10) / 13
        # Tune the speed values and steer multiplier for a stable run.
        db.drive(70, steer * 0.75)
    else:
        # No line to be seen. Stop the engines.
        db.stop()
Breaking Down the Code
- Creating Objects: The first part initializes objects like
ev3,hl,lm,rm, anddb. These represent different parts of your robot such as motors and sensors. - Initialization: The next section sets up initial conditions like making a beep sound
ev3.speaker.beep()so you know the program has started correctly. Then it switches the HuskyLens in line tracking mode withhl.set_alg(ALGORITHM_LINE_TRACKING). - Main Loop: The main loop continuously reads data from HuskyLens
arrow_list = hl.get_arrows(learned=True). If it gets a non-empty list of arrows, it indicates there’s a line in sight. Next, the code calculates how much off-center the line is at the head and tail of the arrow. Finally the code weighs the situation and adjusts steering accordingly (steer). If no line is detected, it stops the motors (db.stop()).
By understanding each part of this code, you can tweak parameters like speed or steering sensitivity to optimize performance. If you want a more optimized version, with some extra strategic tweaks, check the pro version on Patreon.
Conclusion: Empower Your Robotics Projects with Computer Vision
Connecting a HuskyLens to your LEGO MINDSTORMS EV3 opens up new possibilities in robotics projects by integrating computer vision capabilities. This project teaches valuable coding skills and enhances problem-solving abilities as you fine-tune your robot’s performance.