This tutorial gets you started with LMS-ESP32 and Pybricks. The challenge? Controlling a hobby servo, and a color led. You don’t even need to install software on your computer. This is great news for Chromebook users in classrooms! Using some sample Pybricks code, you can have the NeoPixels and Servo interact with your Lego robot. We will use the online Viper-IDE for programming the LMS-ESP32 module and the online Pybricks IDE for programming the Pybricks hub.
Here’s a video of what we’ll build in this tutorial. Pretty basic, but it’s up to you to make it cooler and more colorful! If you don’t enjoy reading, we’ve also got you covered. Skip right to the end for a complete video tutorial.
What do you need for this tutorial?
- A LEGO hub running Pybricks (we used a Spike Prime hub).
- An LMS-ESP32 extension board running the latest MicroPython 1.24.1 firmware.
- A computer with Chrome or Chromium.
- Some NeoPixel RGB LEDs, like ws2812. We designed easy-to-use LED strips that fit a cross axle and Dupont jumpers.
- A 5V hobby servo motor.
Prepare for programming the LMS-ESP32 with Pybricks on a Chromebook or similar
- Flash your Lego hub with Pybricks. You can always revert to the original Lego Spike Prime firmware. See the Installing Pybricks tutorial on the Pybricks website.
- Flash your LMS-ESP32 module with the latest MicroPython firmware. Connect your LMS-ESP32’s USB port to your computer and head over to our firmware installer website. Preferably, disconnect other USB devices from your computer.
- Select the latest MicroPython. At the time of writing, it’s
MicroPython v1.24.1Click on “Connect” and select the USB port. Choose ‘Make connection’ (likely displayed in your language) to connect with the LMS-ESP32. When multiple ports appear, identify the correct port by disconnecting and reconnecting the LMS-ESP32 module. A popup will appear; select ‘Install MicroPython version 1.24.1 with ulab+uartremote+pupremote libraries.’ - Click on Connect and select the USB port. Select ‘Make connection’ (probably shown in your language) to connect with the LMS-ESP32. When you see multiple ports, identify the correct port, by disconnected and reconnecting the LMS-ESP32 module. A popup is chown, select ‘Install MicroPython version 1.24.1 with ulab+uartremote+pupremote libraries’
- Next, confirm to install MicroPython, and click on Install.
- The firmware flasher will erase the LMS-ESP32 and install the new firmware.
Check the connections to your hub and to the LMS-ESP32 from the Chromebook
Now that you have installed the Pybricks firmware on the robot and MicroPython on the LMS-ESP32, we can check that the firmwares are correctly running and that you can connect to both from your PC.
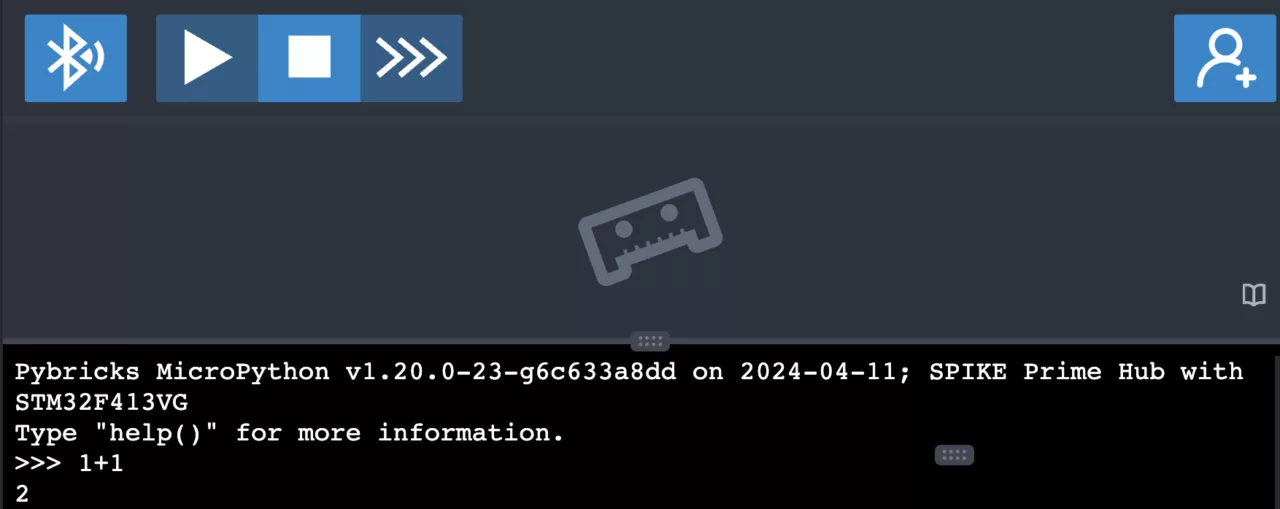
Connecting with the Pybricks IDE
- Start the Pybricks development IDE on code.pybricks.com
- Switch on your Pybricks hub
- Connect to the hub by selecting the large blue Bluetooth icon in the IDE
- You can quickly use the ‘>>>’ to show a REPL prompt. In the lower part of the screen, you will see the Firmware version and an interactive Python prompt. Try typing
1+1and then enter, which should result in2.
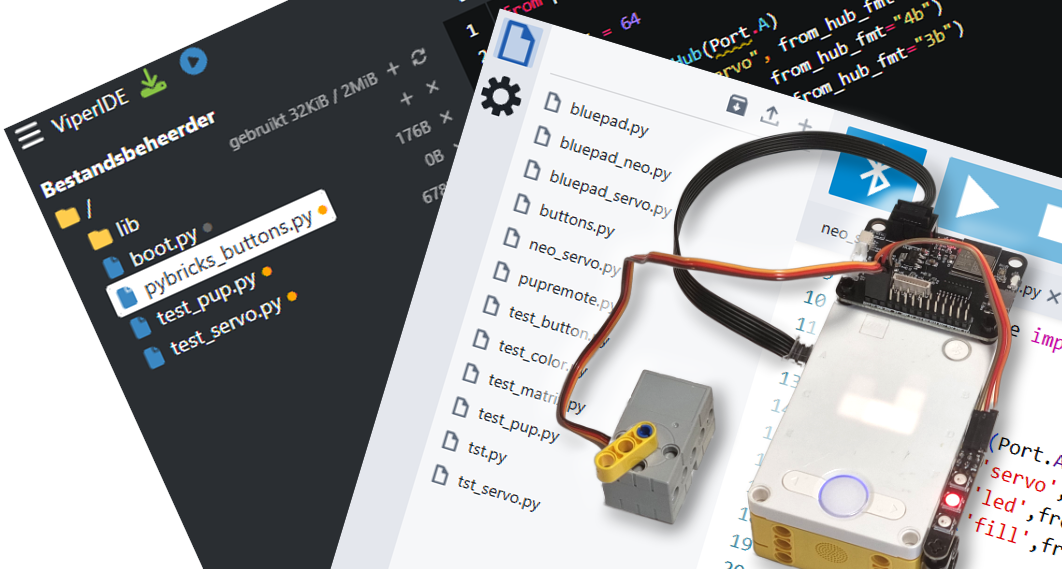
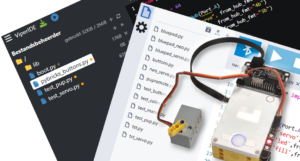
Connecting to the LMS-ESP32 board with Viper IDE
- Connect the LMS-ESP32 to your computer using a USB cable
- Start the online Viper-IDE on viper-ide.org.
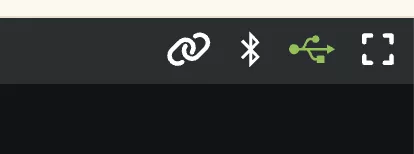
- Connect to the LMS-ESP32 by selecting the USB icon in the upper-right corner of the Viper IDE.
- Select the Serial port corresponding with your LMS-ESP32. Again, when you see multiple ports, disconnect and reconnect the LMS-ESP32 to identify the correct port.
- When connected properly, you will see a green popup telling you the firmware version. In the lower part of the screen, you see a REPL prompt.
- Type
1+1and then enter in the REPL prompt and see that that results is2.
Connect the LMS-ESP32 with your Pybricks robot
Now that we’ve connected to both MicroPython devices individually, we connect the LMS-ESP32 to the Pybricks and make sure they communicate to each other.
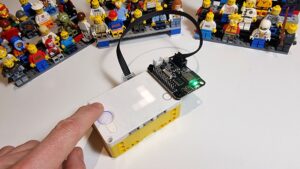
Plug the LMS-ESP3 into your LEGO hub
- Use the cable that comes with the LMS-ESP32 to connect the module to the hub. On one side it has a 3×2 connector which fits only in one possible way into the LMS-ESP32.
- The other side of the cable has a specific Lego connector that fits in one of the ports of your Pybricks hub. Connect it to Port A for this tutorial.
Install the PUPRemote library in Pybricks
- Open the Pybricks IDE and create a new file (using the ‘+’ icon in the IDE). Use
pupremoteas file name (without the .py extension, as Pybricks adds it automatically). - Remove the template code from the newly opened program (CTRL-A, CTRL-X)
- Paste the raw code of the pupremote_hub.py library in the IDE (select all text with CTRL-A. Copy the text with CTRL-C and paste the text in the Pybricks IDE using CTRL-V)
- The PUPRemote library comes pre-installed on the LMS-ESP32, so no need to install it there.
Test connection between Pybricks and LMS-ESP32
We will create a program that sends two numbers to the lms-esp32. It then reads a single number back, which should be the sum of the two original numbers.
- In Viper IDE, create a new program by clicking on the small ‘+’ icon above the editor window. Name it
test_pup.py. Paste the following code.
from pupremote import  PUPRemoteSensor

def sum2(*optional_arguments):
    sum_ab = 0
    if len(optional_arguments) == 2:
        a,b = optional_arguments
        sum_ab = a + b
    return sum_ab

p=PUPRemoteSensor()
p.add_command('sum2',to_hub_fmt='b',from_hub_fmt='2b')

while(True):
connected=p.process()- In Pybricks create a new file and name it
first_test - It will open a file with a template which depends on your Pybricks hub
- paste the following code to the end of the template
- Run the code with the play button. You might have to hit the stop button first if you’re still in the interactive repl >>> mode.
from pupremote import PUPRemoteHub
from pybricks.parameters import Port

p=PUPRemoteHub(Port.A)
p.add_command('sum2',to_hub_fmt='b',from_hub_fmt='2b')

print(p.call('sum2',1,2))
print(p.call('sum2',12,23))
Explanation of the MicroPython code
On the LMS-ESP32, we create a PUPRemoteSensor object. Next, we add a command sum2 to the PUPRemote sensor. The add command references to the function add starting at line 3. This function simply adds two values and returns the sum. In the add_command we define two parameters: to_hub_fmt and from_hub_fmt defining the format of the arguments and return value of the called function. In this case, the hub will receive a single byte value (the sum) and send two byte values (parameters a and b).
On the LEGO hub side, we start with importing the PUPRemoteHub class from the PUPRemote library. In line 3 we instantiate a PUPRemoteHub, and tell it the LMS-ESP32 is in Port.A. The same add_command definition is used as in the LMS-ESP32 program. We thought it would be nice to copy-paste! Now we can use the call member of the PUPRemoteHub instantiation p to call the remote function add. And we pass it two parameters to add.
To summarize the working of both programs: On the LMS-ESP32, we define a function sum2, and we add it as a command to the PUPRemoteSensor. Now, the Pybricks hub can remotely call the function sum2 by using the call method of PUPRemoteHub. It passes two byte values to the LMS_ESP32. These are passes to the function add and the results of the add function are returned to the Pybricks hub. The Pybricks hub prints this result. This is an example to demonstrate that the communication is working and how we use the PUPRemote library. We have fully documented this library in the PUPRemote documentation.
Stepping it up: controlling NeoPixels and Servos from your LEGO hub using Pybricks and a Chromebook
Now, we are ready to connect some real electronic components to the LMS-ESP32. We will see how we can control them from the Pybricks Hub. Let’s start with the NeoPixels first.
Changing the color NeoPixels from your LEGO Hub
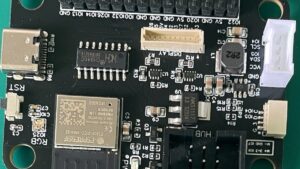
NeoPixels is the common name for smart RGB LEDs. These LEDs only need a single wire for control. WS2812 or SK6812 are other common ways to call them. Look at this WS2812 documentation for more background information. We require a GND, +5V and a data connection. In this example, we take a single strip of 3 RGB LEDs from our webshop. Connect the ‘-‘ on the LED to the GND, the ‘+’ to +5V and ‘D’ to GPIO22. First we try whether the NeoPixel is correctly working using this small program (open a new tab inside Viper-IDE and past the code below in the new window, press the ‘run’ green triangle icon):
from neopixel import NeoPixel
from machine import Pin

np=NeoPixel(Pin(22),3)  # connected to GPIO 22, 3 LEDs
np[0] = (10, 0, 0) # Red (0-255)
np[1] = (0, 10, 0) # Green (0-255)
np[2] = (0, 0, 10) # Blue (0-255)
np.write()
After running this small program on the LMS-ESP32, you should see a red, green and blue LED.
Moving the hobby servo
Servo motors have 3 wires: GND, +5V and a signal wire (see this hobby servo motor document). Usually, the GND is black or brown, the 5V wire is in the middle and the third wire is the signal wire. We connect the GND and +5V to corresponding pins on the LMS-ESP32. The signal wire is a GPIO pin. For this example, we choose GPIO21. We provide a built-in library for controlling servo motors and use the Servo class.
from servo import Servo
from time import sleep_ms

s = Servo(21)

positions = [-90, 0, 90, 0]
i = 0

while 1:
    s.angle( positions[i] )
    sleep_ms(1000)
    i+=1
    if i >= len(positions):
        i = 0
This program drives a servo from -90 to +90 degrees and back in an endless loop.
Control NeoPixels and servo from Pybricks
Now that the NeoPixels and the servo motor are working locally from the LMS-ESP32, it is time to control them from the Pybricks robot.
Create a new program in Viper-IDE (small ‘+’, name it neo_servo.py) and paste the code below in the new window.
from machine import Pin
from pupremote import PUPRemoteSensor
from servo import Servo
from neopixel import NeoPixel

NUMLEDS = 64
SERVO_GPIO = 21
NEOPIXEL_GPIO = 22
s = Servo(SERVO_GPIO)
np = NeoPixel(Pin(NEOPIXEL_GPIO), NUMLEDS)


def servo(*argv):
    if argv != ():
        angle = argv[0]
        s.angle(angle)


def led(*argv):
    if argv != ():
        led_nr, r, g, b = argv
        if led_nr < NUMLEDS:
            np[led_nr] = (r, g, b)
            np.write()


def fill(*argv):
    if argv != 0:
        r, g, b = argv
        np.fill((r, g, b))


p = PUPRemoteSensor(power=True)
p.add_command("servo", from_hub_fmt="b")
p.add_command("led", from_hub_fmt="4b")
p.add_command("fill", from_hub_fmt="3b")

while True:
    connected = p.process()
In lines 2 and 3, we import the Servo and the NeoPixel class. Next, we create new objects from these classes. Near the end, in line 25, we instantiate the PUPRemoteSensor class, using the parameter power=True to provide power to the 5V circuitry on the LMS_ESP32. Finally, in lines 26, 27, and 28, we add commands that define the functions servo, led, and fill.
Now we can call these three functions from the Pybricks hub with the program below:
from pupremote_hub import PUPRemoteHub
from pybricks.parameters import Port, Button
from pybricks.hubs import PrimeHub

hub = PrimeHub()

NUMLEDS = 3

p = PUPRemoteHub(Port.A)
p.add_command("servo", from_hub_fmt="b")
p.add_command("led", from_hub_fmt="4b")
p.add_command("fill", from_hub_fmt="3b")

led = 0
angle = 0
while 1:
    b = hub.buttons.pressed()
    if Button.LEFT in b:
        led -= 1
        angle -= 10
    if Button.RIGHT in b:
        led += 1
        angle += 10
    if b:
        p.call("fill", 0, 0, 0)
        led %= NUMLEDS # Ensure we don't try to adress a LED that isn't there
        if angle < -90:
            angle = -90
        if angle > 90:
            angle = 90
        p.call("led", led, 30, 0, 0)
        p.call("servo", angle)
On the Pybricks hub, we create a PUPRemoteHub object where the connected port is passed as a parameter. Like in the LMS-ESP32 program, we add the three commands. Now, in the while loop, We check for the LEFT or RIGHT button, and change the angle and LED number accordingly.
Video tutorial on this post
In the video below, Stefan walks you through the different parts of this post. Watch the video on YuTube to see the individual chapters.
The next Chromebook LMS-ESP32 Pybricks challenge: something useful
Using MicroPython, we learned how to control NeoPixels and a Servo motor connected to the LMS-ESP32 from the Pybricks hub. We stuck to the basics, and left it up to you to create a cool robot. What will you make? A talking mascot? A waving Nyan Cat?

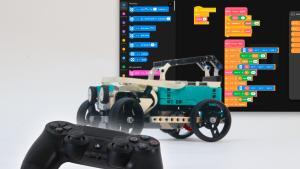
In the next tutorial, we will dive into the BluePad32 firmware and how to use that to read Bluetooth game pads and how to control NeoPixels and servo motors as well.

You define the functions with *args parameter, but with add_command the number of parameters are fixed.
Are there situations where the actual parameters can differ? If not, I recommend to define the functions with fixed parameters to make it easier comprehensible for beginners.